
Nowadays, everybody wants to post their videos on YouTube. If you have a camera that shoots video along with iMovie HD 5 or 6 now you can too! In this article I’ll show you how you can optimize your export settings for the highest quality possible for YouTube as well as some other considerations.
H.264 and MPEG-4

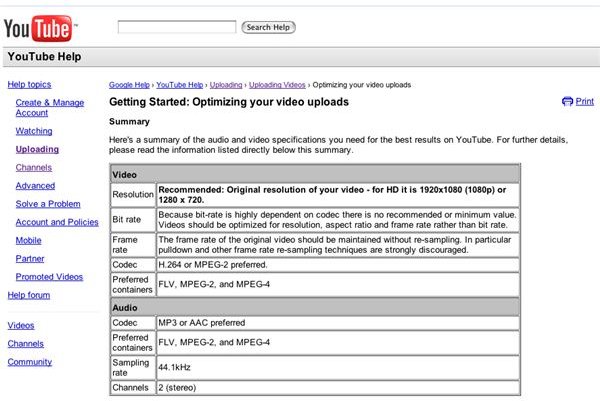
See those two words up there? H.264 and MPEG4 are both state of the art for right now and you’ll want to set all your video exports to this. You will get the best results this way along the widest possible platforms and viewing devices, whether they be PC, MAC, mobile, iPod or iPhone, MPEG4 and H.264 is the way to go standard right now. YouTube has provided some of this information. I have saved a screenshot to the right.
While this is by no means professional editing software, it comes pretty close and is really quite amazing for the average consumer. It has plenty of options that can give any creative type ample tools for video editing, including adding titles, transitions and some basic special effects. More features are added and prices keep coming down; now iMovie HD is widely available and affordable for the average consumer.
So you just want to upload a movie into a YouTube compatible format? You can do this with iMovieHD. Note: YouTube will accept a variety of formats (such as .avi .mov etc) but this article is based on their most recent recommendations. YouTube recommends MPEG-4 format.
Exporting Video
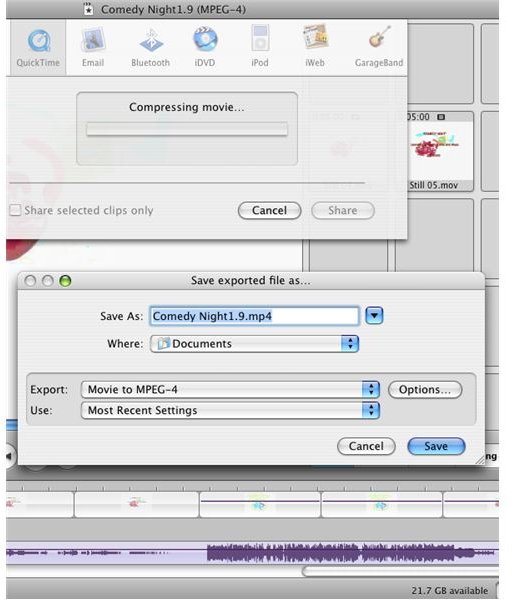
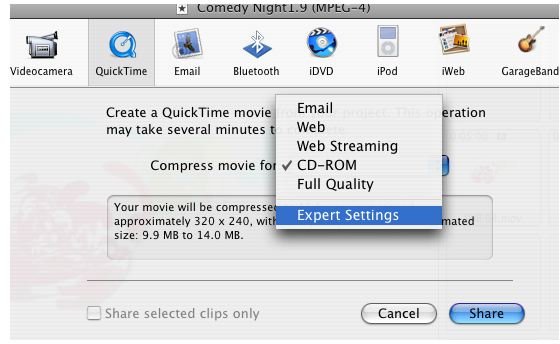
After you’ve spent hours editing your videographic masterpiece, adding transitions and syncing up the soundtrack with some great accompanying music, you’ve put all the finishing touches on it. Now you want to make it available on the web. Go to File>Export. It will open a series of panels for you to optimize.
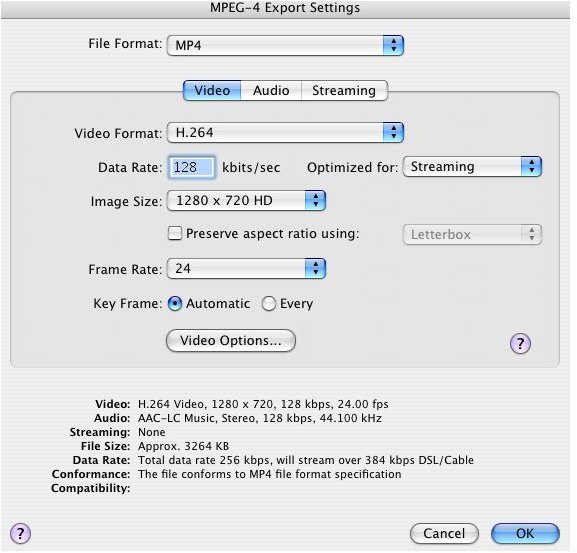
The most time this will take is the compressing of the video file into the proper format while the codec makes multiple passes (higher quality) or a single pass (lower quality) of your video into one of several formats. MPEG4 seems to be the best option, along with H.264 and 44Hz Stereo sound at 128/kbps streaming rate. You’ll want to open the “expert settings” panel. (I’ve included a series of screenshots to the right to guide you.) Opening the “Options” button will give you access to the expert settings controls.
You might want to check your settings to make sure they are optimized for your particular mode of delivery: iPod, web streaming, mobile devices, YouTube, etc.
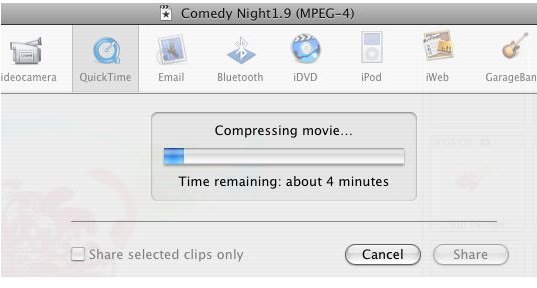
You’re going to “Save” and then your computer will take it from there and compress it into the codec. Higher quality settings and longer videos will of course result in longer rendering and processing times. For this video, I’ve saved it on MPEG-4 and “Most Recent Settings” which is the Expert settings we just entered. If you have a slightly older or much older processor, like a PowerPC G4 or are running anything less than 1 Ghz and something non-Intel duo or multi-processor, this rendering can take 15 minutes to an hour or two to compress! So be patient, make yourself a cup of coffee and a sandwich while your movie is compressed and rendered for delivery!
When you’re movie is done compressing, look in your Movies or Documents folder and there should be a new file there with the .MP4 extension. There you have it!


