This is part two in the series How To Install An Operating System With VMware Fusion 3. VMware Fusion 3 does have some additional installation steps compared to previous versions of VMware Fusion. All in all, the installation process is very simple, and should be able to be done within an hour less.
Continued from Part 1
Within the Virtual Machine Assistant Window, select “Continue” if you are using a disc. Select “Continue without disc” if you are using an .iso file. The next screen will ask you to verify the format type of your installation. So, if you are using a disc, select it from the drop down menu. If you are using an .iso file, navigate to its location on your mac and hit “Choose”. Click continue.
The next screen will ask you to identify the operating system that you are installing. From the first drop down menu, select the operating system manufacturer. Ex: Microsoft, Apple, Linux, etc. From the second drop down menu, select the operating system version. Ex: Windows Vista, Windows 7, Windows XP, Ubuntu. Click continue.
The third screen allows you to create your login and password for the virtual machine. Type in a display name and password. There will be a spot that you can enter your product key if you are installing Windows. It is recommended that you do enter it now, although it is optional. If you choose not to enter it at this time, you may be asked to enter it again later in the installation. Click continue.
The fourth screen will give you two options: install seamless or install isolated. Choose seamless if you want the ability to sync and share documents between your Mac and VMware. Choose isolated if you don’t need this option. Click continue.
The final screen will give you some certain options that you should pay attention to.
Tweaking the settings on your new virtual machine
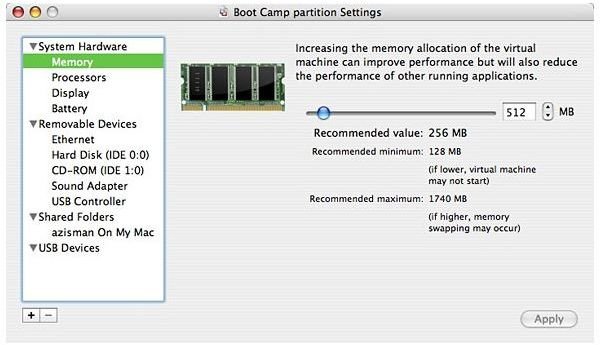
From the final screen, click the customize settings options button. This will open a new windows with a variety of different settings for your new virtual machine. You can go through them all and tweak them to your liking if you would like. However, the two that you need to pay direct attention to are “Processors & RAM” and “Hard Disks”.
Click on the Processors & Ram listing. The first option that you will see is processor cores. If you are using a Mac with a dual core processor, make sure that this setting is set to no more than 2 processor cores. If you are using a Mac with a quad core or 8 core processor, such as a Mac Pro, make sure that this setting is set to 4 processor cores.
This post is part of the series: Installing VMware Fusion 3 To Your Mac and Adding Virtual Machines
This three part series on VMware Fusion 3 shows you how to install VMware Fusion 3.0 to your Apple computer as well as add new virtual machine. The complete tutorial also offers some very useful advice that you should know on how to tweak the settings of your virtual machine.


