If you have Mac OS 10.5 Leopard, you have access to Time Machine. Time Machine is Apple’s powerful new backup tool. It allows you to go back to a specific time in a day, week, or even month to restore files to your drive.
Setting Up Time Machine
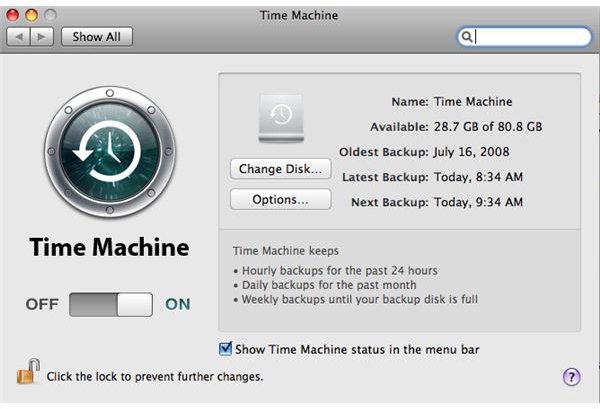
Generally, setting up Time Machine is really easy. You go to System Preferences in the Apple Menu and choose Time Machine. Click “Choose Backup Disk” and point to the external drive you want to backup to. (Figure 1)
Note that you will need an external drive to use Time Machine. Even a USB drive works, if you only want to backup a small chunk of your drive (more on this later). If you want to backup your entire computer make sure you have an external drive that is big enough.
If you are just connecting a drive to the computer you don’t even need to use this step. The computer should ask if you want to use that drive as a backup drive for Time Machine. If you say “Yes” you have nothing more to do. Backups will start and you are good to go.
Time Machine will now backup your entire drive to the external drive and incrementally backup new files in consistent future backups.
As I mentioned earlier, you can even backup to a USB drive. I backup my iPhoto library from work to a 4gb USB drive. To do this you need to customize the Time Machine settings.
First, open Time Machine in System Preferences. Choose “Options.” A window will come down where you can click the “+” and choose folders not to backup. You can get very specific here on folders not to backup, but it can be very time consuming. This is a great way to get picky on what to backup if you have limited hard drive space on your external device. On my 4gb drive I have eliminated everything except the folder containing my iPhoto Library.
Keep in mind Time Machine does not create a bootable backup. This means in an emergency, you can not boot your computer from the external hard drive with the Time Machine backup. For this reason I have Time Machine backing up my user folder on my computer. I use another program for backing up the entire drive (Deja Vu) and there are also other alternatives .
If you ever change external hard drives you can tell Time Machine to change the drive by clicking “Change Disk” in the Time Machine preferences. You can also disable Time Machine by “flipping” the switch to “Off” in that window.
Most users will want to go with the basic setting of backing up the entire drive. You need to choose what works for you. No matter what option you choose, backing up is an important habit you should adapt. You don’t want to loose all of those photos and movies and other files.
Images