Creating drum loops in Reason 4.0 may seem complicated, but this tutorial will have you creating your own beats in no time.
Creating drum tracks with a drum machine can be a tedious and time-consuming task, that can sometimes end with lackluster results and be a waste of time. Propellerheads Reason 4.0 makes creating drum beats a simple task with all sorts of possibilities and sounds. Just follow these few instructions for creating drum loops and you will know how to create drums for any type of musical style.
Steps to Creating Drum Loops
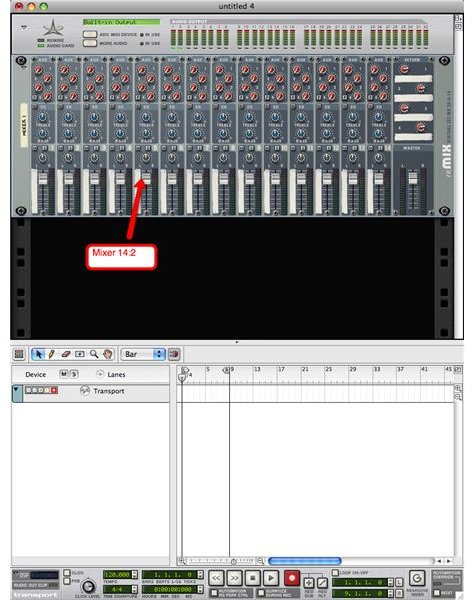
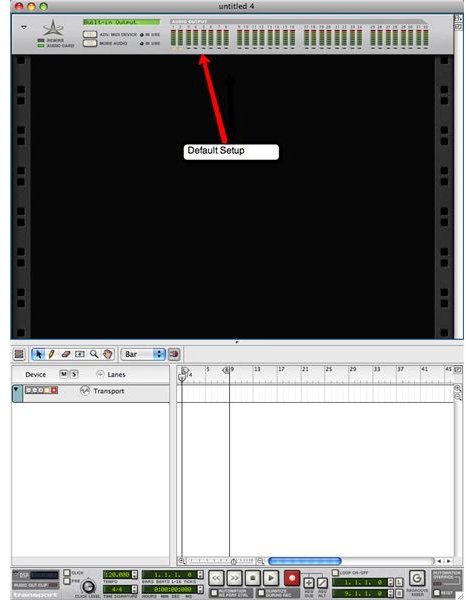
When you open the Reason 4.0 program you are set with the default rack (see image 1) that includes your standard Reason device and will show your audio ouputs. You do not really have to mess with this once the program starts up. Your first real task is going to get the two main devices for creating your drum beat.
With the new Reason 4.0 there is a window to the right that shows all of the devices you can add. Adding them is made simple by just clicking and dragging them to your rack. This window is titled your “tool window.”
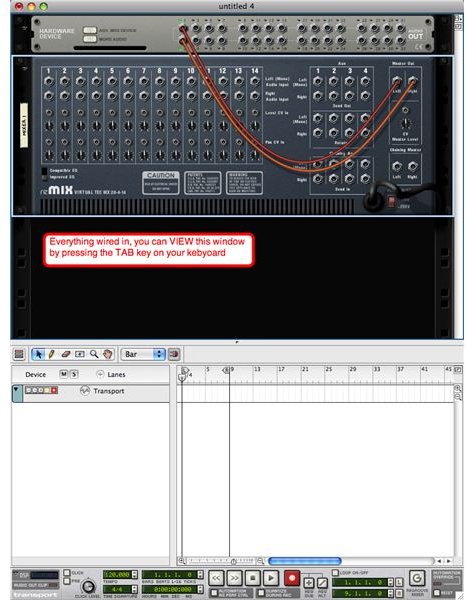
Scroll down the tool window and select the 14:2 mixer towards the bottom. Click and drag the mixer into your window and it will automatically place itself beow the original device that was shown at the default startup (see image 2). A cool little thing to note is when you add a device to the rack, it automatically hooks the cords to each other. You can view this by simply hitting the tab key on your keyboard (see image 3).
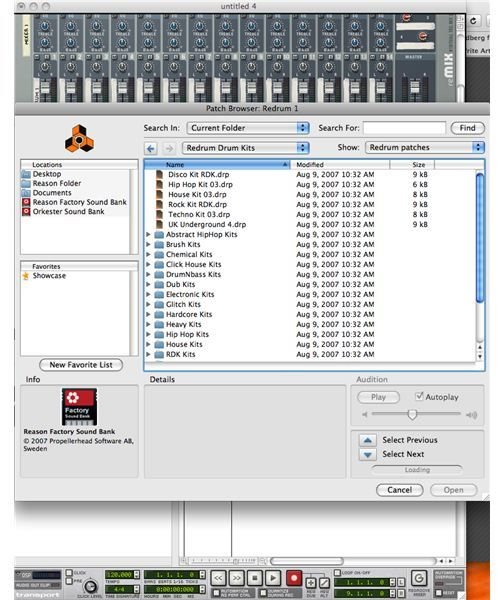
Now that your mixer is in the rack, it is time to get your drum machine. Go to your tool window again and find the ReDrum Drum Machine. Again click and drag it to your rack and you will see it locate itself under the mixer and also be connected to it, and you can view this by clicking the tab.
You’re now ready to start creating your drum beats. The default sound in the ReDrum machine is the disco kit RDK drum. This can easily be changed by selecting the folder icon to the left of “patch select.” When the file opens you can choose from rock drums, hip hop drums and numerous other built-in drum patches (see image 4). When you find the drum patch that fits your style, you’re ready to choose when and where each drum instrument will hit. You normally have a kick drum, a snare drum, a high hat, a cymbal, a tom, and a variation of a couple of these.
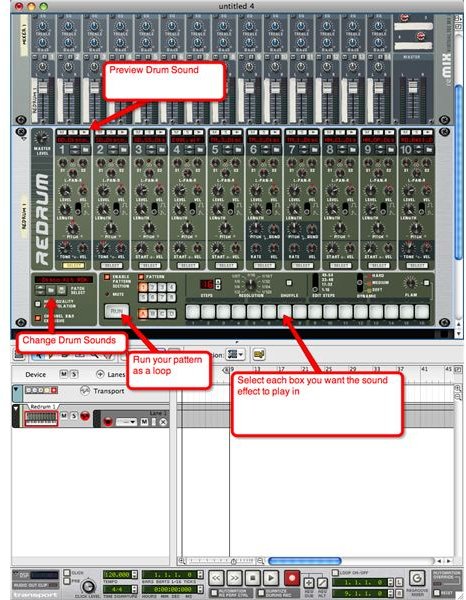
You will see ten different boxes each with their own “select” button in them. When one of these “select” buttons is highlighted it means you are adding that specific instrument, which can be previewed by clicking the play button at the top of the numbered box (see image 5).
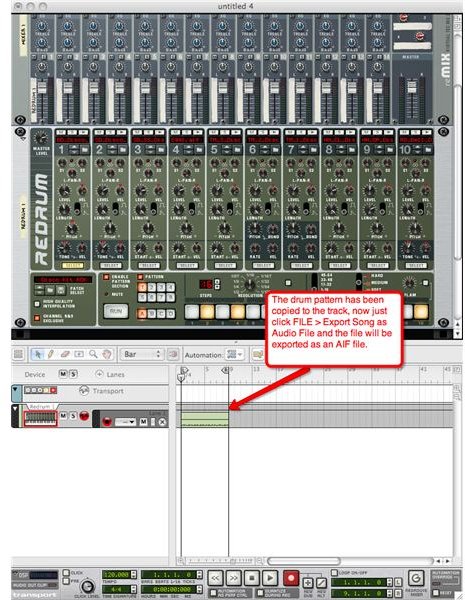
From here on out you are going to place the instrument on the grey boxes that are labeled 1-16. You can get a standard beat by placing a kick drum in the slots (2,4,8,10,14,16) a snare drum in (6,12) and the hi-hat in (2,4,6,8,10,12,14,16). Once this is done click the button “RUN” and you should hear your beat played back over and over again (see image 6). Now, this is a simple beat and you can add or remove beats from any portion of the pattern. Once you find the pattern you like you can “control+click” and you will see a list pop up. From here click on “copy pattern to track” and there you go (see image 7). The drum loop is added to the track below. Now you just click File>Export Song as Audio File. Your file is now able to be put into Garageband or any other music program you have.
Reason 4.0