Setting up an email account for Apple’s Mail can be a breeze if you let it set it up for you automatically. But, by default, most emails are set up with POP. Fortunately, for Gmail, users can use its free IMAP via Mail.app by manually setting it up.
IMAP over the Default POP
Setting up Gmail is a breeze with Apple’s Mail, but when you set up your Gmail account automatically with Mail, you’ll end up with a POP configuration.
POP configuration is not bad, but there’s such a thing called IMAP that makes Mail even more powerful. IMAP - which is short for Internet Message Access Protocol - is a powerful standard web protocol for email retrieval. One of the most useful benefits of IMAP over POP mail accounts with a desktop client is the ability to preserve what is called “message state information”. When an email is marked as read in the desktop client, it reflects the same when you log into your email account, and vice versa - making your email experience unified from wherever or however you check your inbox. With a POP set up in Mail, you may have marked an email as read, but when you go visit your Gmail on the web, these emails will still be marked unread.
Simply put: IMAP unifies your web and desktop inbox.
This article will discuss how you can properly set IMAP for Gmail for Apple’s Mail so you can enjoy a consistent email experience.
How To Set It Up
First, you need to be connected to the internet while setting your Gmail in Mail. The step by step process is enumerated below.
-
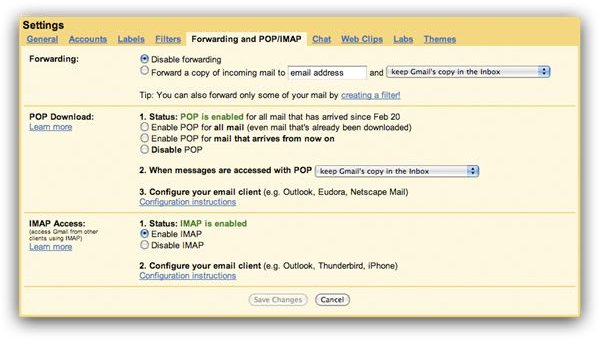
Log in to your Gmail account and click on Settings on the upper right hand corner. In the settings page, click on Forwarding and POP/IMAP tab. In the IMAP access section, make sure to tick the “Enable IMAP” option to turn on the IMAP feature of Gmail.
Advertisement -
Launch Mail.
-
Add Account. Enter your Full Name, Email Address, and Password. Uncheck “Automatically set up account”. Click “Continue”.
Advertisement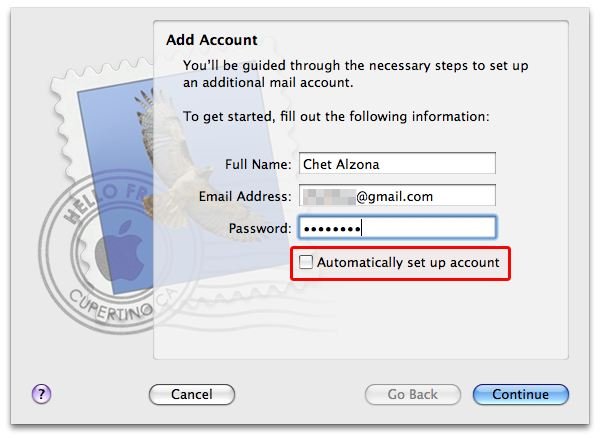
-
Incoming Mail Server. In the Account Type dropdown, select IMAP, then change the Incoming Mail Server from “pop.gmail.com” to “imap.gmail.com”. Enter your full User Name with the suffix “@gmail.com” and enter your gmail password. Click “Continue”.
Advertisement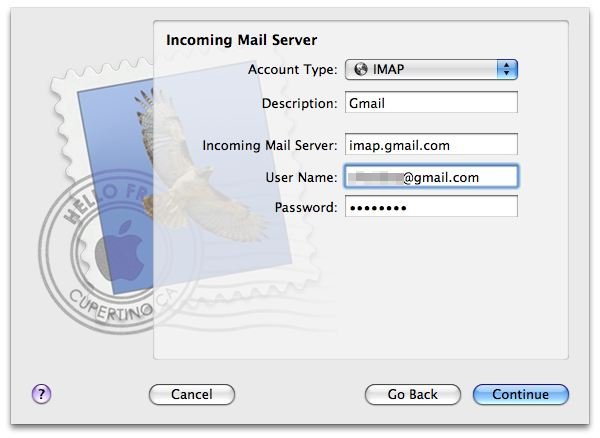
-
Outgoing Mail Server. Make sure that there’s a check “Use Authentication” and enter user Username with the “@gmail.com suffix and your Gmail password. Click “Continue”.
Advertisement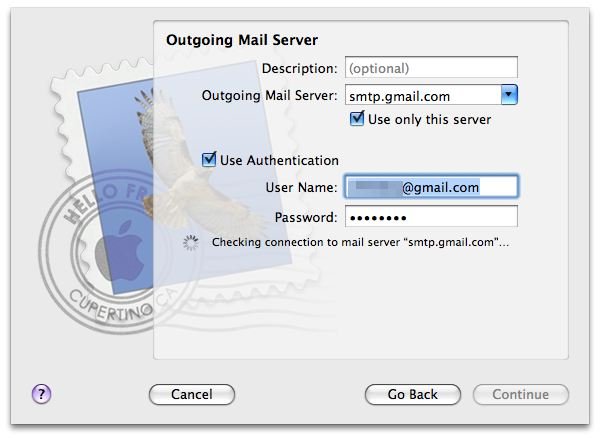
-
Account Summary. Review the details you’ve entered and for the meantime, uncheck “Take account online” since we’ll still be editing some advanced settings in the preference pane. Click “Create”.
Advertisement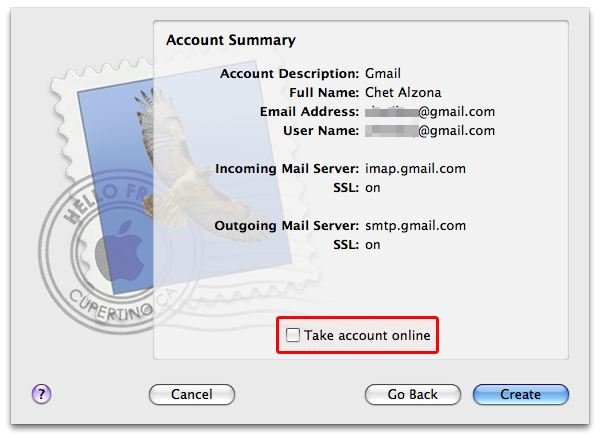
-
Once the account is created, go to Mail’s Preferences and click the Advanced tab. In the IMAP Path Prefix field, enter IMAP.
Advertisement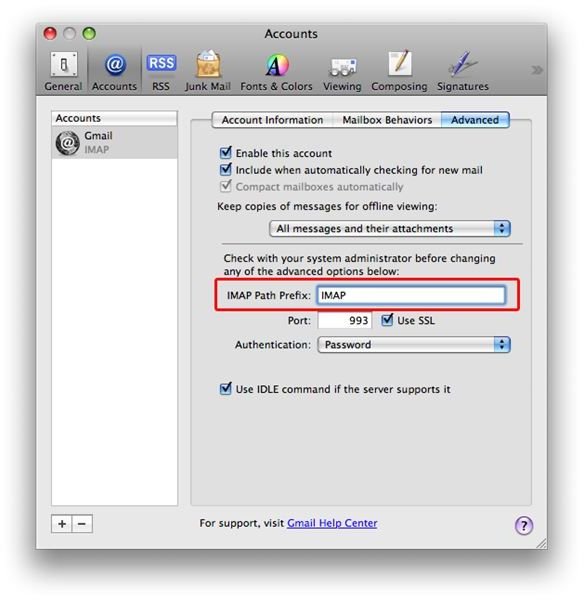
After completing the steps above, you can now take your account online and start downloading the contents of your inbox from your Gmail account. You have successfully set up IMAP in Apple’s Mail for your Gmail account.
Works Like a Charm
The time it takes for your emails to be loaded depends on the size of your Inbox. Once loading of your emails is done, everything you do with emails in Mail will be reflected in Gmail’s inbox on the web.
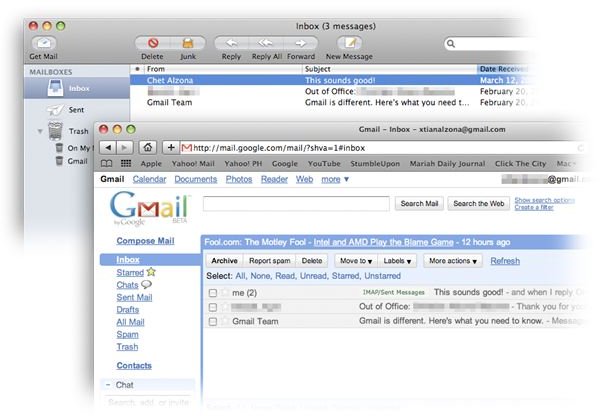
Your read messages in Mail will also be marked read in Gmail’s inbox when accessed with your internet browser. This works as well with deleted messages. Emails you’ve sent to trash in Mail will also be deleted in the Gmail inbox on the web.
These features can’t be met by POP configuration - you’d have to jump between web and desktop client to make both inboxes a mirror copy of each other,but with this set up, it is transparently handled for you - which is the biggest benefit of IMAP.


