The events feature of iPhoto 08 is great, but what if you want to group a bunch of pictures together that are in different events?
The events feature of iPhoto 08 is great, but what if you want to group a bunch of pictures together that are in different events? What if you don’t even have iPhoto ’08? In that case you can use iPhoto’s albums. Albums are a great way to organize photos.
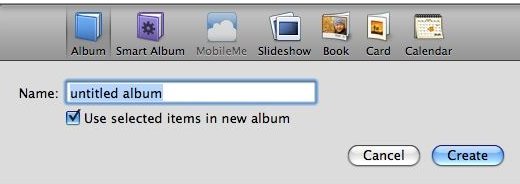
To create an album click the “+ in the lower left of the main iPhoto screen. A window will drop prompting you for a name for the album. You can also change your mind and create a smart album, a book, and more from this window. This article focusses on albums, so we won’t change anything. (figures 1 and 2)
Once you click “OK” the new album will appear in the column on the left side of the window. You can now drag and drop images to the album from your photo library. If you have a bunch of pictures selected before you make the album these photos will automatically go into that album. (figure 3)
If you want to remove a photo from an album select it and click delete on your keyboard or drag it to the trash in iPhoto. To completely delete an album click the album and press delete. Deleting albums and/or photos from an album will not delete them from your library. Photos are not gone for good unless you send them to the trash and empty the trash. Of course, if you use Time Machine you could possibly get those photos back too, but that is another story.
iPhoto albums are a great way for organizing photos for a book, calendar, or other iPhoto print project. Once your pictures are sorted into the album you can select the album and click the project from the icons at the bottom of the screen. This will set up the project with those photos ready to go.
For more organized and specific albums you can try Smart Albums. Check out my article here: Organizing Movies In iPhoto ‘08 With Smart Albums .
Images