If you’ve never explored the use of mirroring your hard drives, you may want to consider it. It allows you to recover all your files in just a few seconds after a system failure, even if your main hard drive is completely useless.
A Quick Overview
You’ve probably heard the various horror stories of people who lose all their data simply because they didn’t back up their hard drives. Generally, after you’ve heard those stories, you’ve probably researched and found a million pieces of software or websites that will store your files “for the low low price of $19.95!”. If you use one of those services, that’s great, but there is an easier way that will only cost you as much as an external hard drive costs. It’s called “mirroring” your hard drive, and it basically saves a copy of everything you do to a secondary hard drive.
Sounds awesome, right? It is, and it’s not too hard to do.
Step 1) Get Your Drives, Get Your Mind
The first thing you’ll need to do if you want to mirror a hard drive is to buy a second hard drive, such as an external hard drive , as well as a prepared mind. Mirroring a drive is not hard, but it does take a lot of work and a lot of patience, so be sure you have all of that before you jump into this.
Step 2) Open Disk Utility, Erase Your Drives
Next, open up Disk Utility (located in your Utilities folder or on your dock) and find the drives you intend to use for this RAID1 modeling, and
highlight them. If you’re having trouble, you should see the drives listed on the left hand side of disk utility alongside your internal hard drive and any disk drives you have installed. If you’re certain your drive is not showing up, you’ll want to troubleshoot it and try to get it to appear.
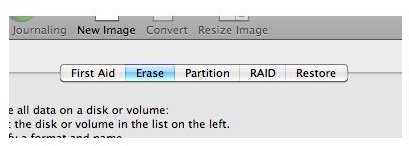
Next, go to the “Erase” tab on the right and look at the “Volume” drop down menu in the right hand section. You’ll want to click on this and change it to “Mac OS X Extended (Journaled)” before continuing with the erase process. (Note: Disk Utility usually has this selected by default). Next, begin the erasing process.
Step 3) Time to Get Complicated: Create the RAID1 Group
Now you’ll want to highlight your newly formatted RAID drives, click the “RAID” tab, and go down to the “Options” button. Here’s where things get a little dizzying, but stick with me: Scroll down to where you have the block size, and change it to “32K”. This will work for most applications, but you may want to consider changing it to 256K if you think you’ll be saving a lot of very large files (movies or music projects) on the drive.
Exit the options menu and make sure all of the above drop down menus are set to the following: “Mac OS X Extended (Journaled)” and “Mirrored RAID Set”. If those look good, click the “+” button, and then you’re ready to move onto the next step, assuming you named your RAID1 set something incredibly cool.
Step 4) Drag Your Drives Into the RAID Array
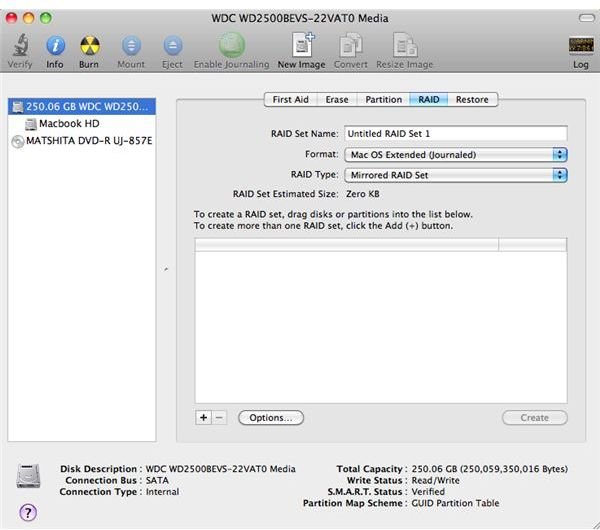
After you see your RAID set appear in the box in the center of the window, go back to the left hand column and drag all of the hard drives you want to mirror to into the set you just made. They should show up underneath it, and if they don’t, you may want to go back to step 3 and retry. After you’ve added all of the hard drives you plan on using, you can click “Create” and then beware of the warning that pops up.
It should say something about how doing this will erase all of the data on each of these hard drives, and you’ll want to check one thing before continuing on: Is your primary internal hard drive in this list? Because it shouldn’t be. If it is, go back and remove it, because it wouldn’t do you much good to mirror an erased hard drive onto more hard drives. After sorting out this little mishap, if you’re sure everything is good to go, feel free to go through with the process!
It should go smoothly and not talk a ridiculously long time, but if you think something is going wrong, consult with your computer’s manufacturer or cancel the process and try again.
Step 5) Putting Them To Good Use
So you’ve created your RAID set, and now you’re curious what the heck you just did and why it’s useful. Well, essentially your array of RAID1 hard drives acts as one big hard drive, so if you copy something to one of them, it copies to all of them. This has a huge potential when used alongside programs like Time Machine, because you can copy all of your files to another hard drive and then access them in the event that your hard drive goes bad and you lose all of your files.
It’s sort of like your own free back-up system that you created all by yourself! Good job!
Now go crash your computer and see how it works. Just kidding. That’s a bad idea.
References:
Information References:
Author Knowledge of Disk Utility
About.com, Raids and Mirrors
Image References
Images and screenshots taken by the author.


