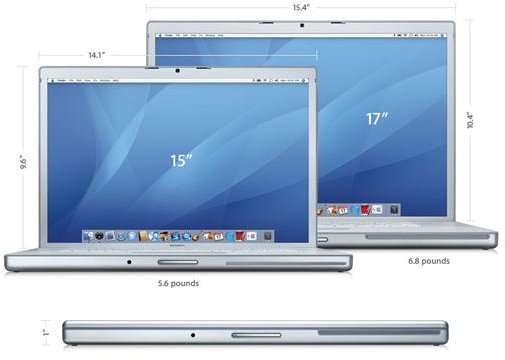
So your internet stopped working, and you’re pretty sure you need to replace the AirPort extreme card in your MacBook or MacBook Pro. Well, thanks to pretty similar architecture, you can do either of these things with one handy guide. Here’s some step by step instructions.
Step 1) Get Your Tools
You can hardly do work that requires tools without first buying some tools! Replacing your AirPort card on a MacBook is one of those tasks that requires tools, and so the first thing you want to do is get the following:
- Phillips double zero screwdriver
- Spudger (plastic works fine)
- Coin (a quarter or penny will work fine)
- Replacement AirPort card
- Screw tray
Now, the screw tray isn’t necessarily required, but it is remarkably helpful when you need to keep track of a lot of screws – and this project is one that will require you to keep track of screws.
Step 2) Be Surprised At How Useful The Coin Is
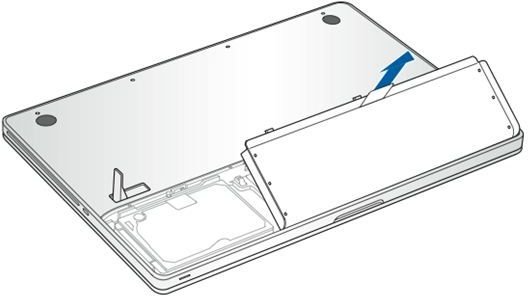
When you read that a “coin” is required to do this job, you were probably a bit skeptical, but lo and behold: we actually have a use for it! Flip your MacBook over and look around on the bottom for the battery locking mechanism. As you can see, turning this little knob from lock to unlock requires either very strong and long nails, or something small and metallic such as a coin. Take your coin, insert it into the hole (not too hard; this could damage the internal components) and slowly twist it from the “locked” position to the “unlocked” position.
After this, simply remove the battery and place it beside you, making sure you don’t lose it.
Step 3) Get That Memory Casing Out Of There
After you remove the battery, you should see a thin metallic plating along the inside of your MacBook. This is called the “Memory Casing” or “Memory Cover”, and it protects various internal components of your laptop. You’ll want to carefully unscrew all the screws attached to it and set it aside for later, assuring you don’t get the memory casing screws mixed with any other screws we’ll be removing later on.
Step 4) Start Removing Other Screws
Now, if you haven’t noticed by now, there are a lot of screws on the MacBook Pro. Some screws do one thing, some do another thing, and a lot of them share tasks. For this step, you need to remove all of the screws that are attached to the top case and trackpad, which is easier said than done. On most MacBooks, this involves removing the three rear screws (sometimes four) as well as any side screws and occasionally some top screws. Now, it’s important that you refer to your particular Macbook’s removal guide, because there’s no way I could fit 20 different screw-removal guides within this one article.
Step 5) Remove the Top Case
Set aside the screws, divided by location in your screw tray, and slowly pop out the keyboard from back to front. I emphasize slowly because there is a small cable connecting your keyboard/trackpad to the insides of your computer, and yanking your keyboard off too fast can damage this cord, this rendering your keyboard completely useless. If you have trouble getting the top case off, use your spudger to gently (very gently) pry it off, but again, do not yank it or pull on it.
After you get it entirely removed, once again use your spudger to pry the cable from the bottom upwards, disconnecting the keyboard from the computer itself. It may take a moment, but be patient; you’ll get it taken care of.
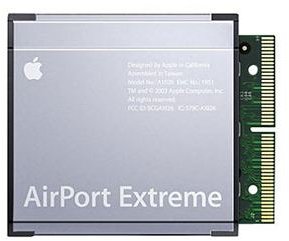
Step 6) Locate the AirPort Card
With the top case gone, you’ll have full view of the internal workings of your computer, including the AirPort card. You can locate this one of two ways: First, it’s a large shiny metal rectangle located on the left hand side of your computer. It should be out in the open, and if it’s not immediately recognizable, you may have to go in closer. The second way you can locate something like this is via reading the labels on all the devices within your computer and finding which one is a wireless card. This is, unfortunately, very annoying, so it’s best to just look up a picture of your card.
Remove the two screws and two cabled from your card, and then gently pry it out of its place.
Step 7) Put In Your New Card and Close Up
Replacing your card is as easy as following all these steps backwards. Take it, place it in the old card’s spot, connect the two cabled, and screw the two screws back in. Then, carefully plug in the keyboard cord and snap the top case back on. Screw in all the screws, put the memory protective casing back on, put your battery back in, and don’t forget to re-lock is using that incredibly handy key you found inside your couch cushions earlier. It really is true: Money isn’t just for buying stuff anymore.
If you have any specific questions about this whole process, do not hesitate to ask in the comments! I’m always around to answer what you’ve got on your mind!
References
Information Reference: How To: MacBook AirPort Card Upgrade
Image References: AirPort Extreme , MacBook Pro , and Battery Removal .


