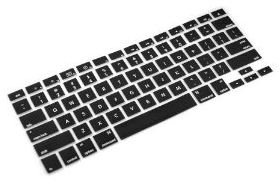
So you got a little too upset one night and slammed your fist down on your keyboard. You didn’t think too much about it, but then noticed that your ‘G’ key popped off, and now you need to know how to put the letter back on a Macbook keyboard. Here’s a beginner’s guide on doing just that.
Replacing Keys and Letters: Easy, or Should I Hire Somone?
If a key popped off of your Macbook, you’ll be remarkably happy to know that getting it back on or putting on a replacement key is not hard at all. It is, in fact, one of the easiest repairs you can do yourself because unlike many other things you’d be doing, there is no crazy unscrewing of the eight specific screws to remove the top case, no carefully prying off the delicate pieces of the computer’s inside, and no complicated rules to follow to make sure you don’t ruin your entire computer with the flick of your wrist. It literally is easier than following the instructions on those little LEGO sets you had as a kid.
Step 1) Get the Key(s)
If, in your fit of rage or fit of happiness (or however you managed to knock keys off of your keyboard), you happened to snap multiple keys off of your keyboard, you’ll need to gather them up from their various resting places and get them placed on your table to make sure none of them are individually snapped in half. If they are, you need to order individual keys from Apple before you can continue on with the replacement process.
Next, flip all of the keys over and look at the backs. You may need to run your finger over them, but you should be able to see pretty clearly whether or not the small plastic insert is still attached to the back of each key. If each one still has its respective inserts, you can move onto the next step.
Step 2) Pry Out the Plastic Insert
The one tool that you will actually need to complete this task is something like a screwdriver, a butter knife, or anything else that can be used to pry something off of something. Sound simple enough? Good! Once you have that tool, carefully insert it in between the plastic piece and the key itself and gently (keyword “gently”) bend your tool downward and pop that insert from its casing, allowing it to fall to the table beneath it.
After the plastic hinge is separated, set it next to the top case of the key in the same orientation that it was initially placed within in the key so that we don’t accidentally put a key on upside down. While this makes for some clever jokes to play on your parents or roommates, it’s really inconvenient if you are the OCD type, as many of us are.
Step 3) Attach the Hinge to the Laptop
Now for the fun part: Actually getting your key back onto your keyboard.
If you look carefully at the place where your key used to rest (if you broke off multiple keys and you’re unsure where each one goes, be sure to refer to an image of a keyboard before placing keys in the wrong spot) and pick up the corresponding plastic hinge that you snapped off in step 2. It shouldn’t be too hard to figure out, but essentially all you need to do is snap the hinge onto the designated spot. If you encounter trouble, chances are your hinge is upside down or flipped the wrong way. Try various orientations until you get it on, and then repeat this for all of the individual hinges you have.
Tip: You may have to use your screwdriver/butter knife/etc to press on the corners of the hinge and pop them into place. Occasionally it can be hard to do this with your finger because you end up pressing down the whole key, making it impossible to snap it into place.
Step 4) Attach the Key to the Hinge
Next, pick up the key (as in, the piece with the letter on it) and gently lay it on top of the keyboard exactly where it’s going to be, face up. When you think you have it aligned perfectly, press down firmly but gently on the right side of the key until it snaps into place, and then slowly slide your finger across it to the left. Listen as subsequent hinges snap into place and that satisfying “click” is heard when the last corner meets its hinge-mate.
If you are unable to get the key to snap into place, try removing the hinge and starting over from step 3, this time flipping the hinge another direction. You may have it upside down or sideways, which means you would also have to turn the key sideways in order for it to work.
Step 5) Attach the Rest Of Them/Rejoice In Your Victory
Repeat this last step for the remaining keys that you accidentally broke off until all of them are on, and then take a deep breath: You successfully completed your own repair of a computer. Do you feel like you could conquer the world yet? Because you just learned how to put a letter back on a Macbook keyboard, so you should.
After everything is said and done, it should go without saying that you should turn on your computer and check to make sure everything is working properly. There shouldn’t be too many issues, as the actual key isn’t what allows you to type; it’s the button underneath it. But if you do have problems, you may need to look into getting your keyboard professionally repaired or removing the top case to check for connection issues.
Happy key-replacing! Feel free to comment with questions!
References
Information References:
Author Knowledge
Image References:


