Everybody likes their mix CDs to look nice, so why not go through the little bit of extra trouble and print out some professional looking CD covers to put in those jewel cases? Here’s a guide on how to do iTunes jewel case labeling.
Jewel Case Labels? What Are Those?
If you’ve ever purchased a physical CD (funny that a lot of people haven’t in this day and age), you’ve opened it up and seen the little sheet of fancy paper with the track listing and possibly other information on it, right? It also houses the cover art and various other pieces of work by the artists, and if you pull it out (it’s on the inside cover) you can read all of the production info and special thanks from the band. They’re awfully complex and often contain multiple pags all stapled together professionally.
For our purposes, let’s just assume that they’re one page, two sided. That’ll make everything much much easier for us.
Step 1) Make a Playlist
As far as iTunes is concerned, mix CDs don’t exist without playlists (smart playslists work too! ), so you can’t so much as burn a CD inside of that application if you haven’t added your songs to a playlist yet. That’s fine, though, because iTunes playlists are incredibly easy to make. All you have to do is click “File” and then choose the “New Playlist” button. The playlist should appear in the sidebar for you to name whatever you want, and then you can start adding tunes.
To do this, scroll through your iTunes library and find all the songs you want. Drag and drop everything into the playlist on the sidebar, and songs should automatically be added. After you finished adding songs, you’ll want to check to see how big your mix CD is going to be, which you can do by looking in the bottom middle of iTunes for the number that ends in either “GB” or “MB”. If it says “GB”, then you’ll need to delete some songs because it’s going to end up being too big for your CD to handle. Other than that, if it’s under 800 MB, you should be fine.
Step 2) Print The Playlist
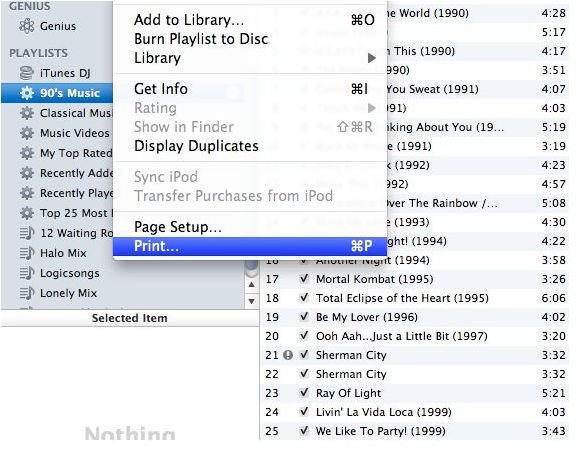
This sounds a little goofy, but if you select “File” and then “Print” while you have your playlist selected it’ll bring up a new window that will allow you to print your playlist in the form of a jewel case insert. Select the “Jewel Case Insert” option (or something to that effect), and then take a look at all the options you have presented to you. You’ll need to choose one of the available presets for how you want your insert printed (grid mode, side by side, single, etc etc) and then you can hit “Print”.
Step 3) Adjust Print Settings, Preview
Before you actually go through with the whole printing process, it’s important to make sure everything is as you want it. Select the printer’s options and adjust things such as ink quality, print layout, etc from within your computer to make sure you don’t overuse or underuse your capabilities. In case you’re not sure what all of this means, your printer should automatically have everything set to a reliable format, but one thing you will want to pay attention to is the print quality. Normally, you’ll have four options:
- Fast Draft
- Fast Normal
- Normal
- High Quality
You should never really need anything beyong Fast Normal unless it’s a very professional business card or letterhead (in which case, high quality will do), so select either Fast Draft or Fast Normal and then feel free to print away.
Alternative Methods?
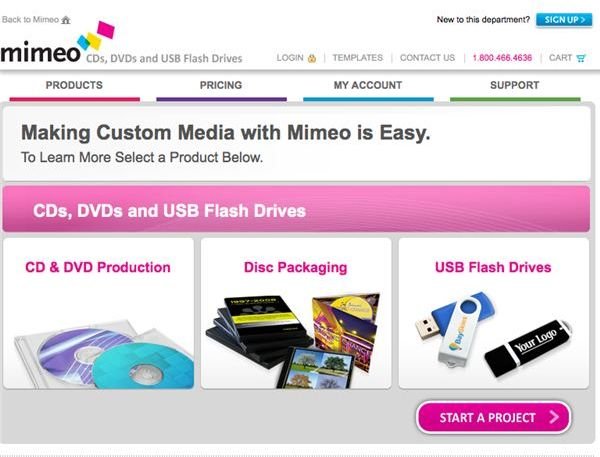
This article covers the way that iTunes can be used to make jewel case labels for your CDs, but unfortunately that’s neither the only way nor the most versatile. One of my personal favorite third party choices is Mimeo for a couple of reasons. Firstly, it’s pretty comprehensive and allows you to upload your own files and images for use on the case, and secondly, it’s all done completely online in your browsers. No need to download any annoying programs or work through iTunes. Another upside to it is that it can make thin jewel case inserts, thick ones, DVD case inserts, and any number of other insert styles that are available with our wide array of digital media in this day and age.
The only downside? Well, it’s totally in browser and you do have to pay for it, which means you’re at the mercy of your internet speed and internet access. If you have a slow connection, images and pages are going to upload and load very slowly, which can be a huge hassle if you’re short on time. Additionally, you can’t do any CD case making at all if you aren’t within a wireless or wired internet connection. Despite these shortcomings, however, Mimeo is probably the best or second best (behind iTunes) jewel case labelling device on the market.
References
Information References:
MacWorld, https://www.macworld.com/article/40086/2004/10/digitalhubnov.html
Mimeo, https://duplication.mimeo.com/mcm/mimeo/index.jsp .
Author Knowledge
Image References:
All images are screenshots taken by the author.


