Computers are mystifying things in many respects, and most people have no understanding of why the things within them do what they do. One of these things is the way that computers store and delete data, and sometimes this can leave a sort of “ghost” imprint of data. Here’s how to delete that.
The Nature of Ghost Data: What, Why, and How?
Mac computers do a funny thing when they delete data. Instead of actually fully deleting it, they just sort of erase the file and wait for you to overwrite it with another file, so despite the fact that you can no longer access the deleted file, it’s still taking up hard drive space. What this can do is create the illusion that there is “ghost data” on your hard drive that causes it to run more slowly and have less free space than it actually does. Thankfully, there’s a very simple set of instructions you can follow to eliminate this ghosts data without needing to download anything or do any fancy computation.
Step 1: Using Disk Utility
A lot of the guides I have written use Disk Utility, which is odd because most people have no idea that many of the tasks they pay to
have completed are just simple operations completed with the click of a mouse inside this very program. Once again, we return to Disk Utility, which is usually located on the dock. It looks like the icon to the right, but if it’s not available in the dock, simply use the Spotlight function on your Mac (the magnifying glass in the upper right) and search for “Disk Utility”. It should pop up without issue.
Step 2: Locate and Highlight Your Disk
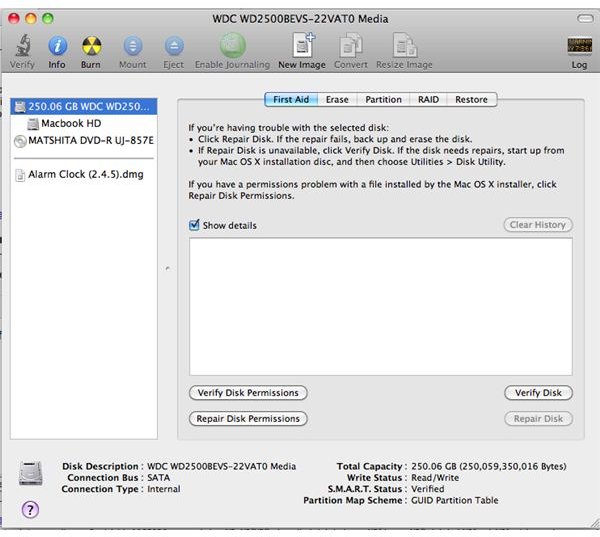
After you open Disk Utility, you’ll get a window that looks similar to the one on the left, and you have to do two things: Firstly, highlight the hard drive you want to clean on the left. In my case, it’s called “Macbook HD”, and once you find the equivalent on your computer, select the erase tab from the right side menu located in the upper middle of the window. This will bring you to another new window with a few options, but don’t click anything just yet.
Step 3: Erasing the Free Space
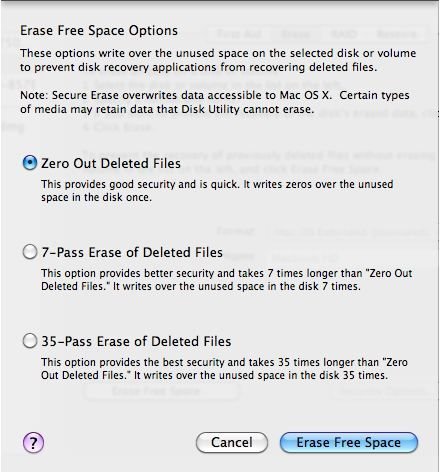
So, if you’ve done everything correctly thus far, you should see the option to “Erase Free Space” in the bottom left of the window. If you click this button, Disk Utility will give you three options:
- Zero Out
- Seven Pass Erase
- Thirty Five Pass Erase
Each option has its perks, but it’s really just a choice of speed vs. depth of the erase. If you want to most thorough cleaning done with great precision, you would select the Thirty Five Pass Erase. A quicker cleaning you should do more often, then, would be the Zero Out erase. Select the option that sounds best to you, click “Erase Free Space”, and your computer should take care of the rest.
Note: Doing this does mean that data restore applications cannot recover deleted files. If there were any recently deleted files you still need to recover, make sure you do so before erasing your free space.
References:
1. Image References: All images are screenshots taken by the author.
2. Information Reference: https://docs.info.apple.com/article.html?path=diskutility/10.5/en/duh1010.html


