Unfortunately, technology can be a fickle beast, and more often than we would like, hard drives become corrupted. When this happens, you need to know what you can do to save as much money as possible when trying to fix it. Here’s a guide on repairing your hard disk drives on a Mac.
Corruption: What Does It Mean?
Like any good piece of technology, hard drives have a pretty good chance of becoming corrupted at some point in their lives. If this happens, it means that your computer’s ability to read the hard drive is lost because some piece of data on it is “corrupted”, essentially the same as being unable to read a book because someone ripped one of the pages in half. Thankfully, this can often be fixed without so much as the click of a mouse by you, which is immensely helpful for people who don’t want to spend $50-$100 fixing a hard drive at their local computer shop.
Step 1) Locate and Open ‘Disk Utility’
The first thing you need to do for hard drive repair (Mac OS X, not Windows) is to open a program called Disk Utility. On many Mac
computers, this file can be located in the dock on the bottom of the screen, and if this is the case, you can find it by looking for an icon with a gray hard drive that has a stethoscope attached to it. If, however, you cannot see it on your dock, you’ll need to use the “Spotlight” function, accessed by clicking the magnifying glass in the top right of your screen. Simply type in “Disk Utility” when the dialog box pops up, and it should show up for you to click.
Step 2) Repairing Your HDD
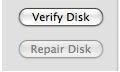
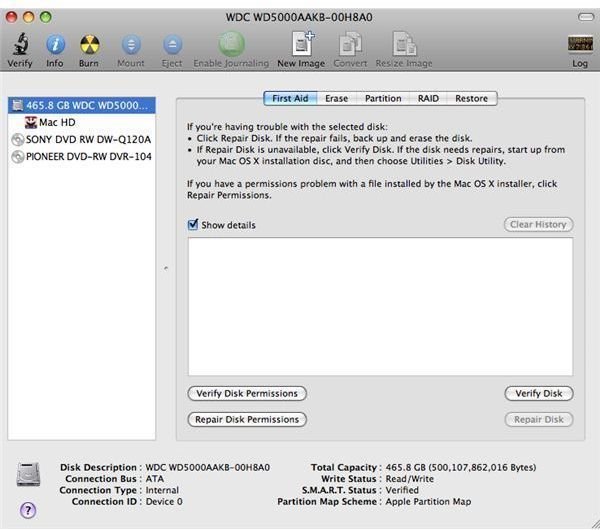
After you open Disk Utility, you should see two distinct sections: One of them is a side bar, where you can highlight your hard drive, and one of them is what we shall call the “Repair Section”, the part to the right of that. First, click on your hard drive in the left hand column, which will highlight it and allow you to choose options in the “Repair Section”. After you’ve done this, you’ll want to make sure you’re in the “Repair” tab of the “Repair Section” (chosen by default), and then choose “Repair Disk”. (Note: If ‘Repair’ is not selectable, choose ‘Verify Disk’ and let that run first, then choose ‘Repair’)
After doing this, let it sit and do its thing for a few minutes, and then when it finishes, it will let you know. That’s all you need to do to run a hard drive repair on your Mac!
Step 3) What Now?
Depending on the outcome of your attempted disk repair, there are two things you’d need to do: Either you’re done and you can go back to using your hard drive freely, or you’ll need to take it into the shop and have it professionally looked it. The latter of these options, of course, it to be used if the repair attempt did not work. If it did, you’re good to go and you can keep using your hard drive to your heart’s content.
One thing to note is that you should shop around when looking for a computer specialist. A lot of retailers will overcharge you for relatively simple tasks such as hard drive repair; make sure you’re getting the best deal before spending your money!
References:
1. Image References: All images are screen shots taken by the author.
2. All information comes from prior author use of the aforementioned program(s).


