
There’s always great music in whatever live concert DVD you have in your library. The problem is though, we don’t always have the time to watch them. Sometimes, we’d rather rather listen to just the audio content. Using a Mac and some free software, it’s easy to rip a concert DVD to MP3s.
Three Things You Need (They’re Free!)
It’s possible to convert a concert or music-oriented DVD and to the MP3 format so you can enjoy the same DVD concert in iPod audio form. This will involve a series of steps using a series of free apps. This article will guide you on how to transfer your DVD to your computer as a video file, convert it into an audio file, split it up in smaller parts per song, port to iTunes, and finally sync it to your iPod/iPhone.
There are three things you need to be able to rip and convert to a concert DVD to MP3 (all freeware).
- Handbrake
- Switch
- WavePad Audio Editor for Mac
Using Handbrake, we will rip the video from your concert DVD. Once the data is ripped, you will end up with a video file of your DVD. This video file will need to be converted to an audio file, specifically in MP3 format. This may be achieved by using a conversion tool called Switch. Switch will generate an MP3 recording of your video, containing all the good concert audio in one long MP3 - which we will split up in smaller files so we can divide it up per song.
Once we’re done, we can load the freshly cut MP3s into iTunes, arrange the ID Tags, add album artwork, and sync away to your iPod / iPhone.
Take note though, that ripping DVDs should be done only with your personally owned, legally purchased DVDs.
Ripping The DVD
The first step in the whole process is ripping your concert DVD to a video file. Fortunately enough, a freeware app makes this possible.
Download and install Handbrake if you don’t already have it in your system. This freeware app will convert any DVD in your drive to your desired format. You can convert your DVDs for Apple TV, iPods or iPhone, or any popular media format you want.
Insert the DVD you want to rip, and
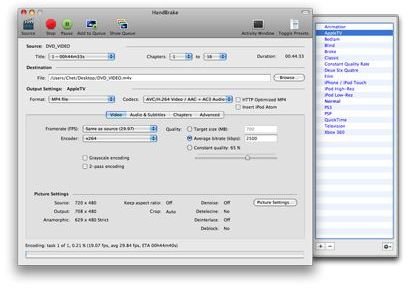
. Select the source ROM drive where the DVD is, choose an output format for the file, and

. It takes a while to finish ripping, and the time it takes to finish depends on the length of the video in the DVD.
Once it’s done ripping, you’ll have the video file in the location you specified.
Next we will be converting this video into MP3 using another program called Switch.
Converting The Video To MP3
Download and install Switch . This freeware app converts most popular media formats into another audio format. For this guide, we’ll be converting a .m4v video file to .mp3. Switch however, can convert most popular media files to .mp3s or any other audio format you can choose from its dropdown.
Simply drag the video file to Switch’s window,
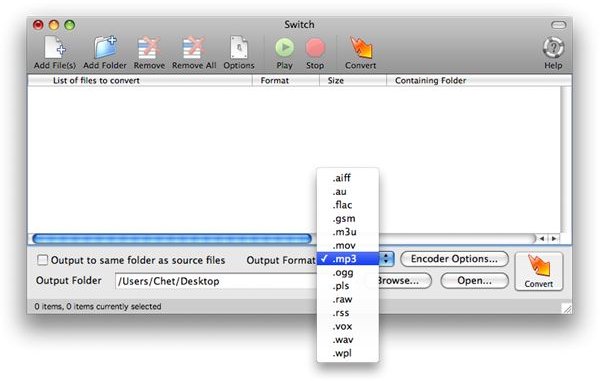
, and specify the output location for the MP3. Click on the Convert button and Switch will process the file. A progress bar will display showing the status of the conversion.
Once it’s done, we’ll end up with one MP3 file containing the whole audio of the concert DVD. We will need to split this large MP3 into smaller segments so we can browse the resulting set of MP3s much like how you browse songs on an album. To produce separate MP3s per song, we’re going to need some audio software that can split one big MP3 into smaller pieces.
Splitting The MP3
We can use several tools for splitting MP3s.

There is WavePad Audio Editor for Mac , a freeware app that makes it possible to split large MP3s. Another alternative app with a better interface, although not free, is Fission by Rogue Amoeba (available for $32). Since we’ve been using a lot of freeware in this guide, we’ll proceed with WavePad Audio Editor, which will produce the same results.
Open up the resulting MP3 from the concert DVD rip video file with WavePad Audio Editor. This app lets you save a selection, cut, copy, paste and so on in a particular audio file you’re working on. We want to create smaller MP3s per song, so select on the song sections sequentially.
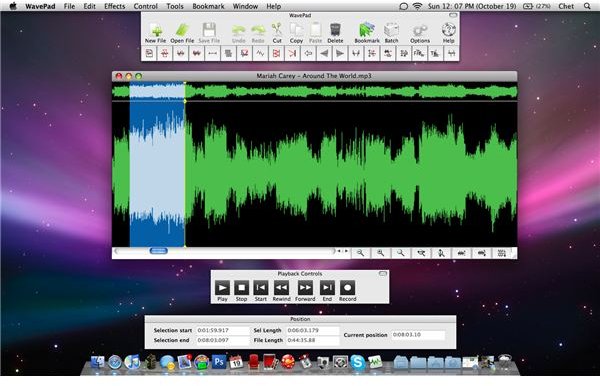
You can play and listen to your current selections to check if your selections are spliced properly.
As with most concert performances, songs are separated by loud audience applause. Therefore, songs typically start and end with applauses.
putting in “01 [Song Title].mp3” for the first song and so on, to guide you when you start putting in tags - especially when it comes to track numbers - in iTunes. How you split the MP3 is up to you.
Keep repeating this process until you get to the end of the concert audio, and you’ll end up with a list of songs.
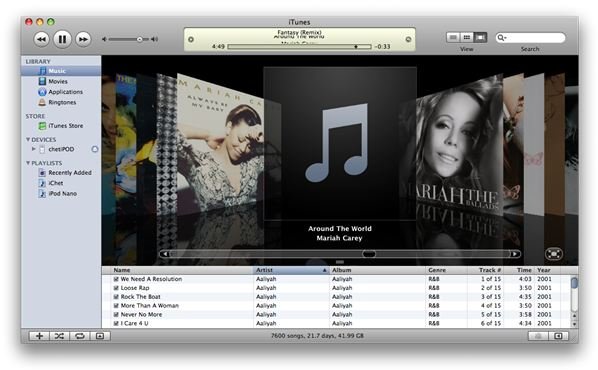
Loading It Up In iTunes
Load your music in iTunes.
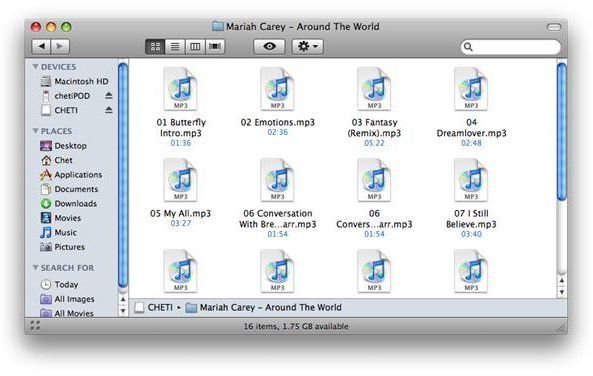
When adding songs to iTunes that’s not from the music store, you’re highly likely to end up with songs that don’t have album art and essential tags like the song name, album name, artist information, genre, track number and so on.
With your newly ripped and split MP3s, this may be how your music will look like when you load them in iTunes.
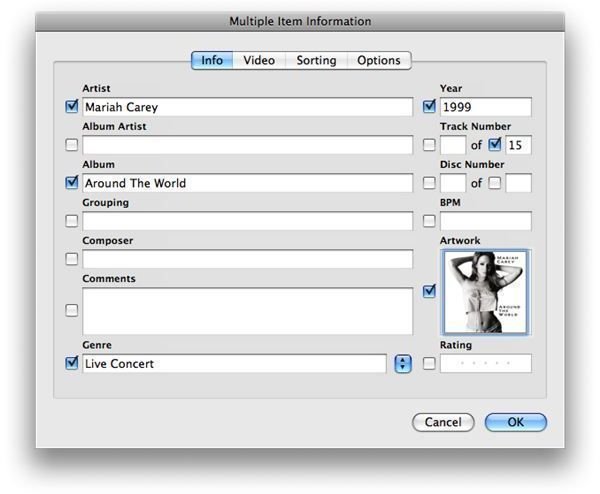
It would be best to take the time to tag these MP3s properly. You can also add album artwork by using the concert’s actual DVD cover. This is not a necessary step, but recommended nonetheless. Adding album artwork makes browsing your iTunes library much more convenient. These images can be retrieved from Google’s image search, or you can scan your actual DVD’s cover page.
I prefer
(as DVDs come with images with portrait orientation), which can be achieved using your preferred photo editing software.
You And Your iPod
Now that you’ve ripped your DVD, converted the video to an MP3, spliced up your concert into individual songs, and loaded it up to iTunes, you can finally sync it now with your iPod or iPhone and carry the music around with you wherever you go. You won’t have to watch your concert DVDs anymore. You can now enjoy all that great music from your concert collection on the go.


