Sharing files and documents between a Mac and a Windows 7 computer is simple. All you have to do is activate the right settings, join a workgroup and enter a password…
Sharing Files Between Windows and Mac
There was a time when Apple Mac computers and Windows PCs couldn’t be connected to the same network without additional hardware and software to enable network file sharing, but since the release of Mac OS X this has slowly become a problem of the past as more and more businesses and homes begin to recognize the benefits of having a Mac.
Even if your Mac is an image or sound processing unit, or just your home’s main entertainment center, with a Windows 7 computer elsewhere on the network you will still be able to access files and folders on your Mac by setting up the right permissions.
Note that this guide specifically covers Windows 7 and Mac OS X 10.6 and later.
Using a Workgroup for Accessing Mac OS X Files from Windows 7
In order to browse and open Mac OS X files on your Windows 7 computer, both will need to be in the same Windows workgroup.
By default this is called Workgroup, although you might have changed this. You can check your workgroup in Windows 7 via Start > right-click Computer > Properties – the lower half of the screen will list the workgroup name.
On your Mac, open System Preferences > Internet & Wireless > Network and select Edit Locations… from the dropdown Location menu. With Automatic selected, select Duplicate Location from the settings dropdown button; this will create a location named “Automatic Copy” which you can leave as is or rename as required. Click Done to continue.
Configuring Your Workgroup Connection
With the location copied, select Advanced… > WINS and in the Workgroup field enter your Windows 7 workgroup name. Click OK and then Apply the changes – you are now ready to configure Mac OS X to allow connections from Windows 7.
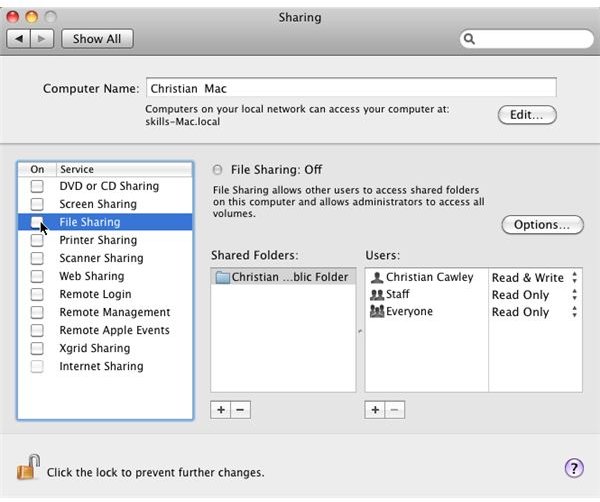
Staying on the Mac computer, go to System Preferences > Internet & Wireless > Sharing and check the File sharing item on the list on the left.
You will see some options appear (if not, check your workgroup names match), and these can be used to add new folders and users to the network share. New folders that you Add will have read and write access by default, so make sure that the correct permissions are set.
A final step is required for configuring your connection – click Options… to specify which type of sharing is active, and select Share files and folders using SMB (Windows). Check each user in the box below this and enter the passwords as required. Note that the Windows password will be stored on the Mac computer in a format less secure than in Windows. You might opt to use secondary Windows account when using this form of sharing, but either way you should really only use this method over a secure local network. Click Done when finished.
Enable the Mac OS X Guest Account
For your Windows 7 computer to open your Mac documents you will need to enable the Mac OS X guest account, which can be found in System Preferences > System > Accounts.
Unlock the settings via the icon in the lower-left corner, and enter your password to confirm that you wish to make changes. Next, select Guest Account and check the option Allow guests to log in to this computer. Re-lock the settings, and you’re done – you can now view, read and write to folders on your Mac from your PC!
References
- Author’s own experience.


