If you need to remove Microsoft Office: Mac 2011 for any reason, you will find that the task can be performed in two stages. The first is a basic “uninstall” while the second completely removes the software from your Mac.
Uninstall Microsoft Office: Mac 2011
An ever popular productivity tool for Windows users, Microsoft Office: Mac 2011 is seeing some success on Apple computers, which already has its own preferred productivity suite in iWork.
However some users are opting to remove MS Office 2011 completely and use alternatives such as iWork or any of the open source office suites, an act which brings with it the problem of how to remove Microsoft Office from your Mac.
Thanks to the various additional files and folders used in Microsoft Office: Mac 2011 in order to create an office experience that is as close to the Windows version as possible, removing the software from your Apple Mac can be quite a lengthy and drawn out process…
Completely Remove MS Office 2011 from Your Mac
To remove MS Office 2011 completely from your Apple Mac hard drive, you will need to follow these steps.
The first is to cancel all running programs via the application’s Quit option typically found in the File menu. If the application cannot be exited normally, use the COMMAND+OPTION+ESC keys to display the Force Quit Application box, and use the Force Quit button to exit each of these.
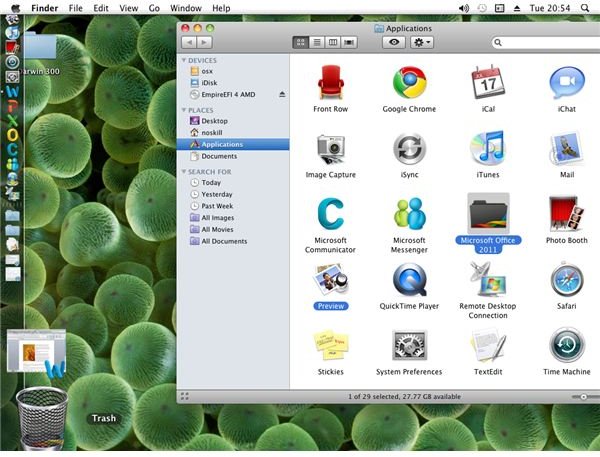
With this step completed you can then remove your Microsoft Office: Mac 2011 folders. Use Finder > Go > Applications, select the Microsoft Office 2011 folder and drag it to the Trash folder.
Now at this stage you might think that the job is complete. After all, Microsoft Office: Mac 2011is removed. However it isn’t complete removed – there are still files and folders that need to be discarded…
(Screenshot by author)
Removing Preferences, Licenses and Receipts
There are various further steps that need to be taken if you don’t plan on reinstalling Microsoft Office: Mac 2011 in future.
The following steps will require you to use the Finder to access various folders on your hard disk drive. For instance to remove the Office Preferences, open Go > Home > Library > Preferences and find all files beginning com.microsoft. Drag these to Trash along with the Microsoft folder.
You should also remove the helper files (com.microsoft.office.licensing.helper.plist and com.microsoft.office.licensing.helper), found in:
Finder > Go > Computer > [Your hard drive] > Library > LaunchDaemons
and
Finder > Go > Computer > [Your hard drive] > Library > PrivilegedHelperTools
Meanwhile licenses can be removed by opening Finder > Go > Computer > [Your hard drive] > Library > Preferences > com.microsoft.office.licensing.plist.
You will also need to discard the Application Support data. Open Finder > Go > Computer > [Your hard drive] > Library > Application Support and drag the Microsoft folder to Trash.
These steps can be completed on Max OS X 10.5 (Leopard) and 10.6 (Snow Leopard) by removing the Receipts, found in Finder > Go > Computer > [Your hard drive] > Library > Receipts. Identify the receipts files as those beginning Office2011_, and move these to Trash.
If you use Snow Leopard, proceed by checking for files in other locations: go to Finder > Go > Go to Folder > /private/var/db/receipts, click Go and discard all receipts beginning c****om.microsoft.office.
Finalising the Complete Removal of MS Office 2011
Further steps are still required for you to finalise removal of the MS Office 2011 suite. At this stage more folders need to be removed, so go to Finder > Go > Home > Library > Application Support and find the Microsoft folder, which should be dragged to Trash.
Perform the same action in Finder > Go > Computer > [Your hard drive] > Library > Fonts if you wish to discard of the Microsoft Office 2011 fonts. Obviously there is a good reason to keep hold of these so it is up to you whether you follow this step or not.
At this stage there are only a few steps left – the first should be to open Trash, check the contents for anything you might want to keep, and then go to Finder > Empty Trash. Finish this step by restarting your Mac.
In Finder > Go > Documents drag the Microsoft User Data folder to Trash, and then head for the final step – find the various shortcuts to Microsoft Office 2011 on the dock and right-click, using the Options > Remove from Dock option.
With a final restart of your Mac, you should find that by following the steps above you have completed the removal of MS Office 2011!
References
Author’s own experience.
Microsoft Knowledgebase, https://support.microsoft.com/kb/2398768