This article goes through ways of copying your existing Ubuntu installation to a separate hard drive. There are a few reasons for wanting to do this including backup purposes, and if you get a new hard drive.
How would you like to backup today?
This article introduces you to backing up an entire hard drive bit-by-bit. Please note that it is sometimes better to back up your home directory only and do a reinstallation. In most cases an entire backup is not needed unless you have a larger hard drive which you would like to use.
The Ubuntu Simple Backup Suite can backup various directories of your machine and includes a GUI tool. What i am about to show you below is not for the faint of heart, I expect you to have used the Ubuntu terminal before as attempting something advance like dd copy can be dangerous if you don’t know what you are doing. If you type a command in wrongly you may damage your current system beyond repair.
Using dd
dd is a special advance backup utility included in the Linux kernal so whilst this article is aimed at users running Ubuntu, this will probably work for all Linux distributions. By default dd can only be accessed from the command line and there is no GUI utility included, dd can take a long time because it backs up bit-by-bit, it is an exact copy of your hard drive.
Please note that dd is a very advance utility used by professionals as well so it has a lot of options which you will not use, dd must be run as a root user so always double check what you type into the terminal box. I greatly encourage you to find some information on dd for yourselves if you have not used it before rather than just copying the commands from this page without knowing what they do, typing: “man dd” into the terminal is a good place to start, a search engine will also greatly help you.
Whilst it is not needed, you may want to do this from a Ubuntu LiveCD as backing up a live filesystem bit-by-bit can go wrong because dd does not understand current filesystem activity.
Lets get on with it!
Okay so I have introduced you to dd now lets get it to do something useful for us, for this you will need a terminal box, a hard drive, the hard drive you are backing up onto, root access, and the ability to double check what you are typing in. I do not think this needs mentioning but the drive you are backing up to has to be either the same size or larger than the current.
The first thing you will need to type into the terminal is:
sudo su
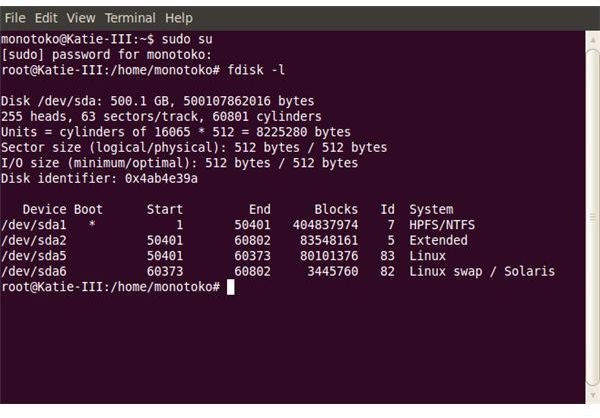
This will log you into the root account if you have access to use sudo, the next thing to type is: fdisk -l
This will give a listing of all the current hard disks on the machine, here is a picture of my own to give you an example of what it looks like the image to the left of this text. (you may have to click the image to enlarge it)
As you can see from the image my computer currently has 1 hard drive and it is at /dev/sda with multiple partitions. Yours will most likely have two or more entries if you are planning to move it to another hard drive, the next thing to do is determine which hard drive is the current one and which hard drive is the one you are copying too.
Once you have determined these you can run the dd command itself: dd if=[current drive] of=[drive to backup too]
“if” means the input file in this article your current hard drive (example /dev/sda) and “of” means the output file (for example /dev/sdb if thats where your backup hard drive is located)
This can take a very long time as it is copying bit-by-bit, so go get a coffee while its running!
I have said before that dd will copy your entire filesystem, this means that if the new hard drive is larger than the current one, it will leave some space at the end which you can deal with using gparted or another partitioning utility after the copy completes.


