If you’re interested in working as a Linux administrator, you’ll need a good understanding of Linux Groups. Such knowledge can also be useful when managing a shared Personal Computer (PC).
What Are Linux Groups?
Groups under Linux establish a relationship among users that is based on a shared set of permissions. If you don’t have a very good understanding of how file permissions work under a UNIX-like system, you might not want to begin working with Linux user groups until you do. Sometimes a group of users needs to work on a project that requires shared work on common files for the team. You might not want their files to be accessible by people who aren’t a part of the project. Linux groups could refer to the various departments of a company. For example, the sales department could all be placed in a sale group just as you could do with accounting personnel. You probably wouldn’t want sales to have access to accounting or any other Linux user groups to which they don’t belong. UNIX-like systems were developed to handle multiple tasks while maintaining tight security. Managing Linux groups is an important part of keeping data secure.
Managing Linux User Groups on the Command Line
Although Graphical User Interface (GUI) tools are usually available for managing Linux groups, many administrators handle this task on a command line. If you plan to work as an administrator or ever test for Linux certification, you won’t be able to rely on the GUI options which sometimes restrict what you can do. Clicking on the screen shots below will allow you to see Linux group commands “in action.”
Explaining the Commands
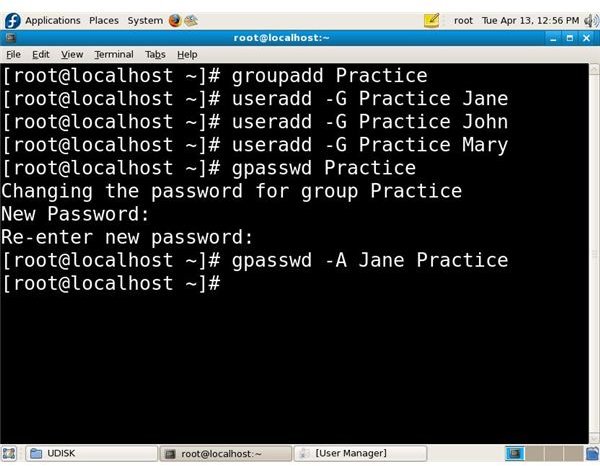
I opened a terminal as root; by the way, I’m working on a Fedora 8 system and the commands presented here should be typed without the quote marks. I typed “groupadd” plus “Practice” to create a practice group for this article. I then added fictitious users: Jane, John, and Mary. You can see that I used the “useradd” with the “-G” option which allowed me to both create the user and add him or her immediately upon creation to the Practice group. If I had wanted to add an existing user to this new group, I would have used the “usermod -G” command, provided none of them were signed onto the system.
I then assigned the group a password with the “gpasswd” option as you can see. Don’t forget to type the name of the group to which you’re assigning a password and to spell the command correctly. It’s easy to type “gpassword” and then wonder why you’re getting an error message. The system prompted me for the password and then to retype it for verification. Remember the rules for creating strong passwords if you’re in an actual production environment. Finally, I designated Jane as the group administrator by typing “gpasswd -A Jane Practice.” The “-A” option designates her as administrator. There’s a list of other commands and the parameters that may or must be passed to them when creating Linux groups, but these are among the basic ones.
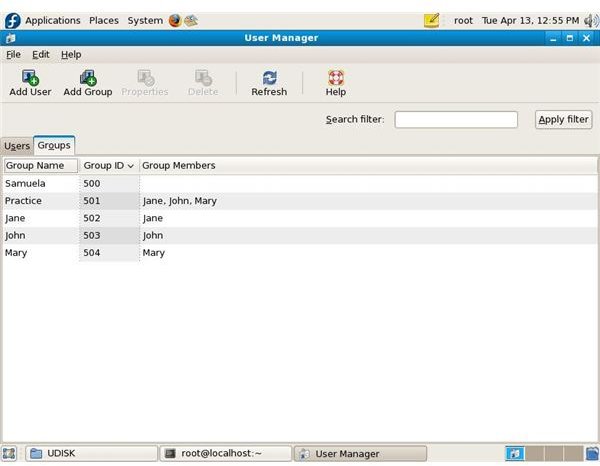
I included the screen shot of the GUI results of the command line work with Linux user groups for you to see. If you don’t have experience working with groups, you can certainly start practicing with the GUI. However, I’ve usually found that if you ever hope to be efficient on the command line, that’s where you should start. It’s easy to work in a GUI you’ve never seen before; it’s not easy to work on a command line if you’re not used to it.


