Having at least a basic understanding of Linux terminal commands can be very rewarding and necessary in some circumstances. Here is a good introduction to why you might want to be familiar with working on a command line and how you can easily learn.
Most of the popular open source operating systems based on the GNU/Linux kernel offer users a Graphical User Interface (GUI) through which they can interact with the system. Even a good number of administrative tasks can be carried out via a GUI. So, why would anyone need to learn Linux terminal commands? Usually, the easier something is, the more that can go wrong with it and more limitations that restrict freedom. Whether you use a GUI or a command line, you’re issuing commands to your system to carry out the operations you want or need.
Advantages of Knowing the Command Line
You’re almost always limited in the number of commands you can issue at one time when you use a GUI. This is not the case with the command line on which you could actually accomplish complex processes faster than issuing one or two at a time. Also, there are some things that a GUI doesn’t handle as well as the command line. Finally, as stable as GNU/Linux based operating systems tend to be, their GUI’s can break.
Are there any disadvantages to the command line? I would say that there might be one. You’re probably less likely to make a serious mistake using a GUI because you see, in plain language, what you’re doing. The language used on a command line can be cryptic, especially when parameters are passed to functions to fine tune operations. I think it’s fair to say that it might be easier to make a mistake using Linux terminal commands, particularly if you’re working as root, also known as super user.
Knowing the Terminology
Always pay careful attention to the commands you’re typing in and any parameters (arguments) you include. Another precaution to take is to avoid working as root unless necessary. Unfortunately, if you have a system like Puppy Linux, you are always root, but this isn’t the case with many other popular distributions, which are also called distros and flavors.
Terms such as command line, terminal, console, and shell have definitions that vary slightly, but in the real world, they tend to be used interchangeably. To simplify things, think of a terminal or console as your access to a shell in which you’ll use Linux terminal commands. A shell, although it looks like nothing but a prompt, it is an actual interactive program. There are different shells available, but the most popular is the Bourne Again Shell (bash) found on almost every Linux distro. Also, be aware that many Linux commands are actually basic UNIX commands used on a Linux system. This makes sense since Linux is a UNIX-like system.
The Root User
Most Linux distributions are administered by what’s known as the root, or the super user. There will always be a root password to be entered to gain this complete control over the entire system and all of its users. In older versions of Fedora, to become root, you would type in root and then provide the password. In newer versions, you type su and then the password. Once established as root, you’ll see the dollar sign that precedes the prompt, change to a hash mark. Again, be careful because you now have no restrictions and can do damage to the system. Ubuntu offers the option of the sudo command allowing you to become root just to complete an operation and then revert back to a regular user for safety reasons. Again, in Puppy, you’re root all of the time.
Suggestions for Learning Basic Linux Terminal Commands
A good suggestion for training yourself to work in a shell is to get used to opening a terminal, learn just one or two operations, and force yourself to use them until you’ve mastered them. Simply abandon the GUI little by little until you are proficient on the command line. You can then keep in practice by using both. This method of learning truly works, but it requires some discipline on your part; it’s always easier to just do the familiar. I also highly recommend familiarity with the basic “tree” of the Linux file system. While there’s no standard set-in-stone file system, rather it’s not being used by all distros, learning the core is of much help in navigating any Linux system.
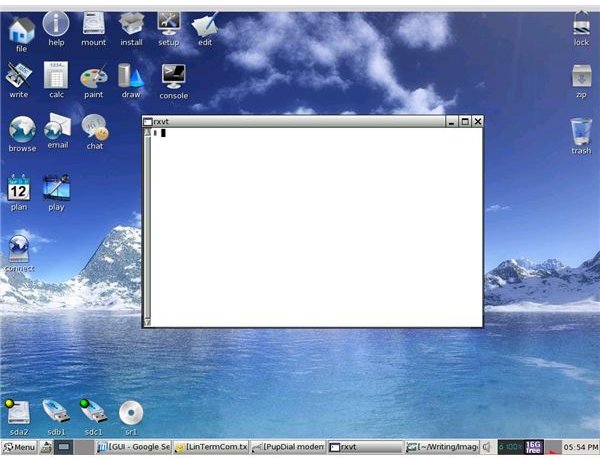
You can open a terminal, which might be called a console on your system, by pressing Ctrl+Alt+F2, but, I’d recommend simply clicking on a terminal or console icon appearing on your desktop. If you don’t see it, search for it in menus; start by looking at the options dealing with system setup or administration.
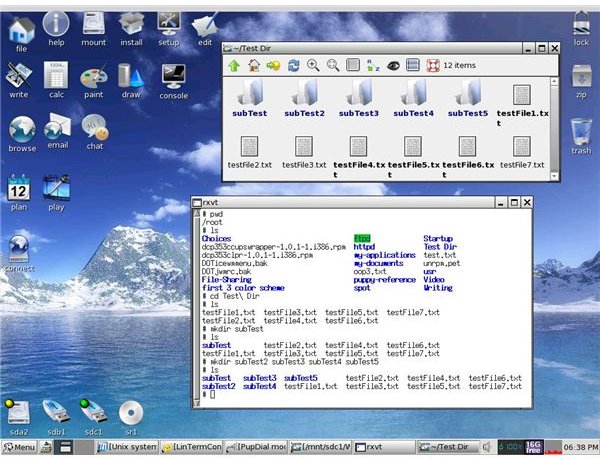
Simple operations such as viewing, creating, deleting, renaming, and copying files and directories can all be done via Linux terminal commands. While learning, you might want to practice with test files of no importance in case they’re accidentally deleted or moved somewhere where you can’t find them. If you click on the screen shots below, you’ll see the files I have in the /root directory of my Puppy Linux system. In Puppy, / is the top level directory like it is in all Linux systems, but there’s also a root directory in it. You don’t usually see root within /. You can also see the terminal I’ve opened, notice the hash mark indicating root or super user control. Not all terminals will look exactly alike and most of them can be configured to have the back and foreground colors of your choice.

Your First Command Line Operations
Now that I have a terminal open, I’m ready to start using the bash shell. All Linux terminal commands will appear next to the hash mark. Where you don’t see the hash mark, you’re looking at the “report” of what took place in response to the command given or you’ll see an error message if you entered a command incorrectly. The first thing I usually do, especially if I’m on a new system, is to determine where in the system I’m at by typing pwd (print working directory). You’ll see the next line reads /root which tells me where I’m at in the file system. I then entered the command ls to list all of the files, directories, and sub-directories in /root. Notice I have a directory called Test Dir for the purpose of this article.
I then navigated to Test Dir by typing cd Test\ Dir and pressing enter. The command cd is used to change directories which is followed by the exact name of the directory in which you want to land. Notice that I had to include a \ in order to escape the space that exists in the name Test Dir. If the name was TestDir, I wouldn’t have needed the escape character. Typing cd ../ will move you up one directory regardless of the name of that directory. I typed ls again to list what’s in Test Dir which shows seven practice text files.
I then typed mkdir (make directory) to create a sub-directory named subTest within Test Dir. It now appears in the listing in blue letters indicating that it isn’t a file, but rather a directory. I then made four more sub-directories all at the same time with the command mkdir subTest2, subTest3, subTest4, subTest5. Here’s a perfect example of the power of the command line. I’ve never heard of being able to make multiple directories in one sweep using a GUI. You can actually see that what you do on the command line also shows up in the GUI for file browsing as shown in the screen shot below. This is only the very beginning of Linux terminal commands. Remember, practice makes perfect and if the time comes when you really need to work in a shell, you’ll be happy you learned how.
Command Line Work