In this article we will walk you step-by-step through the installation of Mandriva from an ISO image on a CD/DVD or USB thumb drive.
Introduction
We have written a lot of articles for Ubuntu (and derivatives), Fedora, OpenSUSE and our readers often ask why one of the most popular distributions, Mandriva, is left behind. In this article, we will give our readers what they want, a step-by-step guide to the installation of Mandriva 2009.1.
You can get a copy of the most recent Mandriva distribution from its homepage: you have two choices; to purchase Powerpack, a commercial release that has installation and configuration support or download One, a full-blown desktop without the support and codecs. Don’t worry though, you can always install the codecs, players, etc. later on. In this article we will focus on the installation of One.
Choosing the Installation Medium
Mandriva One is sized to fit on a single CD, as a live distribution. A live distribution lets you try a Linux distribution without touching your existing installation in any way (you can have a look at our article, Try Ubuntu without Touching Your Windows Drive in Any Way , to get an idea of running a live distibution).
You can either install Mandriva by burning it to a CD or DVD, or you can install it from a USB flash drive. For the former method, you need to burn the Mandriva One ISO image to a CD/DVD and set up your BIOS to boot from your CD/DVD drive. The latter method is faster but your BIOS has to support booting from a flash drive. If you can see “Removable Drive” (or USB Drive) in your BIOS configuration as the first boot device, you can go with the USB flash disk installation.
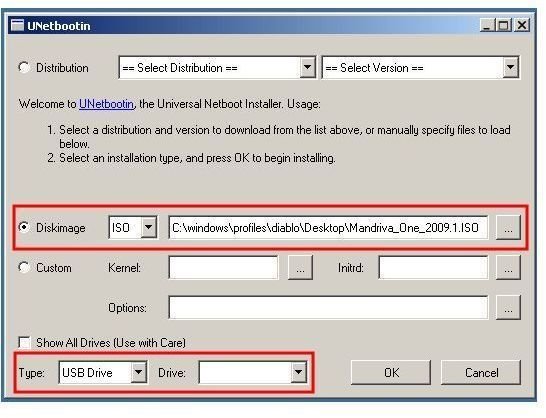
To prepare your flash disk to boot Mandriva, you need to have the [Unetbootin](https:// http//unetbootin.sourceforge.net/) program. It supports Windows and Linux environments, so you are not likely to face any problem running it. Unetbootin does not require any installation, you run the executable file directly in Windows. Run the program, select the Mandriva ISO image you downloaded, select your USB thumb drive and let Unetbootin do the rest. The red rectangles on the screenshot shows the ISO image selected and where you have to choose your USB drive. When Unetbootin is finished, plug in your USB drive, restart your computer, change the BIOS settings to allow booting from a removable drive and off you go.
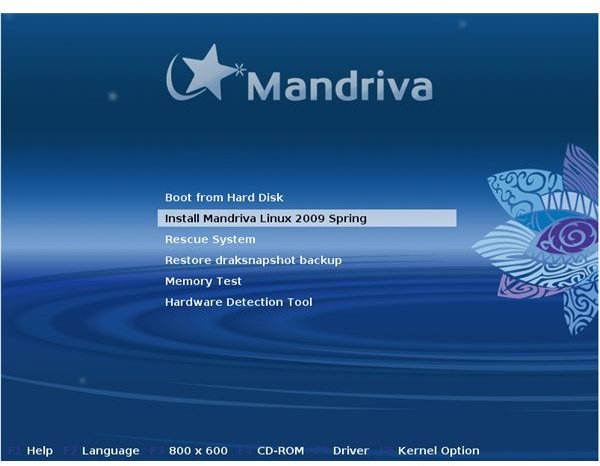
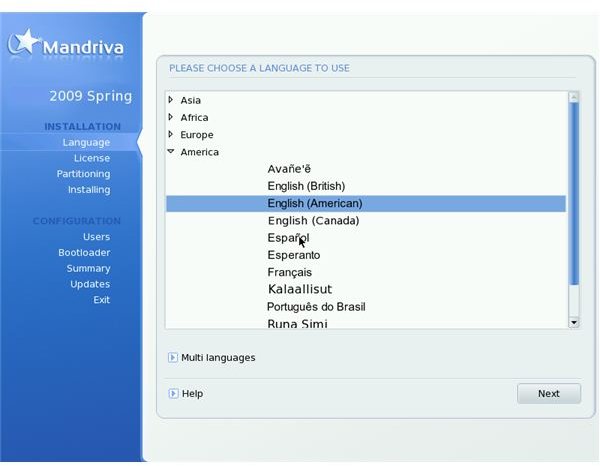
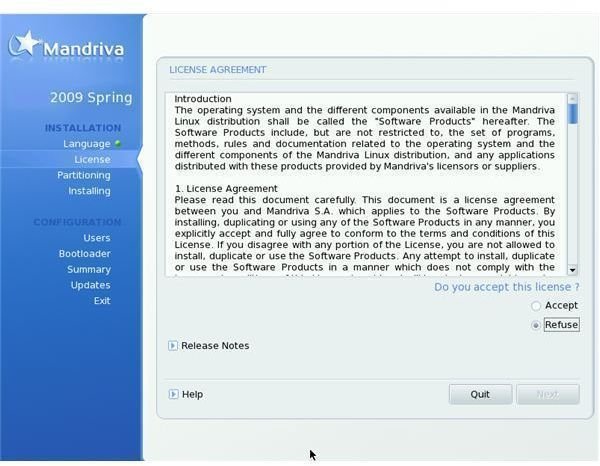
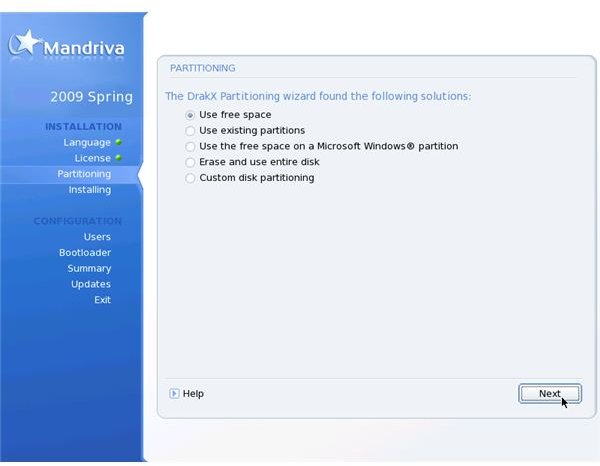
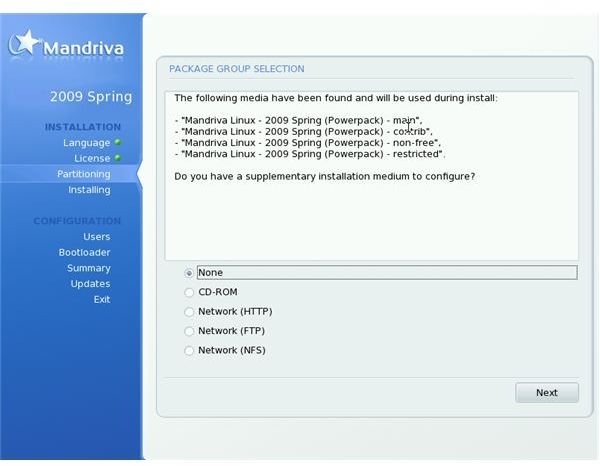
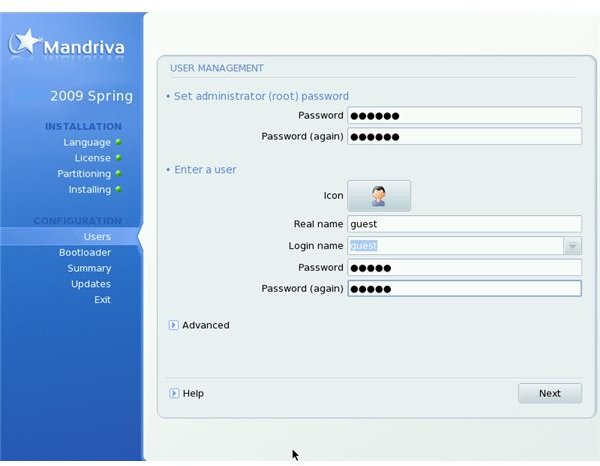
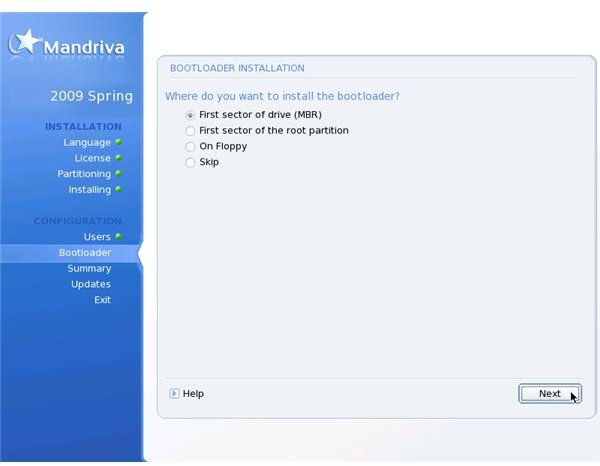
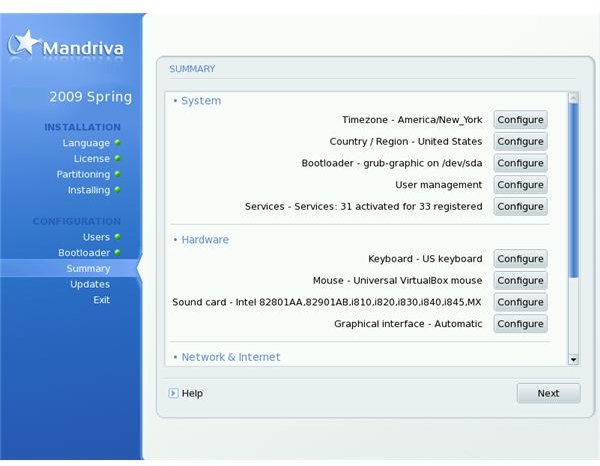
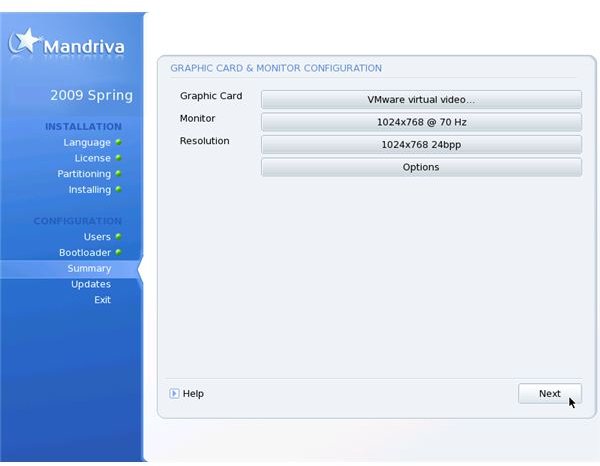
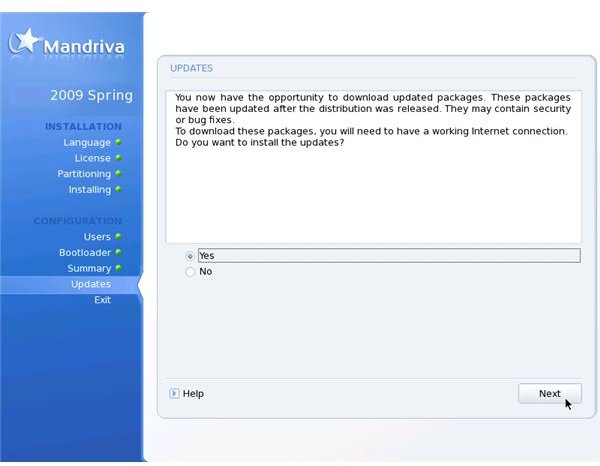
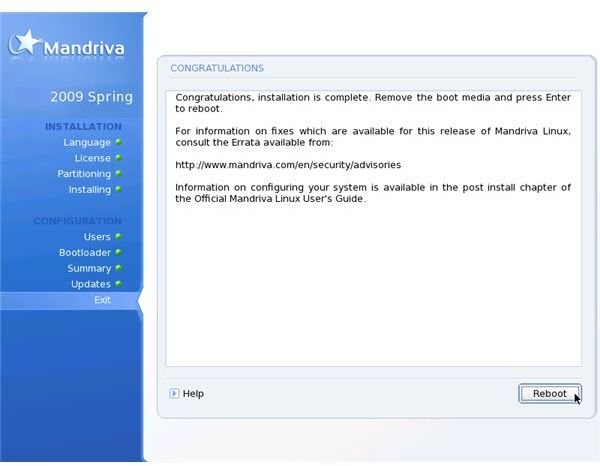
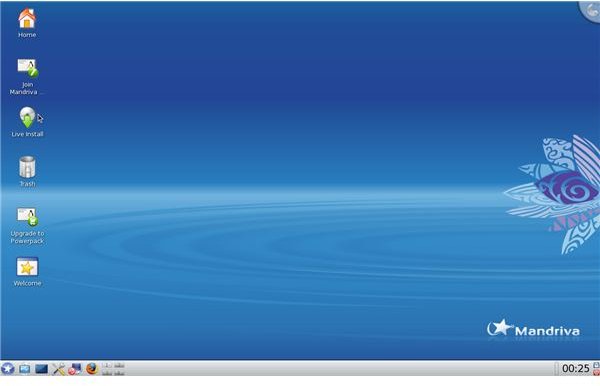
The following image gallery shows step by step instructions on installing Mandriva. The installation screenshots below assume a dedicated, full-disk,fresh installation (not an upgrade), US English language selection, one user, KDE as the default desktop manager and a 1024x768 screen resolution. You can change the settings to your liking.
Mandriva 2009.1 Spring Installation


Conclusion
Mandriva is one of the easiest distributions that the newcomers to Linux can try. The configuration program, Drake is a wonderful tool for changing system settings, saving the user from editing text-based configuration files. There is also Transfugdrake, which assists users to import their Windows documents and settings to their Mandriva system. If you have never tried a Linux distribution before, Mandriva is a good starting point.


