eAR OS comes from Denmark’s Acoustic Reality company, who is a retailer for sound and storage systems. In mid-2008 they released their own media center operating system based on Ubuntu. Believe us, it is really good.
Installation and Coming to Grips
First of all, we have to mention that eAR OS may be a good replacement OS for your multimedia-oriented computer. With it, you can install any application from the Ubuntu repositories since the system is based on Ubuntu. (Out of the box, Ubuntu, Medibuntu, and WineHQ repositories are added.) This implicitly means that the system uses codecs from the Medibuntu distribution, which means less hassle with the codecs.
eAR OS comes as either a freely downloadable Live CD or USD 99 Enterprise version. We will look into the free version in this article. You can either download eAR OS (free version) from their website or BitTorrent. Like the other Linux distributions, you can burn the ISO file as an image to a CD, insert it in your CD/DVD drive, and reboot your computer to start the installation. (If the installation screen fails to appear or the computer starts from the hard drive, go into the BIOS and set the boot order so that the optical drive boots before the hard drive.)
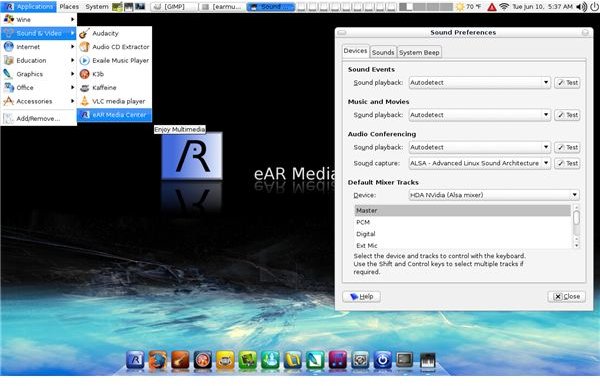
You will be greeted with an elegant-looking Gnome desktop with a Mac OS X style dock at the bottom. To start the installation, double- click on the installation icon on the desktop. When asked, use “earmusic” (without the quotes) as the password and then follow the steps to complete your installation. When you finalize everything and reboot, your new system will be ready. (Image on the left: courtesy of Linux.com )
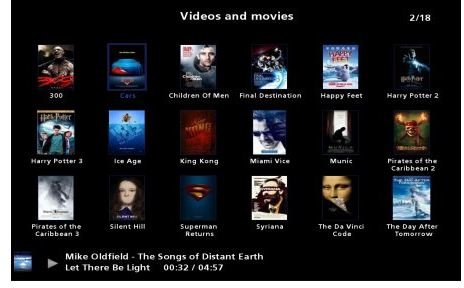
To start the media center, from the Start Menu, go to Sound and Video → eAR Media Center. You will be greeted with a very simple, yet elegant screen. Before working with your multimedia files, I recommend that you to put your music, photos, and videos in the ear-Music, ear-Photos, and ear-Videos folders. This will ensure that you will have your files automatically appear in the media center view without any additional configuration being required. (The database that holds information about your files is updated with each reboot.)
Of course, you’ll want to make sure that your DVD, sound card, screen resolution, and wireless card are all set correctly. Also, I need to mention that your analog TV card will probably not work with the free version of eAR OS, as there is no built-in support for it. However, for Bright Hub readers, we have found a solution.
Using & Tips
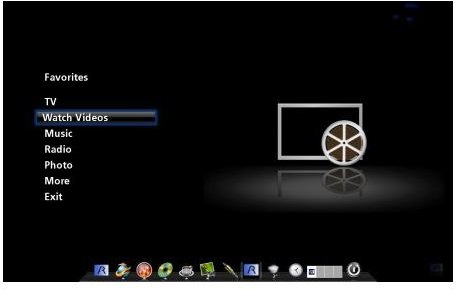
I will first start with ripping and listening to CDs. I recommend that you be connected to the Internet while you are ripping your music because eAR OS automatically connects to the relevant website and receives the CD information as well as album covers, saving you lots of clicks later. Listening to CDs is as easy as selecting “Music” from the program’s main menu and then selecting the album.
To listen to radio, just go to the “Radio” option in the program’s main menu. There are lots of channels available through the program. Listening to online radio is a pleasure, but if you have a download limit by your ISP, watch out because you can easily consume your entire quota.
DVD ripping could not be easier. From the program’s main menu, select “More” and then “Rip DVD to hard disk.” Depending on your computer’s speed either take a coffee break or go to lunch/dinner. When you get back, the task should be completed.
As mentioned previously, eAR OS Free edition enables you to watch digital TV. Selecting “Watch Television” from the main menu will take you to the station list. If you are running this for the first time, you have to wait for some time to let your TV card download the stations.
If you have an analog TV card, here’s something to try.
Close the eAR Media Center and open up a terminal. If you are using the 1.09 release, open up
/home/earmusic/.ear/digital-tv.sh
with your favorite editor and change “kaffeine” to “xawtv” or “tvtime.”
If you are using the 1.10 version, open up a terminal, change to root, and open
/etc/ear/digital-tv.sh
and then change “kaffeine ” to “xawtv ” or “tvtime .”
If you do not have either of these installed, you can do so by
sudo apt-get install xawtv
or
sudo apt-get install tvtime
If everything goes well, you can then watch analog TV. (Our thanks go to Anonymous poster .)
“More” in the menu offers very pleasant options that one would expect from a good media center. Surfing the Internet, watching YouTube videos, visiting MySpace, burning CD/DVDs, and fetching 3D album art are all within this menu.
Finally, my opinion: I think that eAR OS has come far. The codebase is solid with the Ubuntu underpinning, and the experience is nice. However, it has a prohibitive price for the Enterprise version. With an additional USD 30, you could get Windows Vista, or even get other media center distributions and software for free. That said, I can recommend this for your home theater PC or for your everyday computer if you want elegancy in managing your multimedia files.
This post is part of the series: Linux Media Centers
Surely there is not just one single media center in the world, which happens to come from Redmond? You will not believe your eyes when you see what Linux has to offer in terms of media center software. Be sure to read on to choose one for yourself.


