If you do any project management, you know a solid application can make or break the experience. With Windows there is Microsoft Project, but what about Linux? One of the best options, Planner, is an outstanding open source solution. In this article you will see why it is better than MS Project.
Features
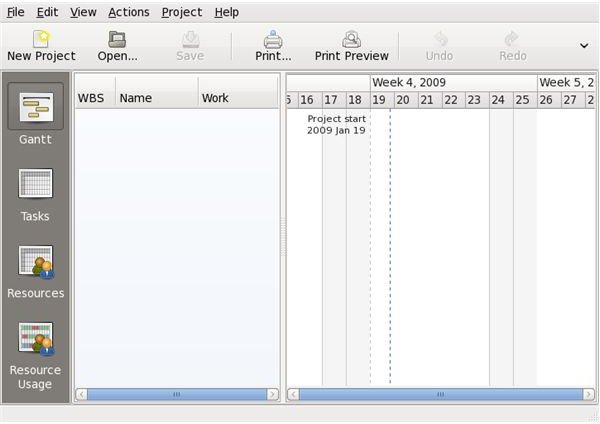
Planner is a cross platform project management tool that features:
- Gannt Chart overviews
- Task views
- Resource usage overviews
- HTML Export
- Definition of tasks, subtasks, resources, and resource groups
- Dependencies between tasks
- Critical path display
- Calendars that include working and non-working time
- Translated for 20+ languages
With Planner you can insert, remove, indent, un-indent, move up, move down, and link tasks. You can edit project phases, day types, project properties, and manage calendars.
Why Planner and not Project?
One of the biggest problems with Microsoft Project is that there are far too many features and tools that are rarely used. With Project, Microsoft’s philosophy is to add tools that could be needed, not are needed. By design, project management is a complex task, and the bigger the project the more complex the task. What Planner does is strip out all of the unnecessary items so what is left is a simple to use application that includes everything you need for managing projects on all levels. Instead of getting trapped in MS Project feature bloat (that includes: Task Drivers, Network Diagrams, Proposal and Activity Plan Creation, Cube Building Service, etc.), you will efficiently work in an environment that helps you maintain and manage your projects. Planner does not get in your way.
Installing and Running Planner
Installing Planner is simple: Go to your Add/Remove Software application and do a search for “planner”. Once you find the entry, select the entry and click Apply. The Add/Remove Software utility will install Planner and all of the dependencies necessary. After Planner has installed, you can close the Add/Remove Software tool.
To start Planner, click on the Applications menu (In GNOME), click on the Office sub-menu, and select the Project Management entry. Planner will start in the main window.
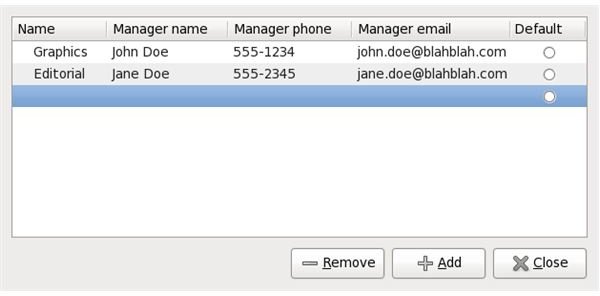
Group Creation
Upon installation, and before you start using Planner, you should create groups. With groups created, project managment will be much easier to deal with. To create a group you will need to click on the Resources button and then click on the Edit Groups entry in the Action menu. Once you add the new group, you click on each item in the group (Name, Manager Name, Manager Phone, Manager Email). You can also select a specific group to serve as the default group.
Once groups are created, you will see them as a drop-down when you add a new resource(s).
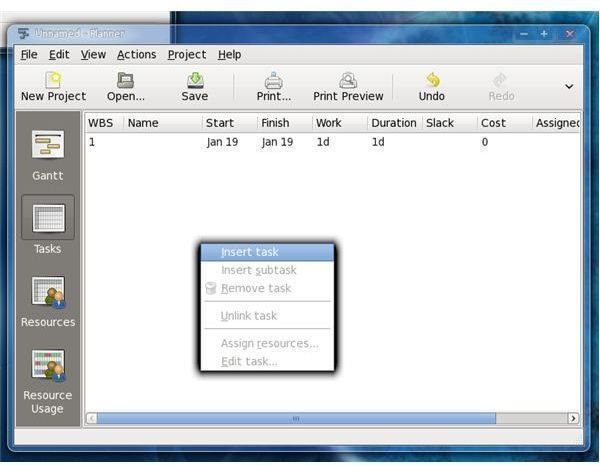
Adding Tasks
When in the Task view, you can right click the screen to bring up a menu that will allow you to select Add Task. Once you click that, a new task will appear in the window. With the new task listed, click on the Name field to give the task a name. You can add a subtask by right clicking the newly created task and selecting Insert Subtask. From this same menu, you can also assign resources to a task.
Final Thoughts
Planner is as simple, efficient, and reliable as any project management application available. Add to this the fact that Planner is free, open source, and cross platform and you will be hard pressed to find a reason not to use Planner.


