Installing Linux under Windows was never this easy. With Wubi, you can install Kubuntu by simply inserting the Kubuntu CD in your CD-ROM player. In this article, I will talk you through this installation, and go over what information to provide to a help forum or in a 911 email if things go bad.
Insert the CD to Start the Installation
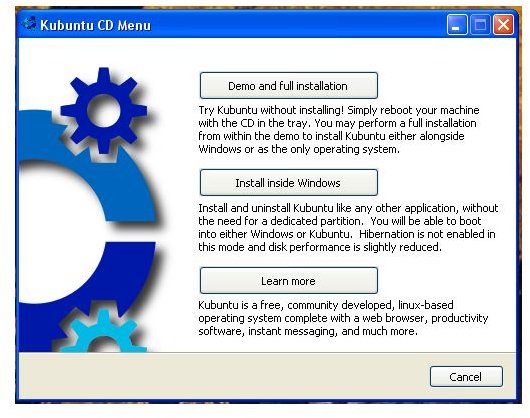
It is an easy step-by-step process to install Kubuntu under Windows. Insert the CD in your CD-ROM player. The following window will pop-up – see image on the left. (Click for a larger view.)
You have a choice here to either install Kubuntu on the hard drive alone or keep your Windows installation and install Kubuntu next to Windows. For this article, I’ll assume you want to install Kubuntu next to Windows. Select option two: Install Inside Windows.
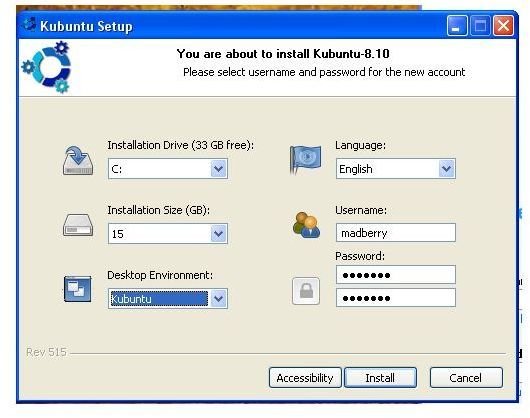
This will bring up another window where you can select the hard drive you want to install Kubuntu on. Also, you can choose the amount of space you want to allocate to the Kubuntu installation. On the right, you have the option to select a different language. Also, it asks you to input a user name and password for the Kubuntu installation.
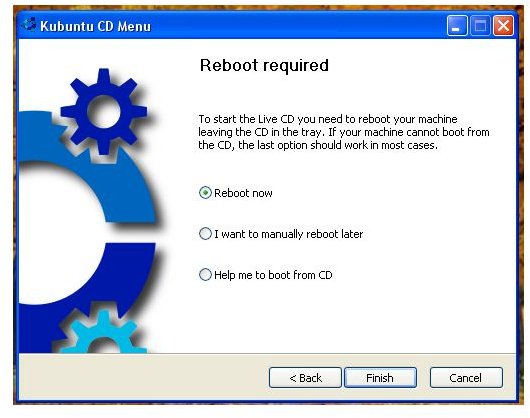
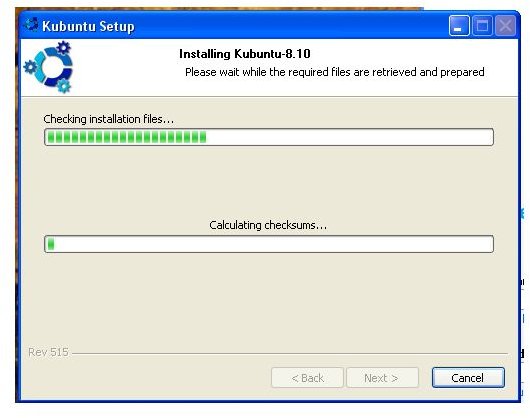
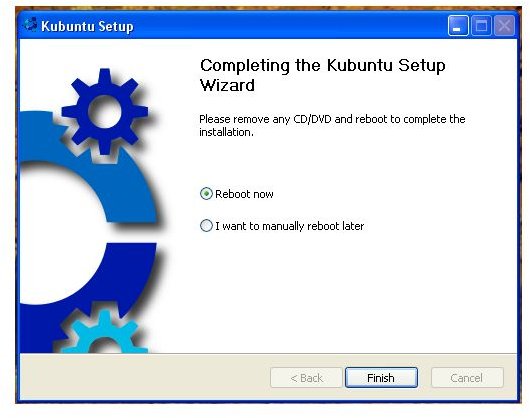
It will now copy files from the CD to the hard drive. After it’s done, you will be asked to reboot.
Screens
What Happens After It Reboots
After the reboot, you’ll see that you now have the option to either choose Kubuntu or Windows XP/Vista. Choose Kubuntu here. It will start up with a Ubiquity window. It will now install and re-partition the hard drive and give the previously decided space to Kubuntu. After partitioning, it will copy the files to the new partition. All of this is done automatically and takes about 25 mins. Reboot and select Kubuntu again.
What to Do if Some of the Hardware Doesn’t Work
Don’t worry, if you are lucky all of the hardware works out of the starting gate. If so, then stop reading and move on to part three (or keep reading if you want to learn about Terminal). If not, then I will now explain to you where to go and also what information to provide.
As I’ve said before, there is a lot of help out there to get your system working. You may start with my own blog. Feel free to use the contact form , and send me an e-mail for help. If you’d rather use forums, go to the Kubuntu forum and ask your question there.
What Should I Provide the People Helping Me?
This is the part where you will learn about Terminal and the commands to run to get the information needed to receive help from others.
What is Terminal? Terminal is the command line of Linux. In Windows, it’s called Command Prompt. You can start Konsole in Kubuntu by clicking start->system->Konsole - the start button is that blue icon that looks like a K. A command is a word that starts software usually followed by options.
Enter the following_: uname_
The outcome will look like this: Linux
Now, with an option, type the following: uname -r
The outcome looks like this: 2.6.24-21-generic or something similar
A command can have several options and the option is what determines what the command will do or output.
The command uname is called to find out two major things: the Kernel version and the version of Ubuntu being used. We need this information when posting to a forum, sending an e-mail, or posting a comment to a blog. Post the output of the following commands:
uname -a
In addition, note the output of:
lspci
This command will tell us what hardware is connected to the PCI slots.
lsusb
This will do the same for USB devices.
If you really want to get fancy, you can save the results to a file and attach that to a forum post or e-mail. Do this by adding the following to a command:
lspci > ~/Desktop/lspciresult.txt
What does that mean? Well, lspci is the command as explained above, and the addition of ~/Desktop/lspciresult.txt will save a text file to your desktop with the output of lspci in it. Do this for both lspci and lsusb since the output could be a large list.
You can copy any of the output from the commands by selecting it. Right click with the mouse and select copy. Then paste it to the e-mail or forum.
For more on Terminal read this article by Josef Nankivell: Awesome Ubuntu Commands You Need to Know!
In part three next week: Introduction to Kubuntu.
Also, I’ll cover how to install packages using Adept Package Manager.
This post is part of the series: It’s Easy to Exchange Windows for Linux
Learn how in this article series. It will take you from the initial installation of Kubuntu all the way up to what to do to get media to play. I’ll even cover installing Java and Flash.


