Ubuntu includes the Remote Desktop Viewer application for viewing remote Linux desktops. The Remote Desktop Viewer, also known as Vinagre, supports the virtual network computing protocol. VNC allows your Ubuntu desktop to access and control remote Linux and Windows computers running VNC servers.
Connecting
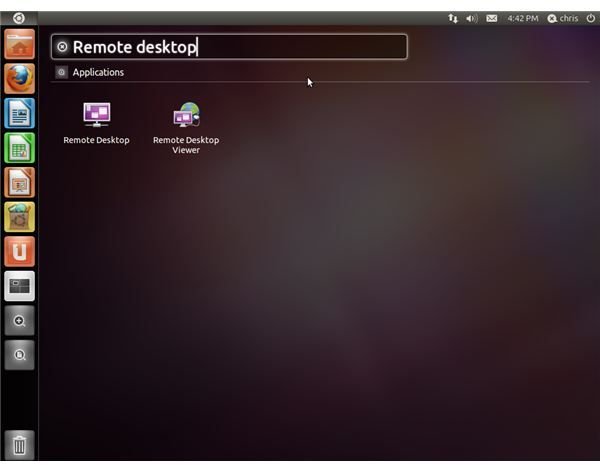
Click the Ubuntu icon at the upper left corner of your desktop and type “Remote desktop” into the search box that appears. If you’re using an older version of the Ubuntu desktop, click the “Applications” menu and point to “Internet” instead.
Select the “Remote Desktop Viewer” application by clicking it.
Click the “Connect” button on the Remote Desktop Viewer toolbar to open the connect dialog. You can also click the “Machine” menu and select “Connect” from it.
Click the “Protocol” box and select “VNC.” The “SSH” option in the protocol box allows you to connect to text-mode Linux terminals using the secure shell protocol.
Type the IP address or host name of the remote Linux computer running the VNC server into the Host box. If the remote computer is on the local network, you can also click the “Find” button to view local computers advertising VNC support. Select a computer in the Choose a Remote Desktop list and click “OK” to choose a local computer.
Configure your desired options in the connect dialog window and click the “Connect” button to connect.
Options
The “Full Screen” check box in the connect dialog controls whether the VNC session will be run in full-screen mode, taking up your entire screen. You can access options in full-screen mode by moving your mouse to the top of the screen. A hidden toolbar with options to disconnect or leave full-screen mode will appear.
The “View Only” check box controls whether you’ll have control over the VNC server. By default, you can control the remote computer using your local mouse and keyboard while connected. If this check box is enabled, you can only view the remote desktop. Depending on the remote computer’s VNC server configuration, you may only be allowed to view the remote desktop.
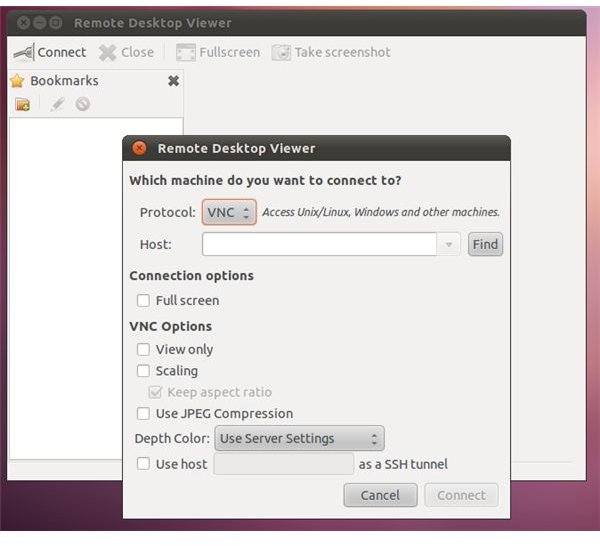
The “Scaling” check box controls whether the image sent from the remote server is scaled to fit your screen. The “Keep Aspect Ratio” check box under it preserves the aspect ratio of the original image as long as it’s checked, preventing the remote desktop from looking stretched horizontally or vertically.
The “Use JPEG Compression” check box controls whether the image sent is compressed using the JPEG compression standard, used for images all over the Internet. Some VNC servers may not support this option.
The “Depth Color” drop-down box controls the color depth of the image sent from the remote desktop. It’s set to “User Server Settings” by default, preserving the colors and quality of the image seen on the remote desktop. Higher color depths require more bandwidth; try reducing this option if the session seems slow.
Features
The Remote Desktop Viewer application displays a bookmarks sidebar by default. You can add a remote desktop to your bookmarks by clicking the “Bookmarks” menu and selecting “Add to Bookmarks” while connected.
Access remote desktops you’ve recently connected to by clicking the “Machine” menu, pointing to “Recent Connections” and selecting a recent connection in the menu.
Take a screenshot of the remote desktop by clicking the “Take Screenshot” button on the toolbar or by clicking the “Machine” menu and selecting “Take Screenshot.”
Close a remote desktop session by clicking the “Machine” menu and selecting “Close,” or just close the Remote Desktop Viewer window.
Remote Desktop Setup

Select the “Remote Desktop” application in your applications menu. If you’re using an older version of Ubuntu, you’ll find it under the “System” menu, in the “Administration” submenu.
Click the “Allow Other Users to View Your Desktop” check box to enable the VNC server. A status message will appear with information about your connectivity and the location at which other users can connect to you. If the message says “Your machine is only reachable only the local network,” forward port 5900 to your Ubuntu computer from your router’s Web configuration interface. Consult your router’s documentation for more information on forwarding ports. You can also click the “Configure Network
Uncheck the “Allow Users to Control Your Desktop” check box by clicking it if you only want other users to view your desktop. By default, any user connecting can remotely control your esktop.
Select connection security options in the Security section. By default, you must confirm each connection attempt by clicking a confirmation message. You can also set up as password. If you disable the mandatory confirmation, be sure to set a password for security.
Select when to display a notification area icon. By default, an icon appears in the notification area when someone is connected, alerting you when someone is connected. The notification area is located in the upper right corner of your screen by default.
Windows
Ubuntu also includes a Terminal Server Client application for connecting to Windows desktops, which use the RDP protocol. You can also install third-party VNC server applications on Windows.
You can connect to a remote Linux desktop from Windows using a third-party VNC client . The remote desktop program included with Windows only supports Windows RDP desktop connections.
References
GNOME: Vinagre Manual, https://library.gnome.org/users/vinagre/stable/
Bauer, Marcus. “Remote Desktop Administration Using Vino”, https://gnomejournal.org/article/29/remote-desktop-administration-using-vino
Ubuntu: Tsclient, https://manpages.ubuntu.com/manpages/natty/en/man1/tsclient.1.html
Screenshots provided by writer


