If you write web content either as a blogger or otherwise, you know how important it is to have a quick screenshot application on hand. Take a look at the best screenshot applications for GNOME, the popular desktop environment used by Ubuntu and other GNU/Linux distributions.
Quick and Easy
Screenshots are an essential accompaniment to any software tutorial or review. In addition to helping the user identify the process and keep on track, screenshots and other imagery will help get a website ranked higher on some search engines.
The perfect screenshot application is highly subjective and mostly revolves around whatever works best for your work flow, but a few key elements are important. For one, the application must not get in your way, but rather facilitate the preview of a screenshot by being as minimal as possible. Secondly, the screenshot application should be relatively simple to use since taking a picture of what you see should not be complicated. Finally, a good screenshot application will provide enough tools that you can create a finalized image without having to use an additional image editor.
Built-In Tools
Under most GNU/Linux distributions running GNOME, you can grab a screenshot simply by pressing the “PrtSc” or Print Screen button. This will copy the current screen to the clipboard and you can then paste the image into an application such as the GIMP or another simple image editor. Additionally, pressing “Alt” and “PrtSc” simultaneously will take a screenshot of just the current window. You can also take a screenshot in GNOME by using the “Take Screenshot” shortcut under the “Accessories” section of the main “Applications” menu. Finally, you can right-click any panel on your desktop and add the GNOME screenshot utility button for easy access wherever you are. These are quick, easy, and require no additional installation.
The major downside to these built-in tools is that they lack an image editor, requiring an additional program for any editing. Additionally, the built-in tools have a lack of customization, meaning you cannot change the quality of the JPEG or change the image format from JPEG to PNG with running the image through a converter like ImageMagick.
Scrot
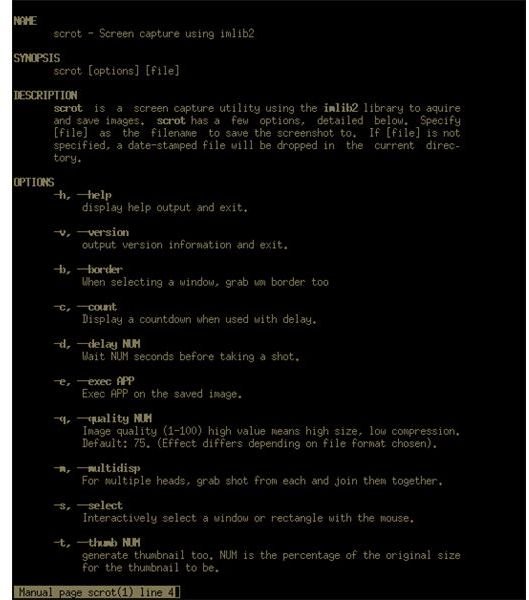
When looking for a minimalistic interface for taking screenshots, nothing is more minimal than scrot. Scrot is a console-based screenshot application that provides timers, area selection, and a number of other useful features. Since you can run console commands in GNOME without even opening a terminal, you can run and take a screenshot with scrot without ever having to touch your mouse. This provides a perfect minimal interface for anyone looking to really get an application out of their way and continue working.
The downside of using scrot is that you will need to memorize all of the command line parameters and options before it can be truly useful. Until you really get the command parameters down, you will likely find yourself referencing and re-reading the manual, seriously slowing down your work flow and risking distraction.
Shutter
Shutter is one of the most feature-rich screenshot programs available. The application takes the usability of scrot, provides
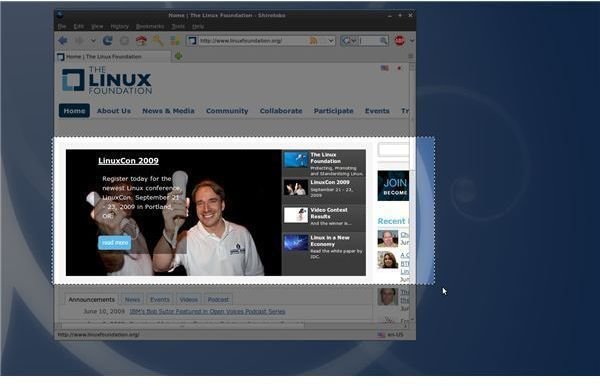
a windowed interface for each option, then includes an editor for obfuscating important parts of a screenshot that you may want to leave out. This final portion, the included editor, is one of the things that puts Shutter a step beyond tools like scrot since often times you will want to remove and e-mail or user name from a screenshot for your own safety. Like other applications, Shutter provides modes for taking full screen, full window, or selection screenshots. The interface also includes a list of your recently taken shots, allowing for several windows of screenshot previews as well. This can be very useful when working with a larger project where a dozen or more screenshots need to be included. The final feature that really sets Shutter apart is the automatic image uploader. Using the built-in Shutter interface you can automatically upload and host your images on the web.
The one down side to Shutter is that the massive amount of options may get in some user’s way. A lot of simplicity and minimalism is removed for the sake of features, but with Shutter this trade off is actually worth it.
The GIMP
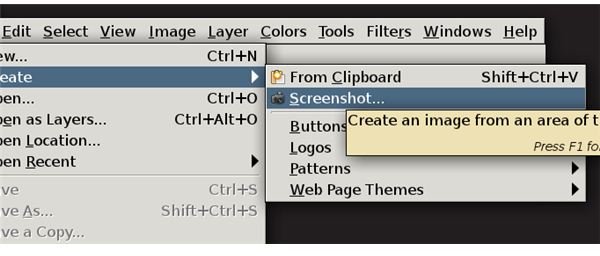
There is not a single open source image editor that compares to the feature set of the GIMP. It has been the de facto standard for image manipulation under GNU/Linux for years and provides, among so many other things, a screenshot function. Located under the “Create” sub-menu, the “Take Screenshot” option lets a user take a single window or full screen shot an automatically insert the image into the GIMP for editing. This can be very useful if you know the screenshot you are taking will require a lot of editing before publishing.
The major downside to using the GIMP is that the amount of features goes far beyond what is needed for a screenshot, providing an easy distraction from any work flow. The application is also much weightier than any alternative, meaning that the GIMP will take quite some time to load if it is not running already. Finally, the GIMP screenshot utility does not allow for the grabbing of a selection, requiring the user to do the cropping inside of the editor. This adds an additional step to what should be a quick and easy process.
References
All screenshots, except those from Shutter, were done by the author.


