Set up a USB printer on a HP Thin Client to print your documents. A USB printer is easy to set up and can be used to print anything paper related straight from your HP Thin Client.
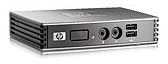
HP Thin Client Overview
Popular on networks where all data is accessed via a central server, HP Thin Clients are cheaper and more energy efficient than desktops or laptops. Thin clients have no hard drive, though some now have a basic operating system pre-installed. Think of a thin client as a terminal where users can access files and programs stored on a single server. This prevents possible data loss if the computer is damaged or stolen. A HP Thin Client contains ports to connect devices such as USB drives, keyboards, mice and printers. However, you can not actually install anything directly the to thin client. All interactions with files and software stay between the server and the thin client.
For more information on HP Thin Clients, see Thin Client History and Top Five Thin Client Hardware Vendors.
Software
Though this is a step many users want to skip, the software is a vital part of the setup process. If you want to set up a USB printer on a HP Thin Client correctly the first time, you must use the software. Do not connect the printer until the software tells you to.
No matter what type of USB printer you purchase, the printer comes with software or the software is provided in the printer itself. If you do not have software, read the quick start manual provided with the printer to see if the drivers are installed automatically when you connect the printer.
Insert the software provided with the USB printer. If you do not have an external disk drive, install the software on the server the thin client connects to. The software will apply to all thin clients connected to your network. Follow the software prompts to install the necessary drivers to run your USB printer. If you can’t use the software for any reasons, see your printer’s manual for a link to download the software, which can be run from your desktop. Please note that you do not have to install the actual software to be able to print. For additional features, the software may be required. For instance, scanning in documents for editing may require the printer’s scanning software. In many cases, the software bogs down your system. The only thing you need from the software disk is the drivers for the USB printer.
Sometimes, Windows will correctly recognize and install your USB printer drivers without the software. Though this method is not recommended, it is quicker when it works. If you try to set up a USB printer on a HP Thin Client this way and you find you can’t print, right click My Computer, choose Manage, select Device Manager, select Printers, right click your printer and choose Uninstall. If the printer is visible in the Devices and Printers window, right click it and choose Uninstall. This will allow you to uninstall and reinstall you printer the correct way.
(Image Credit: Used with permission from HP )
Connect Your Printer
When prompted, connect the AC adapter to your printer and plug it in. Turn on the printer. Connect the USB cable to the printer and connect the other end of the cable to an available USB port on your HP Thin Client. The software and your operating system will recognize and install the printer for you. Always place your USB printer near your HP Thin Client to prevent stretching or warping the USB or power cables.
Test Print
To be sure you set up a USB printer on a HP Thin Client correctly, print a test page when prompted. If you accidentally close the installation screen, open the Devices and Printers window, right click your USB printer and choose Print Test Page. If it prints, you have installed the USB printer correctly.
Additional Resources
Though you hear a lot about USB printers, you may not be certain what USB actually is. Check out What Is USB for a detailed description of USB. If you don’t have an available USB port on your HP Thin Client, check out this article about the best USB hubs available, which allow you to add USB ports to your system. To help you decide which USB printer to buy, check out Top Three HP Printers Compatible With Windows 7 .


