Netgear Router Setup
Introduction
Setting up a Netgear wireless router isn’t too tough and it’s quite nice to have a fast wireless network setup for all your phones, devices and laptops. There’s a certain joy that comes from being able to work anywhere in the house or even outside on nice days.
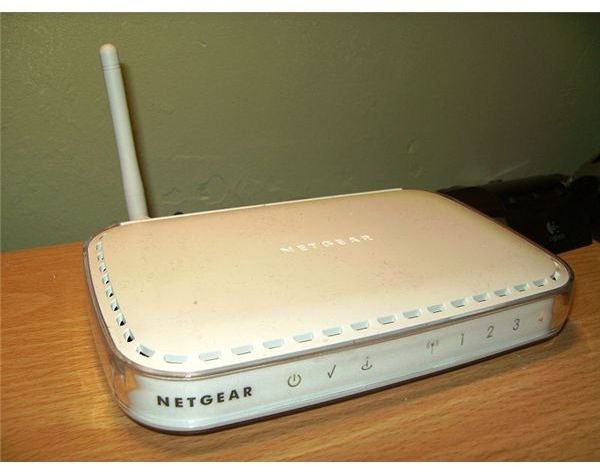
Since I don’t know your exact model of Netgear router this Netgear router setup guide will have to focus on the basics.
Note that you will need to have an ethernet cable to connect the Netgear router to the computer, since you’ll have to have a hard connection to configure the router and get it running.
Startup
The first thing that you will need to do is connect the basics of your Netgear router. Take the power cord out of the box and plug in the router so that it can start running. Once it has power, add an ethernet cable connecting the router to the modem and another cable connecting to a computer.
Once the connections are in place, you can start the setup process.
You may have a Netgear installation CD that came with the router. Feel free to put that in and use it alongside these instructions. The most important thing is that it should have the relevant drivers on it. This can make the whole process a little more straightforward, although it isn’t vital that you have the Smart Wizard CD. The router’s management software also has a tab for “Smart Wizard,” which is the exact same thing and should help you configure the router properly once you make a physical connection to it.
To establish a connection to your Netgear router, open up an Internet browser and go to 192.168.1.1, 192.168.1.0 or routerlogin.net/.com. If you can’t make a connection, then make sure that your cables are connected. If they are, then it may just not have detected the connection. Unplug the router, count to five and then plug it back in to restart it. It should result in a connection. Try again and see if you can connect through the browser.
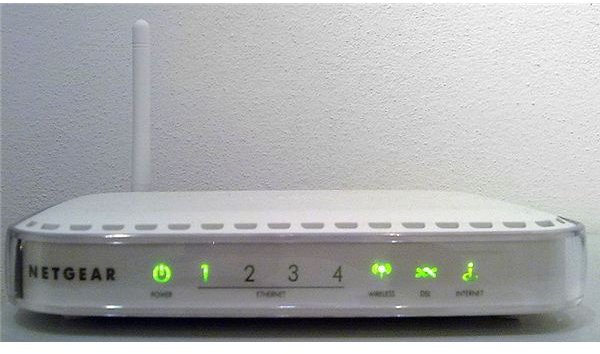
You will need to log in to your router before you can configure the settings. This should just be a default password, unless it’s a used router. If you are using a used router, then you will need to reset it. There should be a small pinhole that you can stick a pencil or needle into to trigger the reset. Hold the button inside down for a few seconds until the lights flash and it resets to default settings.
The default password should just be “password.” All Netgear routers use the username “admin.” The username actually can’t be changed, so this should always work. If “password” doesn’t work, then try “1234.” This should let you login to your Netgear wireless router. At this point you just need to secure your connection and configure your settings.
Configuring the Router

Once you’ve logged onto your Netgear router, you’ll need to do a bit of tweaking and setup before you’re done. If you’re worried about the security of your Netgear router (and you should be if you’ve read my article on Wireless Router Hacking), then you’ll want to start out by changing the password from the default. Just use the “Set Password” tab. You should also be able to name the router, which is fairly important if you live in an area with a number of other wireless networks. This router nickname, officially the SSID code, should be something easy to remember.
As noted before, there’s a smart wizard application available through a tab on the left if you’re having any trouble with the router setting up its drivers and connections. It’s probably a good idea to run this application if this is the first router you’ve used or if the router is new.
With the administrative side taken care of we can move on to wireless security. This is actually quite easy. You just need a strong wireless encryption key. WEP isn’t that secure anymore, so only use that if you don’t plan to use the connection for anything secure or if you have to be able to connect older hardware that doesn’t support WPA.
After choosing the level of encryption, you need to get your key. I suggest that you just hit the randomize key and get a random encryption key. It might seem like a better idea to come up with a 13-character passphrase (if your security level offers that option), but it isn’t exactly hard to look up your WEP key if you need it again. You just need to log on to the router (like you just did) and copy it down again. Plus, any wireless connection will probably save the encryption key anyway. Unless you plan to constantly add new things to your network you can just save yourself a bit of trouble and use a random key. It’s more secure anyway.
Extra Configurations
The last configuration that you can do adds a little extra security. The only thing that I would really recommend is considering MAC filtering. It’s not ironclad security by any means, since most hackers can mask their MAC address, but it’s a fairly good tool to keep out lazy leechers. It will also cause no real trouble for you unless you plan to add a lot of devices to your network. You’ll just need to set up the whitelist once and then you’ll be done. It’s not vital by any means though.
Once you’re done with all of this, you should be able to save your settings and log off. The next time you search for a wireless network on a laptop or device, your new network should show up. Make the first connection and celebrate. You have just set up a Netgear router.
Image Credits - Wikipedia Commons https://commons.wikimedia.org/wiki/File:Netgear_dg834gv4_front.jpg and https://commons.wikimedia.org/wiki/File:Netgear-DG834G-Router.jpg
