Updating your BIOS can ensure up-to-date compatibility – and also correct bugs on a post-market basis; however, a botched attempt at a BIOS flash can prevent your system from booting due to it’s critical importance. Here, I show you how to backup your BIOS for when the bits really hit the fan.
Why Backup your BIOS?
As a critical portion of the system boot process, the BIOS is one of the most important components of your computer system. In fact, it is the very first portion of the boot process to be invoked during system startup. As such, it is imperative that the BIOS is in good working order for the system to boot properly.
However, there often comes a time when new technology comes out that the BIOS on your system cannot handle, and for which it is necessary to update (or “flash”) the BIOS in order to make use of the new hardware. Of course, since we’re talking about a mission-critical part of the computer it’s a tricky proposition when performing such a task, and one which can render your system inoperable if the bits really start to hit the proverbial fan. Since a number of computer systems these days can now attempt restoration of the BIOS itself in such a freakish situation, having a backup copy of the previous BIOS version may be able to get you out of a jam if preparations are made prior to such a failure. For this scenario, we are going to create such a duplicate and save it to external media for later use in just such an emergency.
Starting the Process
In order to backup the BIOS, you obviously need the right software – and the developer of the motherboard installed on your system usually has a utility that can perform the task with the necessary precision. For this example, I am going to use my current system (a custom-built online order from earlier this year) to demonstrate a typical preparatory scenario. In this example, I will be working with an ASUS motherboard using the ASUS Update GUI utility for which the latest version can be obtained via the ASUS Support website .
Disclaimer: This process assumes a custom-build system and/or homebuilt computer, and is for demonstrative purposes only. For a manufacturer-supplied computer such as HP, Dell or similar please contact the manufacturer directly for the proper BIOS duplication procedures. Additionally, this example uses an ASUS motherboard; however, procedures should be similar be similar for other motherboard brands/models.
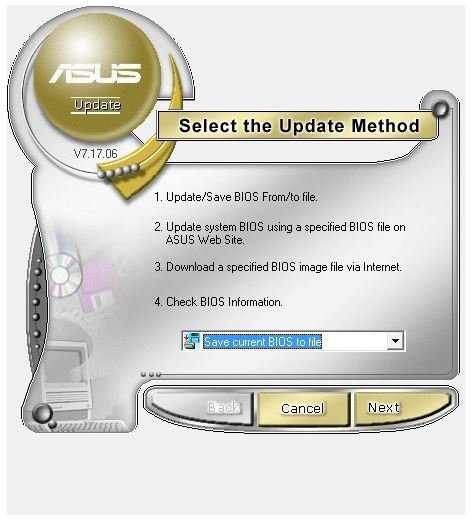
After the utility is installed, you can launch it via the start menu. You will see a window that looks similar to the example to the left, from which you should select the Save current BIOS t
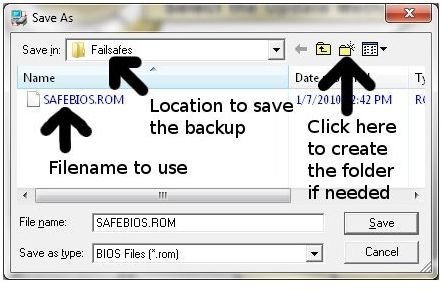
o file option as shown to the left, then type in the filename that you want to use for the BIOS backup (ex. SAFEBIOS.ROM) and select a location on your computer to save it in. I recommend using a dedicated failsafes location (as shown to the right) on your computer for reasons that will be explained later; for this example, I am using C:\Users\{MyUser}\Failsafes (substitute {MyUser} with your Windows username as displayed on the Start menu) to save my backup; if a Failsafes repository doesn’t exist, create one with the New Folder button in the save window.
Note: Since BIOS restoration uses a DOS-like interface you MUST use the 8.3 filename convention for this task.
When the BIOS backup starts the ASUS update window disappears until the backup completes (usually in a second or two). We’re done now, so click Cancel to end this portion of the backup process.
Saving the Backup to External Media
Now we need to copy the BIOS duplicate to an external media device for use in an emergency scenario. The best way to do this is to burn it to a CD-R disc. You can also use a USB flash drive if desired but a CD-R disc is the best way to go since it has less of a chance to fail on its own thus destroying the backup irreversibly (which we don’t need to happen with something as critical as this!)
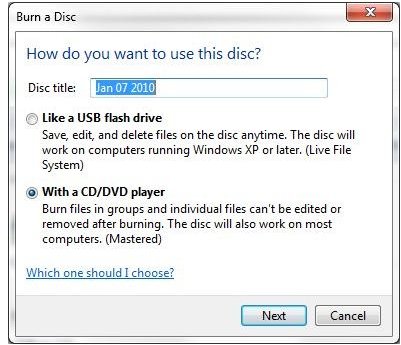
First, click Start, then Computer. Insert a CD-R disc into your burn drive (most computers have one these days) and double-click the icon for that drive. If you don’t have a burn drive (you can tell by such indicators as CD-RW or DVD-RW) then insert a USB flash drive and double-click its icon. Now when prompted to select a disc usage option for this task (if under Vista/Windows 7 and using a CD-R), select With a CD/DVD Pla_y_er as shown to the left; otherwise the disc will NOT work for the required task. Next, click Start, choose your user name, and double-click the Failsafes repository we created earlier.
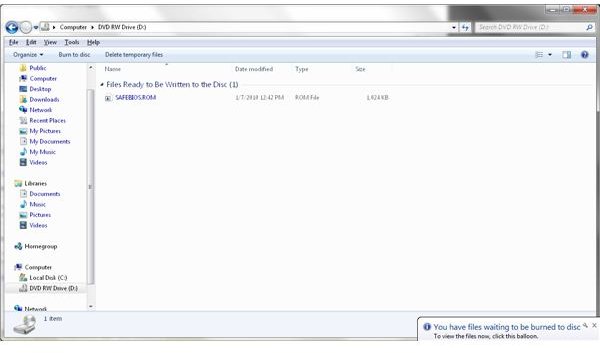
Now drag the SAFEBIOS.ROM file from the Failsafes repository we created and place it over the disc/USB drive window (you may have to drag it over the taskbar icons first) and release. A copy of the file should now be visible in the window as shown to the right, confirming the success of the copy. Now you need to initiate the burning process if using a CD-R disc if using one; when the You have files waiting to be burned to disc alert pops up, you don’t need to click it since you’re probably still in the disc window. Rather, you simply need to click the Burn to disc option (or similar) to start the next part of the process.
Completing the Disc Burn and Finishing Up
Once the Burn to Disc window opens, you have a few last things to do in order to finish the process as shown to the left
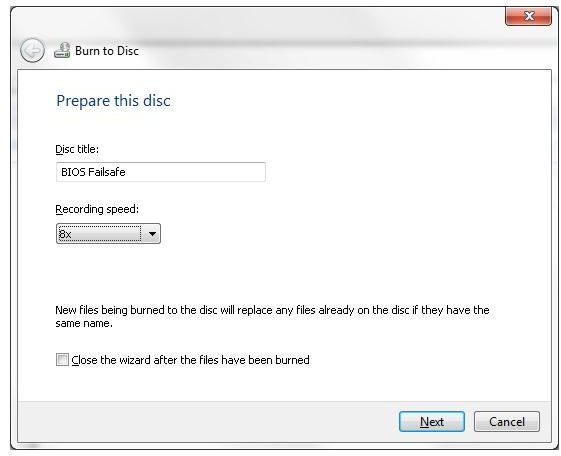
. First, set the disc title to something that makes sense for the requisite job making sure it is something that fits the available space for disc-naming (something like BIOS Failsafe should work). Next, select the formatting speed you wish to use (24x is the default on most current systems, but scaling it all the way down to 8x should help prevent burn errors – and we do NOT want any disc errors for this one) and then click Next. The burn should only take a few minutes, after which the disc will automatically eject. Do not remove the disc before the burn is complete, as doing so will corrupt the disc forcing you to start over.
Once the burn is complete, label the non-shiny side with BIOS Failsafe for Emergency Use and store it in a safe location. Then, if you ever need to recover the BIOS simply insert the disc and allow the recovery procedure to attempt restoration.


