Learn how to configure a router in a few easy steps. You’ll be surfing the Internet safely in no time!
Routers are becoming increasingly popular for home use as broadband and cable becomes more mainstream. With the increase in delivered bandwidth and the number of computers within a household, a router is an ideal way of managing Internet access for multiple users.
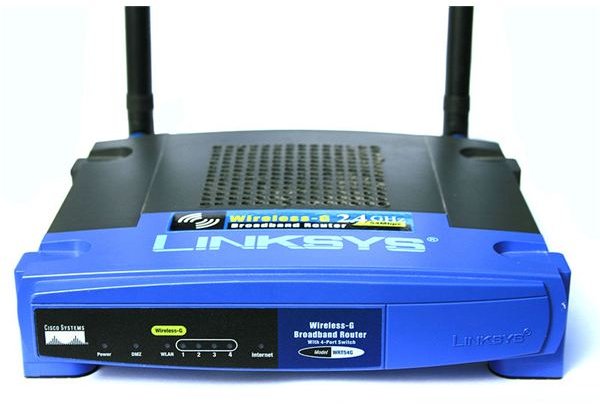
One of the most popular home routers is the Linksys WRT54GS , which in various revisions has been around for years. The bundled software is good, the wireless range and signal strength is great, and the configurability of the router is excellent. There is also third party, Linux based firmware that you can install to turn the router into something worth ten times the price. I currently run one of these with Tomato firmware, which turns my little box into something Cisco sells for a lot more.
This article will describe how to set up the Linksys router for basic use. The methods used here will relate to other router types too, but the tab names and screenshots will be Linksys specific. There are many options within the router software that we won’t cover here. Once the initial configuration is complete, you can tweak to your heart’s content!
Configuring the Linksys WRT54GS
The router will work out of the box, but has none of the security functions enabled as standard. It should be connected by Cat5 or 5e ethernet cable between a modem and the computer network as its job is to manage traffic and protect the network with its built-in firewall.
Configuring the WRT54GS is quite straightforward thanks to its user-friendly web interface. To access it enter; https://192.168.1.1 into your web browser. You will be prompted to enter a username and password. Enter admin for both, you will be changing this later.
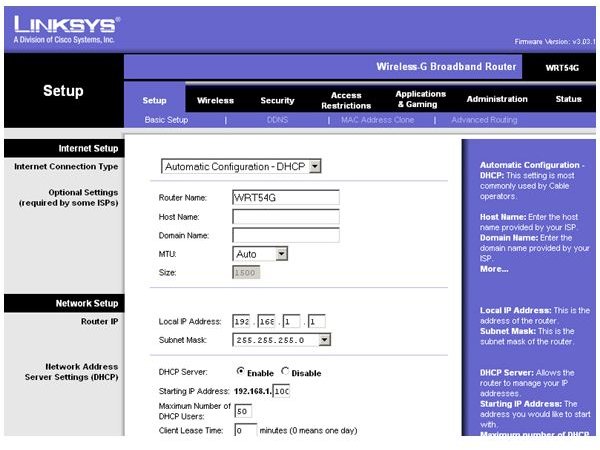
Router Name
This image above is of the first web interface showing the basic configuration settings. Nothing needs to be changed here for most home user setups, but I suggest changing the Router Name to something meaningful and changing the Time Zone. If you have made any changes, click Save at the bottom to enable the changes. You will need to do this on each page if you make amendments to the configuration.
Wireless Network
The next tab is for the wireless connection if you have one. Disable it if you don’t have a wireless connection, no need to offer free Internet access for your neighbours! If you do have wireless, the settings are pretty straightforward. Wireless Network Mode needs to reflect the wireless device that you want to connect to the router. If it’s an older device, Mixed mode would be good here. If a newer one, then 802.11G will offer the best speeds. The exact mode should appear somewhere in the device’s manual or setup options.
Change the Wireless Network Name or SSID to something meaningful to you. If you live in a built up area, there may be several wireless devices competing for the airwaves so having a name you recognize will make it easier for you and your devices to connect. Set the Wireless Channel to anything you like, ensuring you set the wireless device to the same channel.
Select the Wireless Security Tab near the top to bring up a new screen.
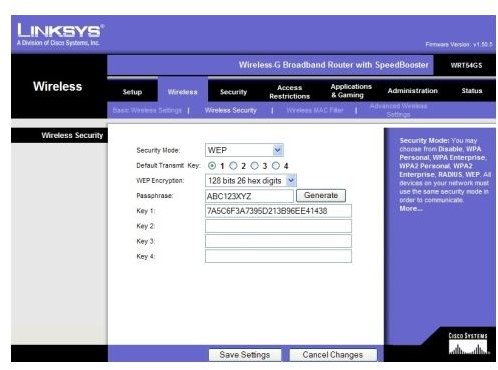
Security Mode
The Security Mode should be set to WPA2 Personal if your wireless device can use it. As the image shows, the default is WEP, which is okay but relatively easy to defeat. WPA2 is one of the best types of wireless security available to home users. Set the WPA2 Encryption to the highest your devices can handle and set a Passphrase. This can be anything you like, the more complicated the better, but you have to remember what it is in order to be able to program your devices with it. They need the passphrase in order for the router to allow them access to the network. Save again if you made changes and then choose the Security tab.
The most important basic configuration change is to enable the firewall. While the built in firewall is good, it is still a good idea to have another one on each device that connects to the network as added protection.

Security and Freedom
For the maximum security, enable all options in the Security tab and save. While not foolproof, the firewall is an effective first defence for your network.
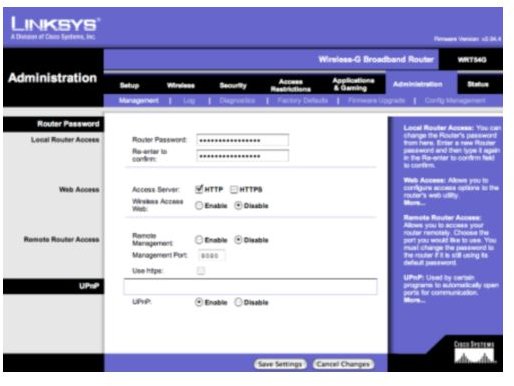
Lastly, select the Administration tab in order to change the password. Set the Router Password to something complicated but memorable, disable Remote Management and save the settings.
Following these few steps will secure your router while still allowing you the freedom to use the internet and wireless as you want to. Your router and network are now protected and ready for use!
References
- Screenshots provided by writer
- LinkSys: Wireless-G Broadband Router, http://ec1.images-amazon.com/media/i3d/01/A/man-migrate/MANUAL000000300.pdf
- WRT54G v2 Linksys Router by Digon3 under CC BY 2.0
- Columbia University Information Technology: Linksys WRT54G Wireless-G Broadband Router, http://www.columbia.edu/acis/networks/aptnet/linksys/index.html


