Read on to learn how to use Windows Vista’s Complete PC Backup and Restore feature to create a recovery disk for hard drive recovery and disk data.
Vista’s Complete PC Backup and Restore is a powerful hard drive recovery utility that not only facilitates hard drive backup and disk data recovery, but also enables you to restore your complete operating system and other important system files. It can also be used for hard drive repair.
The Complete PC Backup and Restore utility can be accessed from the Windows Vista installation DVD disk, which is provided with some computers. However, some PC manufacturers, rather than provide an installation CD, instead install this utility directly onto your hard drive. This obviously poses a problem if your system crashes and you cannot boot up to access and use the utility. Furthermore, even if you can access it, it will restore your computer to its factory state.
Luckily, Windows Vista enables you to create a backup recovery disk. This disc enables you to access system recovery options if your system crashes or if you simply don’t have an installation disk. which not only allows you to boot from your DVD drive in the event of a computer crash, but also enables you to restore your complete operating system and other important system files. Read on to learn how to create and use a vista recovery disk.
How to Create a Vista Recovery Disk
- Click on your Start button to open the Start menu.
- Click on All Programs and then select Maintenance.
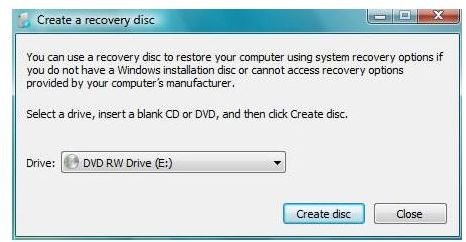
- Select Create a Recovery Disc from the dropdown menu that opens.
- Next, insert a blank CD or DVD into your CD/DVD-ROM drive.
- Click on the Create Disc button. Allow about 5 to 10 minutes complete the process.
Once Vista has finished creating your recovery disc, you will be able to boot from it, just as you would a regular Windows installation disc. You can now use it to repair or restore your hard drive in the event of a system crash.


