This tutorial will walk you step-by-step through the process of upgrading your BIOS.
Upgrading Your BIOS
The BIOS, acronym for Basic Input/Output System, is a crucial utility that comes pre-loaded on a ROM chip on your motherboard. The BIOS contains a set of instructions that your computer needs to start up and operate successfully. Flashing your BIOS updates it to the latest release.
As with any other software, it is necessary to flash your BIOS (upgrade it) to the latest release so as to maximize your system’s capabilities. This is because today’s technology advances in leaps and bounds, forcing motherboard manufacturer’s to constantly improve on their products to keep up. Flashing your BIOS also enables it to detect newer components and devices, as well improve system stability by fixing bugs. Read on to learn how to flash your BIOS.
WARNING
It is important to know that updating your BIOS can be considerably risky, and must be undertaken with extreme caution. If there is no bug or instability with your current BIOS, it is strongly recommended that you keep it. If you choose to flash your BIOS, you stand the personal risk of BIOS flash failure.
Step #1: Do your homework
Dig out that instruction manual that comes with your computer or motherboard. Read the information pertaining to flashing the BIOS (Yes, actually read it). Take note of any warnings listed. (If you do not have the manual, you may download it from the manufacturer’s website.)
Step #2: Record Your Settings
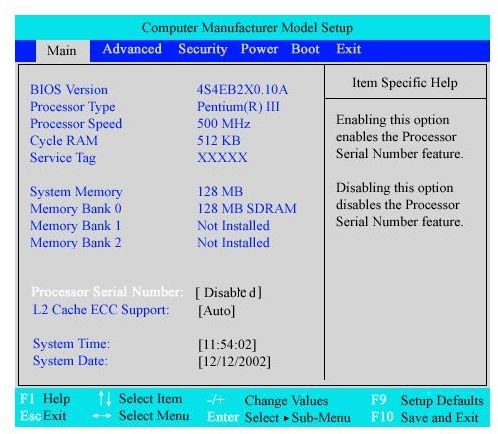
Reboot your computer. Enter the BIOS set up screen. The method you use to enter the BIOS set up screen differs from one PC to another, but typically involves a specific key sequence in the first moments of start up. Check your computer’s manual for specific instructions.
Record all your settings from this screen before you proceed to flash your BIOS. You may simply write them down or hit the Print Screen key on your keyboard. Alternatively, take a photo with a camera.
Step #3: Identify Your Model
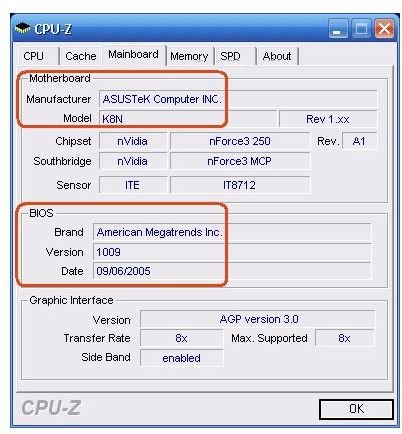
Identify the manufacturer and model of your motherboard, as well as your BIOS version. This is the most critical step in the whole process. You need this information to determine the proper BIOS upgrade to use.
There are a number of ways to get the information:
- Check your motherboard manual or receipt. This is easiest way to do this is.
- Use a free software application such as such as cpu-z
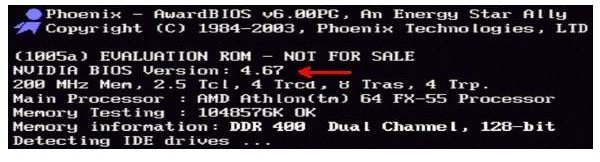
- Obtain this information as your computer boots up. It will be displayed during the boot sequence, typically in the upper left-hand corner of the screen.
- Manually look up the manufacturer and model of your BIOS by opening up your computer reading it off your BIOS chip.
.
Step #4: Download an Updated Version of your BIOS
Visit the website of your motherboard’s manufacturer and locate an updated version of your bios. You will typically find it on the Download or Support section of the website. Download the BIOS update to your PC.
Note
Often, the BIOS update file will incorporate a flash utility, which is necessary to erase the current BIOS, then replace it with the updated version. In some cases, particularly for older hardware, you may need to download this utility separately.
Step #5: Run the Downloaded Update
Run the downloaded update, and follow the onscreen instructions. The same instructions are also detailed on the manufacturer’s website.
Reboot your computer. And you are done!
Warning
It is critical that you not power off your PC during this update process, because this will corrupt your BIOS. If you are updating the BIOS of a laptop, it is therefore essential that you plug in the power cord.


