Sharing and backing up files in a network without booting your computer may sound like a job requiring professionals. However, many users are not aware that they can solve this issue with off-the-shelf hardware at a considerably lower cost.
Hardware
Before going on to shopping, make sure that you have your modem’s IP address on hand. It could be 192.168.1.1, 10.0.0.2 or 192.164.254.1. Jot it down somewhere; we will need it later on.
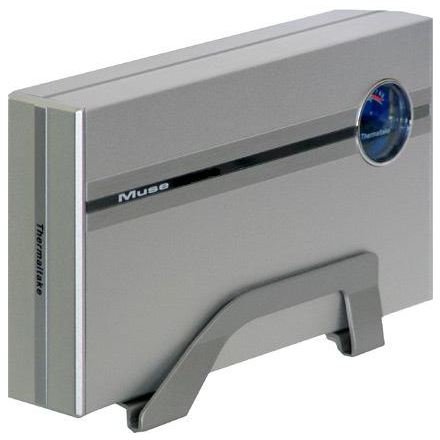
Depending on the hardware available in your electronics store, you can either purchase a Network Attached Storage (NAS) drive with or without a hard disk inside. If the drive is without a hard disk, it is called a NAS enclosure. I will go with this one, since it will cover all the basics. Of course, going with the one already having a hard disk is easier. One of the NAS disks I have at home is Thermaltake’s Muse, so in the article I will explain everything about this one. Yours may be different in shape, but be sure that the configuration is the same. You can find NAS enclosures below $100 at Amazon.com.
Second, we need a switch, because we will be setting up connections. You can purchase an 8-port switch for your home needs. Of course you can go for 5-port if you do not have a large number of networked clients. Anyway, let’s stick with the 8-port one.
Third, we need at least two Ethernet cables.
Fourth, for the enclosure we will need a hard disk. Check what the enclosure supports. Mine supports only IDE disks, yours will possibly support SATA disks. Choose freely, do not stop, go for the highest capacity that fits in your budget. You will thank me later.
After spotting your shopping items, be absolutely sure that they all have Gigabit Ethernet capability in all connections. A chain is only as strong as its weakest point: If you have everything in Gigabit speed, but your cable capacity is slower, then your network will work as fast as the cable’s speed. You can select the hardware easily by checking out the box: It will either read something like “Gigabit Ethernet Port” or “10/100/1000 Mbit”. Go and pay for the goodies.
Now, so we don’t have to bother ourselves at home, head over to the customer support in the shop. Tell them that you will hook the NAS drive to your network and ask for information on configuring it with a static IP address. Do not let the NAS disk act as a DHCP Server, since the results will definitely be annoying. Tell the customer support personnel that you want a static IP address. S/he will ask you your network’s IP Address. Take out the sheet where you have noted your modem’s IP address in the beginning. Tell him/her that you want your disk to have an address like 192.168.1.200 (or 10.0.0.200 or 196.164.2.200 depending on your network).
A note for the BrightHub readers: separate your IP addresses so that the computers have something like 192.168.1.2, ..1.3, ..1,4 … and your disks are 1.200, 1.201, 1.202 … This will make your network tidy. You can place a networked printer at ..1.150 and you will be able to keep track.
When she is done, ask her to format the disk and get it ready for plugging in.
Setting Up
Here is the best part: Unbox all the items. You have your NAS enclosure, your hard disk, NAS drive’s adapter, 8-port switch and two Ethernet cables.
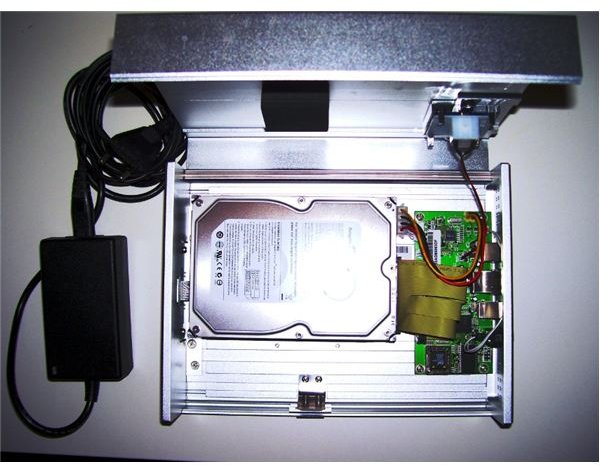
Open up your NAS enclosure. Most probably, it will have two screws at the back or a small button somewhere, just have a look at the user manual. When you open the cover, put the hard disk inside, connect the cables as told in the manual. Close the enclosure.
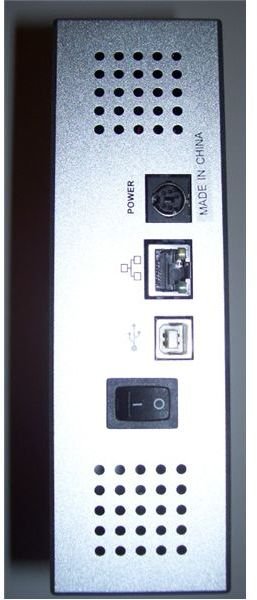
Remember the article where I told you to purchase a wireless router only if it had Ethernet connection? Now you will be thanking me. Take the Ethernet cable that is in the router and plug one end in the switch, so that you connect the router to the switch. Take the other Ethernet cable and plug your computer to the switch. Now we have both the router and the computer connected (via the switch). Final step: plug in the adapter to the NAS drive, and then plug one end of the cable to the NAS Drive and the other to the switch.
Boot up the router, then your computer, and then your NAS. Fire up your browser and type your NAS’s IP Address on the address line. Yes! You have reached your NAS Drive’s configuration page. All is checked and clear.
Now, if you are a Windows user, go to the Desktop and right-click. Choose New -> Shortcut. Type your NAS Drive’s IP address with two backslashes (e.g. \\192.168.1.200 .) and complete the wizard. The shortcut will take you to your NAS Drive every time you double-click on it. The good part is that you can drag and drop files/folders to your NAS drive as you do with any file folder on your computer’s own disk.
If you care about the security and access permissions to your NAS drive, please check out the drive’s user manual. The configuration for the drives are very easy and intuitive. If you have come so far, security and access permissions will cost you just a couple of clicks.


