Photos are supported on the iPad natively, and you have option to bring them on the device from your computer or download them from the Internet. Here is a look at the different ways that you will be able to put photos on your iPad.
Photo Pad
The iPad is used for a whole variety of media types and apps, and photos are actually very useful on the device. The iPad 2 has allowed users to create their own photos with the camera, but you still have the option for downloading photos to the iPad using the Internet or iTunes. Here is a look at the step by step process of how to copy photos over, how to download them from the Internet, how to sync them back to the computer, and how to delete the photos you brought on there.
Sycing from iTunes
The standard way of downloading photos to the iPad is to use the same syncing mechanism that you use when bringing music and video over. Start by plugging in your iPad to your computer as if you were going to sync
it. Select it from under the Devices heading in the left hand panel of iTunes , which brings it up into the middle. Go to the far right tab that says Photos, directly to the right of Books.
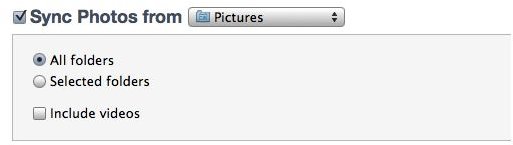
This will bring up the photo syncing options, and you will then have to check the box next to “Sync photos from” option. Once you do this you will have a couple of options.
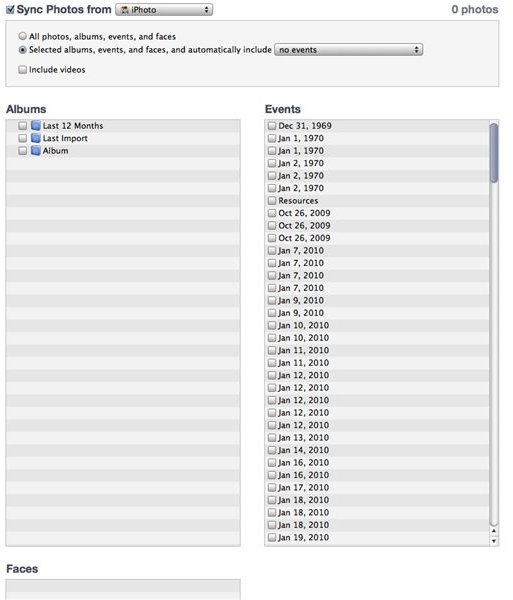
First, the folder option in the pull down menu is set to Pictures. It can be reset to iPhoto or a folder that you specify. If you change it to iPhoto, or another folder, you will have the option to choose “All photos, albums, events, and faces” or “Selected albums, events, and faces, and automatically include” and then events by their date.
Below you will find the available albums and events for the given folder, which for iPhoto may be things like “Last 12 Months” or “Last Import.” Once you select the specifics you want, or just images more broadly, you will hit Apply. This will mark the change and initiate the sync of the iPad once again. It will copy the photos from the computer over to the iPad, and they will now be accessible in the Photos app under the album name that you imported it in from.
From the Internet
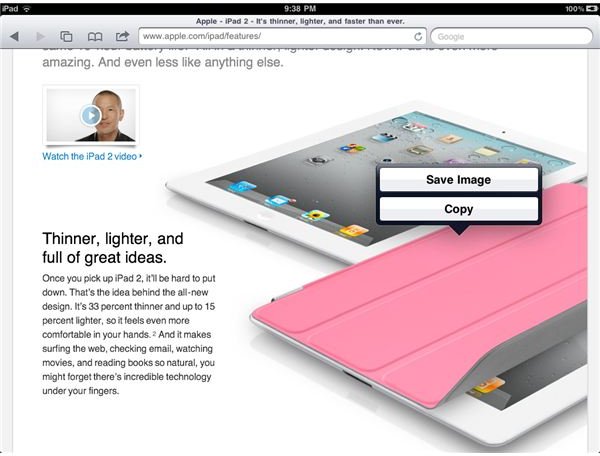
If you are looking to import photos to the iPad from the web, the process is actually shorter. When you are browsing on the Internet in Safari you can go ahead and identify a photo you would like to saved by pressing down on the image and holding down. You will get two options: Save Image and Copy. Go ahead and choose Save Image, and the image will automatically be saved to your Saved Photos in the Photos app.
You also have the option to import photos to the iPad from the web by going through the previous syncing process that you used for downloading photos to the iPad. Instead, you would just go online in any browser, right click and save the image you want, and then target the folder where the image was synced in iTunes to then sync it to your iPad.
Reversal of Syncing
Start by plugging in your iPhone to your computer as if you were planning to sync it, but then cancel the sync. Open up iPhoto, which will automatically read your iPad and then show the roll of pictures that it has on it. You will then go through and select the images that you want, choosing the Import Selected button at the bottom once you have done so. It will run through the various images while importing, asking if you want to keep or delete the photos.
Once you choose to keep them, which keeps them both on your computer and the iPad they came from, they will be placed into the Last Import section in iPhoto. They will be available in the iPhoto folder for later use, and you even have the option to sync them back to the iPad later on by using iTunes and selecting the iPhoto folder that they are housed in.
Deleting Photos
Once you have figured out how to import photos to the iPad, you may need to pick out a few to delete from the tablet. This is an easy process, though you will want to go to iTunes set up to make sure that you do not re-sync the image afterwards.
Open your Photo app on your iPad and choose to look at Photos instead of Albums. Go to the upper right hand corner and select the button that appears as a curved arrow leaving a rectangle. This will initiate options on an image when you select one, such as Email, Copy, Print, and Delete.
Choose the image, or images, that you want and then hit the red Delete button that is to the right of the Print button. You will be asked if you want to delete the photos, and when you confirm they will be removed from your photos entirely.
References
- Screenshots by Shane Burley
- Source: Author’s Own Experience
This post is part of the series: Photos on the iPad
Here are different articles that deal with photos on your iPad.


