If you have a Mac that needs a keyboard, but all you can get your hands on is one from direct competitor, Microsoft, you’ll need to jump through some hoops to get it to work. Here’s how to do just that.
Microsoft Keyboards
Microsoft have really stuck their tentacles into a lot of places in the computing business. First it was computers, then operating systems, then everything from speakers to mice to keyboards to game systems; they really are a bit of a swiss army knife, aren’t they? Well, now some people are coming to a cross roads: Microsoft makes an awful lot of computer accessories, but Mac computers are becoming more and more popular. So what happens if you end up buying, say, a Microsoft keyboard but only have a Mac computer?
You just have to work around a few things.
Step 1) Try It Like Normal
The first step to getting that keyboard to work on a Mac is to simply plug it in and use it as though it was a keyboard built for Mac. This tends to work better with wireless keyboards, such as the Microsoft Wireless Desktop 700 which is built for use with Macs, but really you shouldn’t have much an issue with any of their various products. The reason for this is simple – Microsoft understands that a huge portion of computer owners own Macs, and they don’t want to exclude any potential customers from buying their products.
That being said, you could run into a couple of issues doing it this way, not the least of which is that wired keyboards sometimes use a different type of interface than wireless (an interface that Macs do not support) so you won’t even be able to plug them in, much less use them. Stick to USB keyboards and you can avoid this, but that’s not the only hurdle you may have to jump.
Step 2) No Luck? Find Those Drivers
Ah yes, now onto the good part! Since you had no luck just using the often plug-n-play ability of such devices, you’ll need to go look for some drivers. The good news? Microsoft has made this remarkably easy, if you can find the right web page to download from. So how do you do this?
- Go to Microsoft’s website, www.Microsoft.com .
- Click on the “Products” tab at the top(ish) of the page.
- Go down to where it says “All PC Hardware” and click that. This should bring you to a new page.
- On the new page, look for the “Downloads” link at the top of the page. Click it.
- Now you’ll be on a new page that, by default, is on the “Mice” tab. Find the “Keyboards” tab at the top and click that.
- Bingo, now we’ve arrived at the place we need to be. So what do you do from here? Take a look around the page and find your specific device. If you’re unsure what your device is called, look at the box that it came in.
- Once you’ve figured that out, locate it on the page and click the red link.
Step 3) Download and Install Those Drivers
Great, so we found the drivers; what do we do next? Well, first you’ll want to select your operating system from the drop down list available to you on the download page. If you don’t see your particular OS, this is the end of the line for you because that means your device doesn’t support your computer. You’re better off returning it and buying a new keyboard that does. If, however, your OS is listed, click it on the list and download the file that appears below. I recommend saving the file to the desktop as opposed to just opening it for two reasons: One, it’s much easier to find that way. Two, if something goes wrong you don’t have to re-download it.
Now, once it’s downloaded you’ll want to double click the .DMG file (assuming you’re actually doing this on a Mac) and let it expand out to one of the disk images. It should auto-open, but if it doesn’t, double click on the newly made disk image (found on your desktop) and click the package that contains the drivers. Follow the installation instructions and input your password when it requests. After it finishes, you’re done with the installation process!
Step 4) Get that Keyboard Running
The last step to this whole process is the actual usage of your keyboard, and there are three possible things you’ll have to do in order to get this to work. For all of them, you should not need to restart your computer in between setting them up/plugging them in and actually using them, but if you don’t see results without restarting, you may consider doing just that. Anyway, onto the last part…
Wired Keyboards: If you purchased a keyboard that uses a physical wire to connect to the computer, all you should have to do is plug it in and type away! Like I stated before, if it doesn’t work upon first plug in, try restarting your computer and trying again.
Wireless Keyboard (USB): Like the wired keyboard, all you should have to do is plug in and (maybe) restart!
Wireless Keyboard (Bluetooth): If you’re using Bluetooth, set up on Mac is a cinch. To access to Bluetooth set up menu and get that all taken care of, look in the upper right of your screen on the top bar and click the Bluetooth logo.
That’s all for this guide! If you still need Microsoft keyboard drivers (Mac), help with set up, or anything else, just leave a comment!
References
- [Helpful Link] Microsoft Driver Downloads, https://www.microsoft.com/hardware/en-us/downloads
- [Information] Author Knowledge
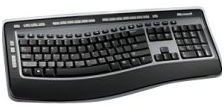
- [Image] Product Page, Microsoft Wireless Keyboard 6000 Wireless Keyboard
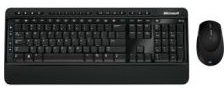
- [Image] Product Page, Microsoft Wireless Desktop 3000 Wireless Keyboard


