Got a new Dell keyboard? Here’s a guide on setting up, using, taking care of, and troubleshooting it.
Setting Up Your Keyboard
Whether it’s wired or wireless, getting a new Dell keyboard is an exciting event. Even so, it does have its faults and its difficulties, not the least of which is the set up process. When you first take your keyboard out of the box, you’ll notice that it’s a pretty straightforward device with one or two extra knickknacks. If you got a wired keyboard, the only thing you should be getting is a keyboard and a cord (maybe a CD with drivers, but we’ll get into that later). For wireless keyboards, you’ll either get just a keyboard (for you Bluetooth fiends out there), or you’ll get a keyboard and a little USB dongle that I’ll explain in a second.
To actually set up your keyboard should be pretty straightforward – if it’s USB powered, plug the end of the cord (or the little USB dongle) into a USB port on your computer. USB 1.1 or higher should work just fine. Now restart your computer if it wasn’t already shut down and see if it works.
It Didn’t Work? Get Some Drivers
Most computers nowadays will not have an issue taking a keyboard you plug in and making it work without any extra hassle on your end. If, however, your keyboard doesn’t work when you plug it in, you may need to go download some drivers .
Drivers come in two forms – downloadable via the Internet, and installable via a disk. If your keyboard came with a disk (not many do these days!), just pop that into your computer and follow the instructions for installation. If it did not come with a disk, you’ll need to head over and get some drivers from the manufacturer’s website, or the website of your computer’s manufacturer. There will be helpful links to these places at the end of this guide, but for now just follow these instructions to properly install drivers:
- Download the drivers for your device from the proper location.
- Double click on the downloaded file.
- Follow the on-screen instructions.
After doing this, your keyboard should work, but restart your computer and let it boot up properly before trying it just to be sure.
Keyboard Care and Maintenance
So now your keyboard is working, and you want to make sure it stays that way. Here are some easy tips to follow to ensure you get the absolute most life out of your device:
- Don’t eat or drink around the keyboard. I know it’s tempting to eat a snack while you’re sending out a few emails, but the crumbs will get into your keyboard no matter how ridiculously careful you are. Excess grime that gets stuck underneath the keys can cause them to malfunction and cost you time and effort to repair.
- If you can, cover the keyboard when it’s not in use. This isn’t totally necessary, but it does help keep dust and dead skin from entering the crevices between keys. If you can’t cover it up, just blow it out every few weeks and you should be alright.
- Don’t continuously unplug and replug the keyboard if you can avoid it. This can not only damage the connector on many Dell keyboard models, but it can also damage the USB port that you’re using, thereby rendering it useless.
Follow these three easy tips and your keyboard should work for many, many years to come!
Troubleshooting
The last of the Dell keyboard instructions I want to give you relates to what you should do if your keyboard stops working. The process is referred to as “Troubleshooting” and can be extremely helpful if you want to avoid going to a professional for as long as possible. Here are a few quick things you can try before taking it to a professional:
- Shut down your computer, unplug the keyboard, plug it back in, and start up again.
- Try re-installing the drivers by removing them (via the control panel) and then re-downloading/installing.
- Take it apart and clean it out, or just take a vacuum cleaner, place it on reverse and blow into the keyboard to knock out loose crumbs and dust that may be disrupting proper function.
- If it’s wireless, make sure the frequencies match using the dials or buttons on the keyboard and USB receiver respectively.
If you’ve tried all of these things and it still doesn’t work, unfortunately you may have to take it into the shop or buy a new keyboard altogether! This isn’t a huge deal, thankfully, because keyboards are relatively inexpensive these days.
References/Helpful Links
- [Helpful Link] Dell Drivers
- [Information] Author Knowledge
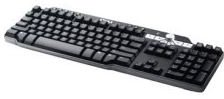
- [Image] Product Page, Dell Multimedia Keyboard Wired Keyboard
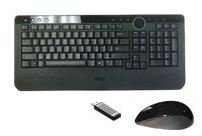
- [Image] Product Page, Dell Wireless Keyboard and Mouse Bundle Wireless Keyboard


