Have you ever felt frustrated going back and forth between two computers and wishing there was an easier way? There are solutions out there to enhance your productivity that are quick, easy, and completely free to set up.
What You Need
To start you need to have what’s known as a KVM (Keyboard Video Mouse) Switch. Originally, this was a physical device that you would plug everything into and then flip a physical switch in order to change things over. While they do still exist today, the better option for most people is to use virtual KVM software. One of the best ones out there is called Input Director, although it requires Windows to use. If you’re interested in using a different OS, Synergy might be better suited for your needs. Links to both products appear at the end of the article.
In order to switch back and forth between the different computers, some sort of network connection must be made. You can do this wirelessly, via crossover cable, or through a network hub.
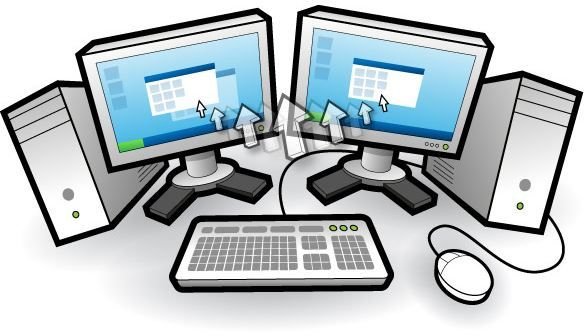
The last thing you need is the most obvious… the two computers. Through this method you can set up more than one computer, but given that the setup process is identical, I’ll assume you have two computers and each has a single monitor for a dual monitor setup. You’ll need these computers to have their respective monitors pointed towards yourself, and have the keyboard and mouse of both computers handy, although after the setup you’ll only need one keyboard and mouse set from then on.
Making it Happen
The first thing you need to do is download Input Director and install it on your respective computers.
Next, decide which computer will be the primary computer. The terminology that Input Director uses is Masters and Slaves. The primary Master computer is the computer that your keyboard and mouse will be plugged into, and it will send its signal to the other computer. If your computers are set up in such a way that it doesn’t matter physically which computer you use for which (Master or Slave), you should consider if one of them will use an alternate controller, like a remote. Most of the time, when you’re using a remote, you just want the actions to be taken by one computer rather than by both. Setting up the media computer as the Slave will allow that to happen easily.
The easiest way to set up the computers is to set up the Slave(s) first, followed by the Master computer. Before you can do this, you need to know either each computer’s name, or its local IP address. Both the name and the IP address are unique identifiers to your computer and either of these can be used in the “Hostname” field during setup.
Get Your Slave Working for You
Once you have secured the computer’s identity with either the hostname or the IP address, set up of the slave can be done quickly by following these steps:
-
 Advertisement
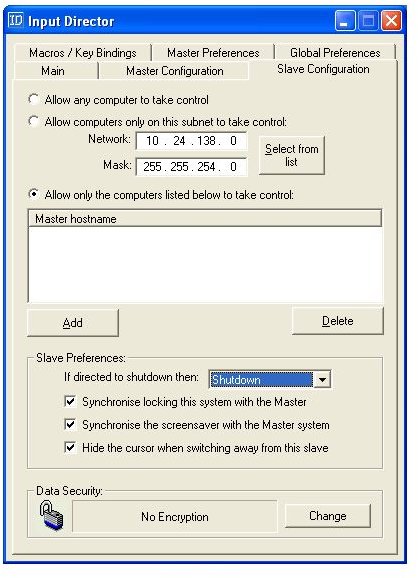
On your slave system, start up Input Director. At the top there will be several labeled tabs, and you’ll need the one called “Slave Configuration”.
-
Select what computers can take control of the slave. If you’re not connected to the Internet, or don’t want to fuss with this for now, click the circle to allow any. Otherwise, Click the ‘Add’ button and fill in the Hostname of the master computer.
Advertisement -
Click on the ‘Main’ tab and select the button to ‘Enable as Slave’
-
Click on the ‘Set Hotkey’ button and then press the ‘M’ key, the ‘Ctrl’ key on the left side of the keyboard, and the ‘Shift’ key on the left side of the keyboard. This sets up this key combination to return focus to the master computer, and will need to be done again later on the master computer.
Advertisement
Master Your Domain
Although there are many advanced options that can be changed later, the basic setup of the master computer is as follows:
-
On your master system, start up Input Director. At the top there will be several labeled tabs, and you’ll need the one called “Master Configuration”.
Advertisement -
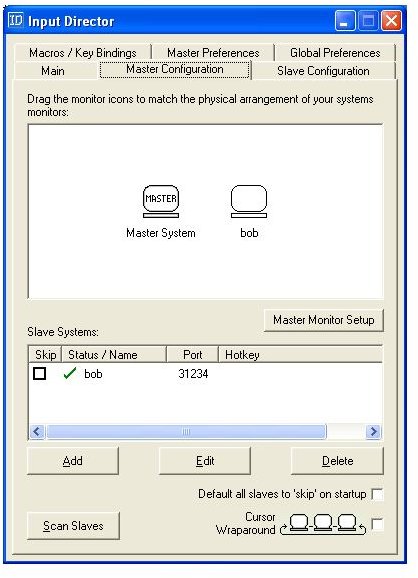
Click on the ‘Add’ button and type in the Hostname of the slave computer.
Advertisement -
Click on the ‘Set Hotkey’ button and then press the ‘S’ key, the ‘Ctrl’ key on the left side of the keyboard, and the ‘Shift’ key on the left side of the keyboard. This sets up this key combination to return focus to the slave computer. If you set up additional slaves later, use a different letter.
-
Click ‘OK’ and return to the main screen.
Advertisement -
Within the ‘Master Configuration’ tab you should now see a representation of both the master computer and the slave computer up at the top, and the details of the slave computer at the bottom.
-
Click on the ‘Main’ tab.
Advertisement -
Click on the ‘Set Hotkey’ button and then press the ‘M’ key, the ‘Ctrl’ key on the left side of the keyboard, and the ‘Shift’ key on the left side of the keyboard. Like before, this sets up the proper keystrokes to return focus to the master computer.
Take a Break, You’re Done
Now your dual monitor setup is complete. When you hit ‘Left Control + Left Shift + S’, the keyboard and mouse will work on the computer that you have set as your slave system. Even though it’s connected to the Master computer, the mouse and keyboard input you provide will be transferred to the Slave system and you’ll be able to watch in real time as your mouse moves and your typing appears. If the connection is broken, or if you type in ‘Left Control + Left Shift + M’ instead, the keyboard and mouse will work on the Master system exactly like it normally would.
There are many different options on how to set up the monitors, but just having the ability to let the mouse and keyboard roam freely back and forth between the computers can be a godsend to gamers, media fans and hard-working computer users alike.
References
All reference material and images for how to setup a virtual KVM are from Input Director v1.2.2 with advanced setup instructions here .
If you’re looking for a non-windows alternative, give Synergy a try.


