If your ASUS 1005 keyboard stops working for any reason, it may be time to replace it. The steps for ASUS 1005 notebook keyboard replacement are fairly simple and requires little disassembly, allowing even computer beginners to replace their own keyboard.
Preparation
Before you get started, turn off your ASUS 1005 notebook. Disconnect it from its power supply. If you have any peripheral devices connected, disconnect them. Everything must be disconnected before removing the existing keyboard. Other devices and cables can result in electric shock or damage to keyboard components. Be sure to read through this entire article before you begin attempting to remove your notebook keyboard.
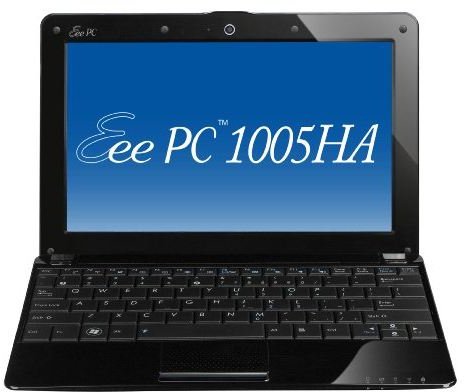
Image Credit: ASUS 1005HA Notebook / ASUS.com
Tips
Always try to work on your ASUS 1005 notebook in a static free area. Since this isn’t exactly realistic for most people, find a non-carpeted area to stand on. Clean any flat, hard surface before setting your notebook on it. This will help reduce static and dirt, which can damage your notebook.
Lay a clean lint-free towel or cloth to the side of the notebook. This will hold any components, such as the battery, that you remove, including the old keyboard.
Have the replacement keyboard sitting safely to the side, ready to be inserted. This will make the replacement process easier. To keep the new keyboard clean, place it on a separate lint-free towel.
ASUS 1005 Notebook Keyboard Removal
Remove the battery to access the keyboard clips. Turn your ASUS 1005 notebook over. The battery compartment is located next to the hinges on the back of the notebook. Slide the two slide locks directly below the battery to unlock the battery. Lift the battery to remove. Never disassemble your notebook with the battery inserted.
Use a small screwdriver, such as an electronics screwdriver, to pull back the four latches or tabs within in the battery compartment. Use gentle pressure to pull back the latches. Note that these will not remove completely.
Turn the ASUS 1005 notebook back over and open the lid into a normal viewing position. Use the same small screwdriver from above to gently pry up the keyboard. You will hear small clicks as it removes from the notebook. Start from the top left corner and work your way around until you can lift the keyboard away from the notebook. Do not try to completely remove the keyboard at this point.
Open the lid until it’s almost completely open. This will allow you to move the keyboard up until you can access the ribbon holding it in place. Gently push up the two black clips holding the ribbon in place. Set the keyboard on the towel.
ASUS 1005 Notebook Keyboard Replacement
With the new replacement keyboard, insert the ribbon connector in between the two black clips and press the clips back into place. Align the keyboard and press it firmly into place. You will hear soft click as it snaps into place.
Close the ASUS 1005 notebook and turn it back over. Use a screwdriver or your fingers to snap the clips in the battery compartment back into place. Once again, be gentle to avoid breaking the clips. Reinsert the battery until it snaps into place. It should fit flush with the back of the notebook.
Turn the notebook back over, reconnect all the power adapter and start your system. Test the keyboard to ensure it works properly.
References
ASUS EeePC 1005HA Upgrades - https://eeepc1005.blogspot.com/2009/09/upgrade-time.html


