Find and Install a Gateway Notebook Cpu Fan
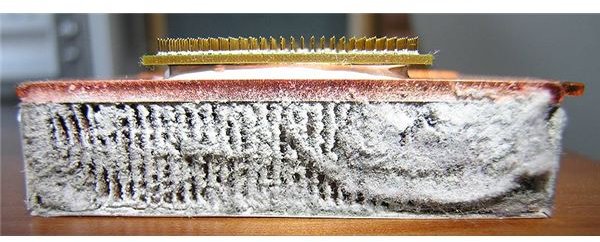
Has Dust Damaged Your CPU Fan?
If your Gateway notebook has developed problems with overheating and slow performance, there is a good chance that there is a problem with the cooling system. Generally speaking this comprises of a small fan positioned along the side of the laptop chassis, designed to draw warm air away from the processor.
These fans can become clogged with dust which will affect performance; if the component is damaged beyond use, however, you will need to find a replacement.
With the right Gateway notebook CPU fan for your laptop you should then be able to replace the faulty device with relative ease providing you have some experience of repairing computers.
Is the Fan Actually Faulty?
The first thing to investigate if you are looking into repairing your Gateway notebook is whether the fan is genuinely faulty.
While most fans are damaged by the presence of dust, this can be removed in a general service and clean of your laptop. This is something you can either do yourself or pay for – although bear in mind many computer stores will charge more for performing this sort of service on a laptop than on a desktop because of the comparative risk.
All you will need to “de-dust” your computer innards is a suitable a screwdriver and a can of compressed air – these can be purchased from computer and electronics stores for a few dollars. Once your computer is open, “spray” the dust out of the chassis onto your anti-static desktop surface and then when the laptop is reassembled, vacuum the dust away!
Choosing the Right Gateway Notebook CPU Fan
In order to ensure that you will be replacing the fan with the correct model, you have two choices. You can either open the chassis (risky, requiring a lot of unscrewing) to check the fan type and model, or you can check online for a device schematic or suitable component reference number.
One good way of doing this is to search for your Gateway notebook’s model number, followed by the words “cpu fan” – this will at the very least leave you with a set of results informing you where you can purchase a replacement device.
With this information to hand you will then be able to purchase a replacement CPU fan for your Gateway notebook.
Risks of Opening Your Gateway Notebook to Replace the CPU Fan
Depending upon the model of your Gateway notebook, the process is for opening the device will be relatively straightforward, but in all circumstances you should first check online and at support forums for copies of the device schematics so that you know how to remove the various components.
Before beginning, ensure that the laptop is switched off and disconnected from the mains; also remove the battery in order to protect you and the hardware from any accidental shocks.
You will also need to remove several other components in order to access the fan, disassembling the device from the underside by removing the hard disk drive, CD/DVD drive (if present) and Wi-Fi card before proceeding to remove the majority of the chassis.
Disassembling a notebook computer can take as much as a couple of hours – so if you are uncomfortable with the process or don’t have the time then taking your computer to a specialist to replace the fan is advisable.
References
Source:
- Author experience
Images:
- Image credit Wikimedia Commons/Aurdiusa
