How do You Add Connectors to Join Two Autoshapes? Find Microsoft Excel Tips at BrightHub.Com
There are lots of reasons why you may want to join two AutoShapes in Excel – whether you’re designing a flow chart or you just want to emphasize the connection between two items.
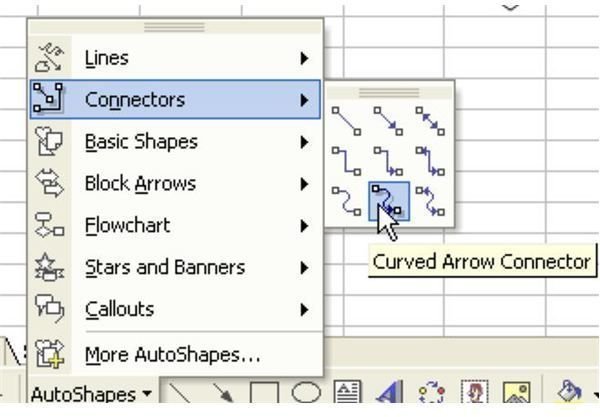
Strategy: One of the AutoShape flyout menus is called Connectors.These are an amazing and very special type of AutoShapes. A connector is designed to join two AutoShapes. The special trick is that as you move the AutoShapes, the connectors will redraw themselves to keep the connection intact.
There are three types of connector lines: straight, bent, and curved. Each type is available with no arrows, one arrow, or two arrows.
-
Draw two AutoShapes on your worksheet. Make sure that neither AutoShape is selected. From the AutoShapes dropdown, select a connector, as shown in Fig. 1400.
-
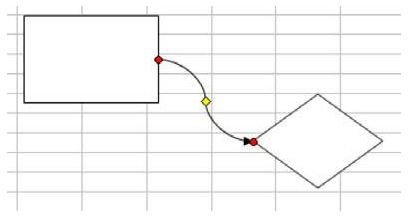
You must start at one of four connector points on an AutoShape. Hover the mouse over the AutoShape to show the four connection points, as shown in Fig. 1401.
-
Click on one connector point and drag towards another AutoShape.
When you get near another object, the mouse will jump to one of the connector points on the other object, as shown in Fig. 1402.
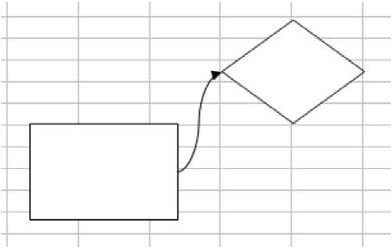
As shown in Fig. 1403, as you move the objects on the sheet, they remain connected.
Summary: To connect to AutoShapes, use the Connector flyout menu.
Commands Discussed: AutoShape – Connectors
Images

References and Additional Resources
If you’re looking for more tips and tutorials, check out 91 Tips for Calculating With Microsoft Excel. This collection of easy-to-follow guides shows how to customize charts and graphs, different ways to make complex spreadsheets easier to update, and even how to play games like Craps in Excel. If you can’t find what you’re looking for, leave a note in the Comments.
Other Resources:
Microsoft Excel Official Site, https://office.microsoft.com/en-us/excel/
Bill Jelen, Microsoft Excel 2010 In Depth, Available from Amazon.com.