
In this tutorial, you will learn how to create a pink gradient butterfly wallpaper for your desktop using Adobe Illustrator. This tutorial will walk you through each step and show you how to get the butterflies.
Illustrator Butterfly Wallpaper
This tutorial I will show you how to create a simple butterfly wallpaper for your home office computer. We will create this wallpaper using Adobe Illustrator . This is a pink gradient wallpaper with butterflies. You can position the butterflies where you want them. I will show you how to create the background part and the butterflies. Before you get started you will need to download and install the KR Butterflies Dingbat. You can do a search on google for this dingbat. It only takes a minute to download and install the dingbat .
Knowing the Size of Your Desktop
You will also need to know the size of your desktop. You can go to your properties window on the desktop to find out what size the desktop is. You will need to find this out, so that you will know what size to create the wallpaper. The common sizes are 800 x 600 and 1024 x 768. You can right click on your desktop and click properties. Then click the settings tab and it will show you the size of the desktop
Creating a New Document
Now we are ready to get started. Open your Adobe Illustrator program and create a new workspace. Create
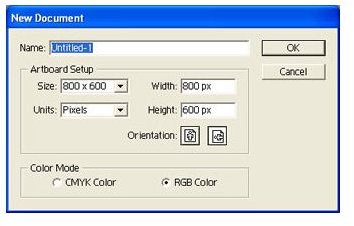
it the size that you need for your desktop. Tick the RGB colors field. The background color will not matter because we will cover it up with our gradient background. Click OK to create the new workspace.
It is best to zoom out of the workspace so that you can manage it better. Drop the magnification to 50%. You can keep going back to 100% to see how it looks but it’s best to work at 50%.
Drawing the Background and Adding the Butterflies
Click the Rectangle Tool in the toolbar on the left. Draw a square or rectangle large enough to cover your workspace. We will apply a
gradient to the background. Find your Gradient Box . If you can’t find it, go to the top of the window and click Window > Gradients. Click the arrows beside Gradient to expand the box. Now click the gradient bar to apply the gradient.
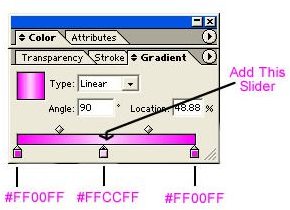
You will notice that there are only two sliders on the gradient bar, the white slider and the black slider. We will need to add a new slider. Click in the middle of the two sliders to create a new slider. Click right below the gradient bar. Now you should have three gradient sliders. Next, we will change the color of the gradients.
Double click the first slider on the left. Then double click the color fill box in the toolbar on the right. Change the color to #FF00FF. Click OK to apply it. Double click the middle slider and change the color to #FFCCFF.
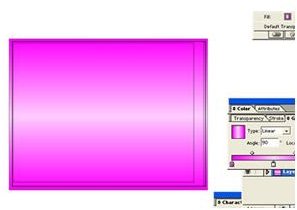
Change the last slider color to #FF00FF. Now you will need to change the angle to 90. Type 90 in the angle field. That will rotate the gradient. That is the background part of the Butterfly Wallpaper.
Now we will start adding the butterflies. I told you in the beginning that you could position the butterflies how you wanted them. I was just going to show you how to create them. By now you should have the butterflies dingbat installed.
Grab the text tool and type a lowercase q. Change the font style to KR Butterflies. Change the color to white or whatever color you want to use. Change the size of the butterfly to what you want. You can copy and paste the butterflies to create more. You can also rotate them to give them different looks. The other butterfly that I used was created by typing the letter M. You can type other letters to get other butterflies. Play around with the positions, colors, and size and you can come up with a great looking Butterfly Wallpaper. When you have finished, save the wallpaper and set it as your desktop wallpaper.
Image Credits
All Images Belong to the Author of this Guide.


