Creating your own templates in Scribus is a useful way of speeding up your workflow and making your design work more efficient, particularly if you’re creating similar documents again and again.
Creating Templates
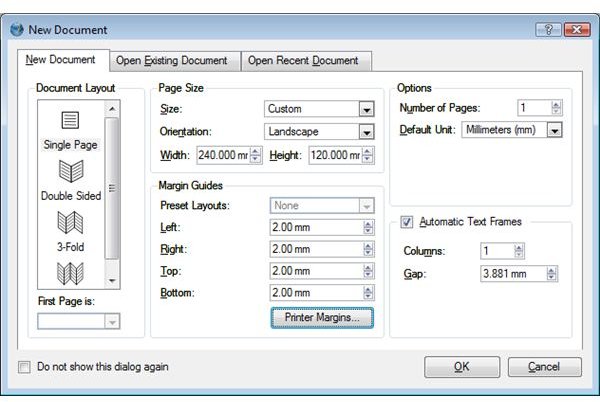
In Scribus, the process of creating a template begins just as it would for any other document. Simply select “New” from the “File” menu and the “Document Properties” dialog box will appear.
When making templates, it’s important to remember that your aim is not to create a finished document, but rather a useful base layer from which you can quickly and easily create other documents. This means that you need to think not so much about the aesthetic beauty of the page elements, but rather how they can be efficiently optimized for a particular type of document.
One of the most fundamental aspects of your document is your page setup and margins. If you regularly use a non-standard paper size or have particular margin, trim and bleed configurations that you use, putting them into a template file will save you having to re-enter the details time and time again.
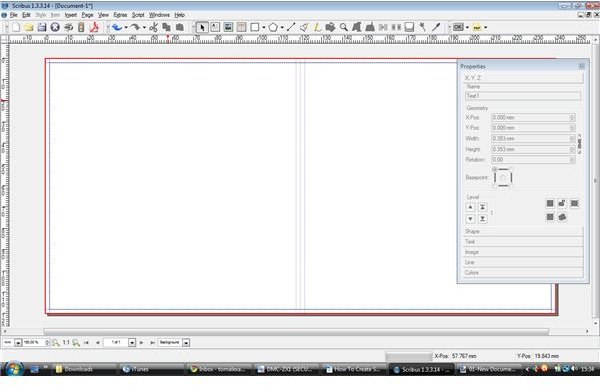
If you wish, you can add placeholder elements to the document, such as sample text and temporary images. Doing this helps you visualise the final design and allows you to easily distinguish one template from another - useful if you build up a portfolio of your own templates.
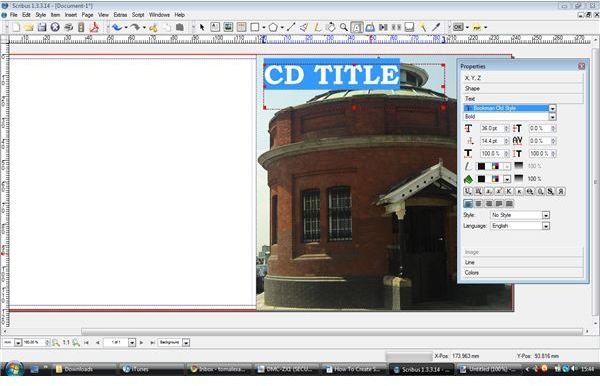
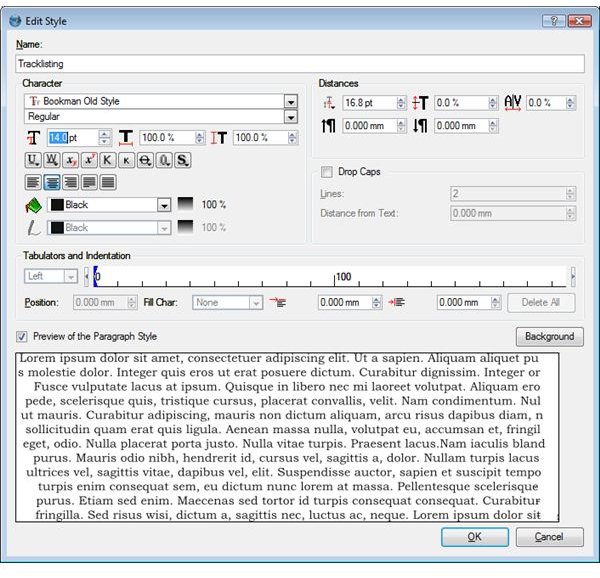
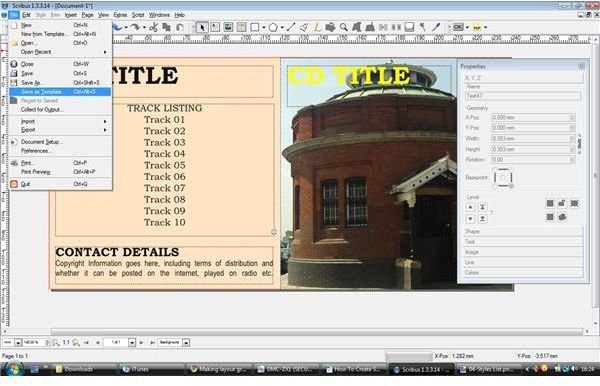
It’s also worth setting up paragraph styles and applying them throughout the document you are creating. Doing this will allow you to make broad changes to the typographical style of any documents you create from the template, without having to individually select each text element and change the individual parameters. Here, customized paragraph styles are being created for the CD title, track listing and other elements of the CD slipcase. As each of these typographical elements serves a different purpose in the document, a different paragraph style is appropriate.
Saving Templates
Scribus requires that Templates be saved as normal documents first, so go to the “File” menu and “Save As” in the normal fashion.Once this is done you can go back to the “File” menu and “Save As Template”.
Scribus will then ask you to select a directory to place the template file into. By default, it should automatically go to its usual template folder. Click “OK” to select this directory.
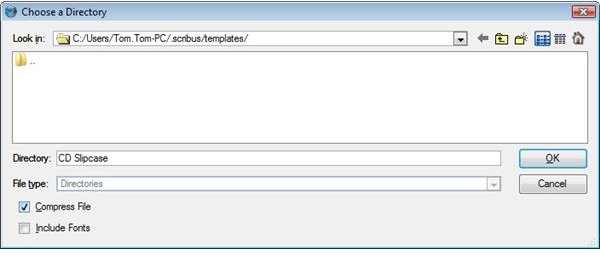
Scribus will then ask you to name the Template file. If you wish, you can add further details, such as your name and any notes you have by clicking the “More Details” button.

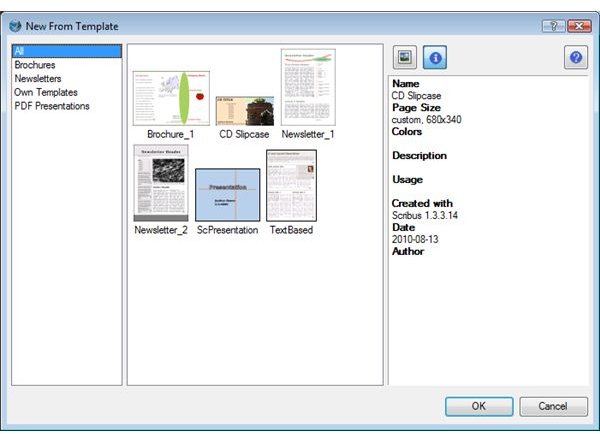
Now that the template is saved, you can create subsequent documents from it at any time by selecting “New From Template” from the “File” menu. The template selector will pop up and you should see your template amongst the others installed. Simply select it and click OK to create a brand new document from your template.
Altering this file will not change the original template and it can be saved just like any other Scribus publication.


