
If you’re an artist, an online merchant, or someone who wants to share images with the world on their blog or Flickr, you’ve probably thought about watermarking your images. This article teaches you how to create small watermarks that won’t detract from your image but still credit you as the owner.
When Do I Watermark?
If you’re going to post images online, it’s not a bad idea to take some steps in order to protect your work. But what needs to be protected? Things such as:
-
Artwork - Artwork, both digital and traditional, should be watermarked in order to protect it from being reposted, or even reprinted and possibly sold without your permission.
Advertisement -
Photography - High quality photography, much like art, is often subjected to being saved, reposted, and sometimes even printed and sold for profit. A watermark helps reduce the likelihood that someone else will profit off of your hard work.
-
Blog Images - You’ll be surprised how often people will save images from blogs and repost them as their own. While this isn’t always frowned upon in the blogging world, watermarking your images does prevent it from happening, or at least can let the viewers know whose images they are (which can result in an increase of views for your blog or website).
Advertisement -
Auction Images - Do you sell things on eBay? Watermarking your images with your store URL will prevent people from profiting off the time you spent photographing the goods you’re going to sell.
Watermark vs. Low Resolution
For portfolios, a watermark can often be distracting when placed over artwork and photography. How do you get around this? Easy. Place smaller, lower resolution (75DPI) images in your portfolio, which renders them completely useless for printed works, stopping art thieves dead in their tracks.
Do I Really Need to Watermark Images?
The choice to watermark an image is completely up to you. If you’re not making buckets of money off of your art, chances are that art thieves will not be making any money from it either. Not to mention, a lot of people who may take and repost your images aren’t thieves, but simply people who don’t realize what they’re doing is wrong. A lot of people think that watermarks look tacky and detract from the entire image, and I’m inclined to agree. I can, however, show you how to create a less distracting watermark in a few simple steps.
How To: Create Watermark to Protect Images
Open your image in your favorite image editing software - I personally prefer Adobe Photoshop , but this is extremely easy to do with the GIMP and PaintShop Pro as well. If you’re familiar with these products, these steps should be very easy to follow.
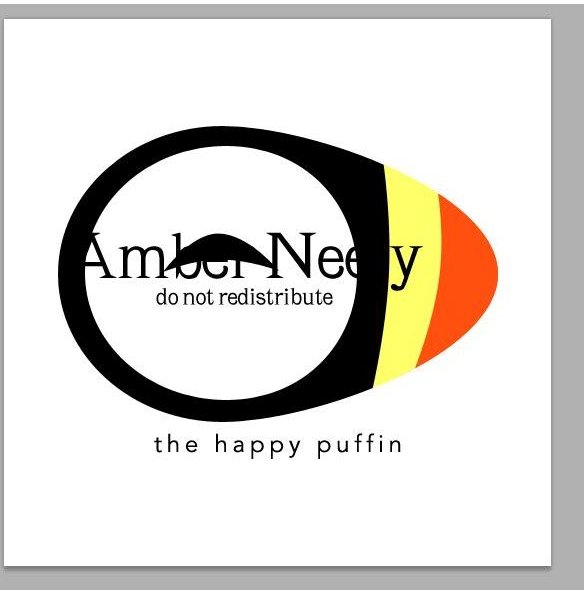
Create a text layer on top of your image and type in what you would like your watermark to say. Generally, it’s a good idea to put your name or the name of your website on it. Make it so it spans across the center of your image. For example, I’ll put Amber Neely across mine.
Click any image for a larger view.
A good watermark will also state what you can and cannot do with the image, but be as brief as possible, such as “do not redistribute.” Here’s what that would look like.
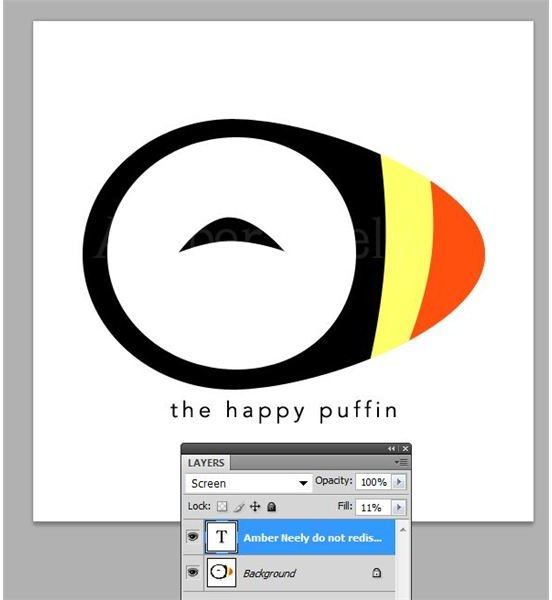
Set your text color to white, and your layer blending mode to screen. Adjust the opacity of your watermark to the point of it being barely visible. For example, my watermark is only at 11% opacity in this image.
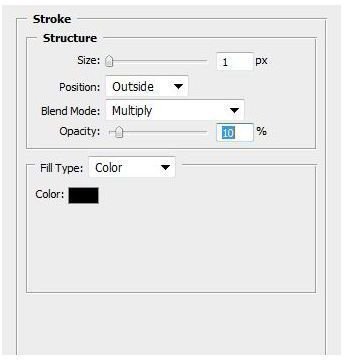
If you find that this doesn’t offer enough protection (or you’d just like a darker watermark because your image might have a lot of white in it, like mine does) go into your layer styles and add a 1px black stroke around the outside and set the blending mode to multiply. Adjust the opacity of the stroke so it is barely visible.
Remember, a good watermark should be noticeable, but should not detract too much from the image! Here’s the finished effect:

References
All images and references from the author.


