One of the most challenging of projects a photographer can get is to take a good photo of a glass object. This article explores the unique challenges posed by glass and how to conquer them to obtain a truly memorable glass photograph.
How to Photograph Glass
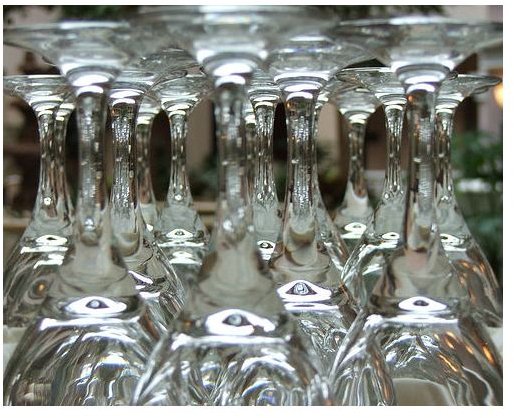
Due to its translucent and reflective nature, photographing glass poses a unique challenge. It’s very tricky to get a perfect photograph of a glass object, but once accomplished, the photo possesses a beauty which makes the whole effort worthwhile. Let us learn the nuances of this fine art of photographing glass.
The Essentials on How to Photograph Glass
You might just need to capture that beautiful vase or crystal wineglass that sits on your mantelpiece, or maybe put up a glass item for sale on eBay . Whatever the need, if not done the right way, photographs of glass can quickly turn into a disaster, replete with bright spots and myriad reflections. To eliminate these, we need to ensure that the lighting is at the right angle, and the environment immediately around the glass subject is controlled, so as to prevent reflections. This is done by ensuring the following:
Use diffused light:
The kind of light used is the one most important aspect to consider when learning how to photograph glass. The light has to be diffused and not hard or direct. Diffuse glass reduces glare and uniformly lights up the reflective surface. One may diffuse light in the following ways:
- Use natural diffuse light like outdoors on a cloudy day .
- Place the object in a white box with walls made of white sheet or thin white plastics or even plexiglass or a white cotton cloth.
- Bounce light off a white surface like a poster board or the ceiling.
- Using multiple low power lights placed uniformly around the subject gives a more diffuse light than one or two bright lights.
Use a polarizing filter:
The polarizing filter can cut reflections from shiny surfaces like glass and metal. More on effective use of the polarizing filter can be found in this article .
Another tip for cutting out glare if photographing small glass beads or marbles is to put them in water and then take the photo through the water. This helps cut off most of the glare.
Have an uncluttered background:
An uncluttered, preferably plain and out-of-focus background draws the attention of the viewer to the foreground; in this case, the glass subject. Placing the object on a piece of colored paper or cloth, and placing the sheet both below as well as behind the subject would ensure a clutter-free surrounding .
Don’t forget your tripod:
The one most important photographic accessory you will need for this exercise would be your tripod. You don’t need an expensive professional grade tripod – even a small, portable one would do just as well. The advantages of using a tripod are many:
- It lets you place your camera in an optimal position in relation to the subject as well as the light sources.
- You can have longer exposures using softer sources of light to get the perfect tonality in the photograph.
- Use of longer exposures also enables using smaller apertures , allowing one to effectively blur the background much better.
How to Photograph Glass: Techniques Used to Photograph Glass
There are three main techniques used to photograph glass:
- The light cube method
- Bright field method
- Dark field method
1. The Light Cube Method:
The object to be photographed is placed within an opaque white cube, which is illuminated from outside. The material of the cube is such that it diffuses the light entering the cube in all directions, resulting in an even and uniform lighting and eliminating all reflections. A piece of colored paper can easily be placed within the cube to get a background of choice.
There are two disadvantages of using this method:
- One has limited choice over the way light falls on the subject. The glass object sometimes loses dimension due to the unilateral source of light and looks quite flat.
- One also has limited angles of composition . It’s almost impossible to get action shots, say water or a fruit falling into the glass object, as it’s enclosed within a cube!
2. Bright Field Method:
A better way of photographing glass is to manipulate the reflections so as to define the boundaries and shape of the glass subject. As the name suggests, in bright field lighting, the background is white or bright and the outline of glass is dark or black. This is obtained by placing two sheets of black on either side of a white background sheet. The glass subject is then placed right in front of the white sheet. A source of light should be placed such that it illuminates the white sheet from below and behind the glass subject. Now composing the scene so as to avoid the black sheets produced a photo wherein the background white is visible right through the glass and the surrounding black sheets are reflected by the borders, thus giving sharp black borders which define the shape of the glass.
One can also place the light source right below the glass subject for a different and beautiful effect.
3. Dark Field Method:
Contrary to the above method, here the background is dark and the outline of the glass is bright or white. It is done exactly as in bright field method, except that the positions of the white and black sheets are now interchanged.