
Photograms were the originally method of producing images on paper before there were even cameras. Learn how to create your own artistic images using photo paper and objects you have around your home.
Photograms are some of the first known photographic images, and are created by putting objects on materials which are photo-sensitive and then exposing them to light. The area not covered by the object is darkened, leaving a sort of ghost image of the object. Think of the images created when you place your hand on the copier and press “Start”.
Although the practice is about 200 years old, it was not used in artistic expression until around the 1920s. Originally, photogram practice was used to catalog plants, by placing their leaves on the paper. Now it is widely practiced as a form of art.
How to Make a Photogram
Materials You Need to Make a Photogram
The most basic experiment to perform when learning to make photograms involves just a few materials. You will need:
- Photo paper. This can be many types of light-sensitive papers or even negative sheets. The cheapest is printer paper, which is good to learn with because it is cheap, but is limited in it’s abilities.
- Solid objects such as keys, rocks, pens, or anything else you want to capture.
- Dark Room. This must be a room sealed off from all contaminating outside light. You want to have total control over light source and intensity.
- Enlarger or mobile lamp. An enlarger is used in most photo labs, but you can also begin by using a reading lamp with a light bulb higher than 75 watts.
Creating Your First Photograms
In the dark room or photo lab, lay out your photo paper, and place your objects the way you want them on top of it. Position your light above the paper, and turn it on. The area not covered by the objects will darken, while the area under the objects will remain white. No chemicals should be needed for this process, especially as you are learning the basics. As you learn more, additional possibilities in this art form may require some chemicals solutions, some can even add different colors to the end product.
Adjust Variables
You will need to experiment with light timing and intensity to observe different effects and capture the ones you want. The exposure effects happen very quickly, so try an exposure time of about 5 seconds the first time, and then add or subtract time to adjust the contrasts in your photogram. The longer you leave the paper under light, the darker the exposed areas will become, until eventually the effect begins to bleed into the unexposed areas as well.
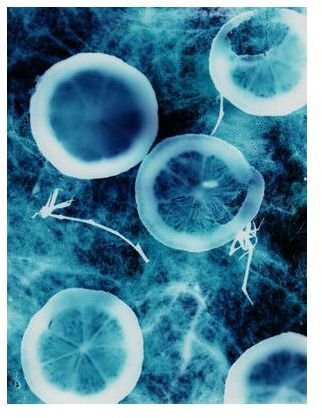
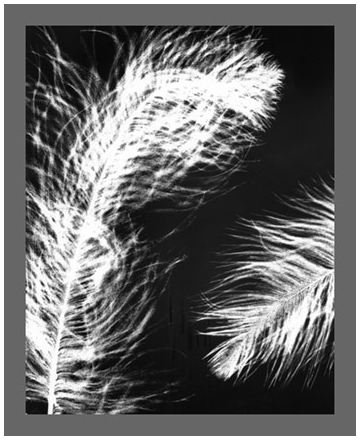
Other variables that can be tweaked are light intensity, position, and type of objects. Pulling the light further away will create a soft effect, and using a very high watt light will make the photogram form much more quickly. Object opacity can also be fun to test. Using semi-transparent object like lemon slices will create the image of the interior of the fruit. Using leaves and flower petals will do this as well, hence the original use of photograms for scientific purposes.
Once you learn the basics in creating photograms, there are many methods and techniques to try. Experimenting is the fun part of learning photograms. This is the time when your own artistic style and expression can shine. So have fun!


