This article continues from the last to explain and demonstrate how to create and insert a watermark into an image using Adobe Photoshop CS4.
INSERTING YOUR WATERMARK
Make sure that you save your watermark as a .psd file. After you have it saved, there are a few different ways to put your watermark onto one of your images. The easiest way, in my opinion, is to open both the watermark and the image. In Photoshop CS4, multiple images are organized in a new tabbed system, which makes switching between projects extremely easy.
Once both your watermark and image are open, I use the move tool to “pick up” the watermark, and I drag it to the tab of the photo I want to insert the watermark on. After about 2 seconds, the tab will open and you can continue to drag the watermark directly into the image. When you let go, a new layer will be automatically created and you will see the watermark on the photo.
Drag to the Tab
FINISHING YOUR WATERMARK
The last adjustment you need to do is to resize the watermark. To do this, make sure that the watermark layer is selected, and then choose Edit and then Free Transform. Then, you will see a box appear around your text and you can resize the watermark to any size that you desire. Rotate it if you want, or leave it horizontal.
When you get it the way you want it, just hit Enter and that will apply the transformation. Be sure to save your new image. I usually do a Save As… in order to save the changes as a different file. In that way, my photos with and without watermarks will stay separate.
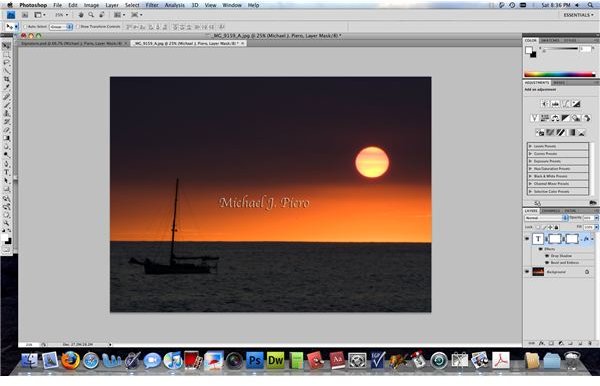
Final Product

After your first few watermarks, this process will begin to fly! Watermarks are a great way to let people know that the photos they are enjoying are yours. This is very important if you are publishing your photos in print or online. If it’s not watermarked, there’s the danger that someone may steal it. Following these simple steps can safeguard your photos and your art.
This post is part of the series: Watermarks and Adobe Photoshop CS4
Creating a watermark in Photoshop CS4 is easy with this tutorial. In this article, five easy steps are given to make your own watermark and add it to your photos. This tutorial also works using Adobe Photoshop CS3.


