How to Create Free iPhone Ringtones with Garageband and iTunes
Using Your iTunes Library
When the iTunes store announced a while back that users would be able to create ringtones out of their purchased music, it was not without a catch. Buyers had to pay an extra fee to change their music into a ringtone that they could use on their iPhones or other cell phones. They managed to this by making ringtone files, different from your standard MP3 files.
Pay no longer iPhone owners. Garageband has an export feature built in that allows you to not only import music you have in your iTunes library, but also customize it and turn it into a ringtone file. You can even create your own music and export it as a ringtone file to make your own personalize ringtones.
How to Create a Ringtone in Garageband
The process is very simple to do. Your first step is to open the Garageband program on your Mac computer (not available for Windows or Linux). Give your ringtone a title. This will be the name that the file will be imported into iTunes with (it can always be changed though in iTunes). There is always a default track already created, the piano sound effect. Delete this by clicking on the file and hitting Apple>Delete. You now have a clear slate and are ready to import your song.
You can do this a couple ways. If you want to create a personalized file, just go into Control and select the ‘show loop browser’ option. Here you can drag and align looped music clips where you want and create your very own custom ringtone.
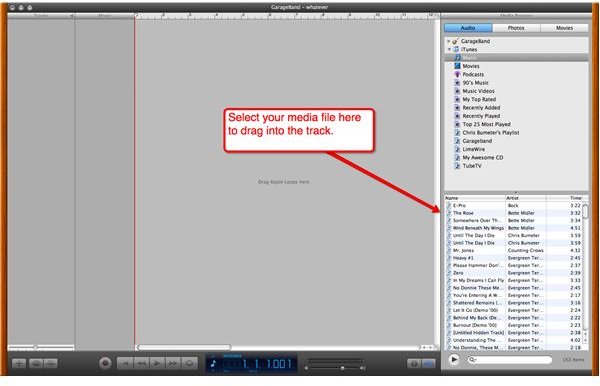
If you’d rather have a song you like already as your ringtone, it’s just as easy, if not easier. There are two ways of doing this. First click Control again and click on the ‘show media browser’ option. Click on the Audio tab and then the iTunes folder. Here you basically click and drag over the song you wish to make into a ringtone. The other way is to open the finder menu, find the file you want and click and drag the file right into Garageband.
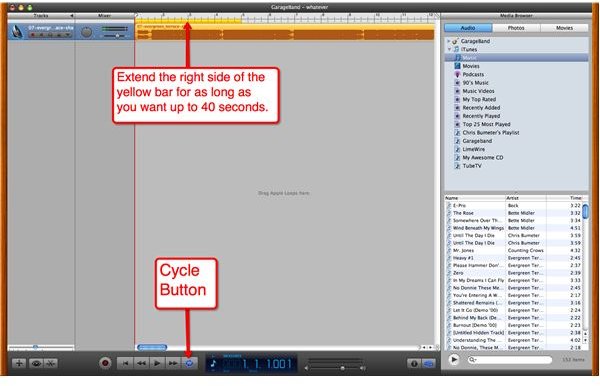
Once your file is imported you now are ready to select the portion of the song you want as your ringtone. The only restriction you have here is that the file can be no longer then 40 seconds long. So to select the parts you want click on the cycle button, which is located on button to the right of the play button. You will see a new bar appear above the sound file. It should be a yellow bar. Extend this so that it is 40 seconds long. You then just drag the whole yellow bar to where you want the ringtone to start. That’s all you have to do.
Putting the New Ringtone on Your iPhone
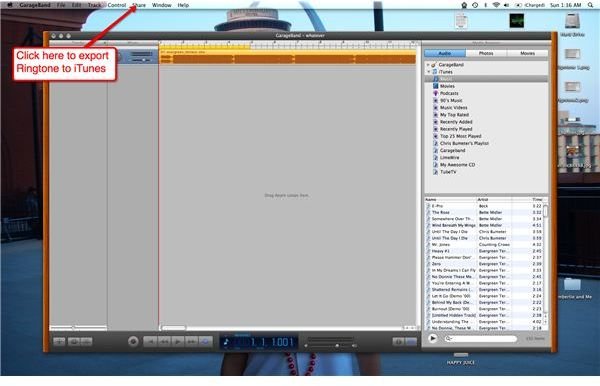
Now that you have the file you want and you have the cycle bar set to start and end the ringtone you are ready to export it to iTunes. This is the easiest part. Simply click on the Share pull down, and click on the ‘send ringtone to iTunes’ option. That’s it, the file will be converted into a ringtone file and placed in the ringtone option in iTunes. From there on you can sync your iPhone’s ringtones or if you have your iPhone set to manually adjust your songs and videos, you can just click and drag the ringtone to your iPhone.
From there you can select it on your iPhone by going into Setting, tap the sounds option, then tap the ringtone option and your newly created ringtone should be there to choose.
Repeat the process for each ringtone you create. It’s very easy and beats having to pay any extra money to create a ringtone. You can even adjust the volume on the ringtone with Garageband if you wish. You have full customizability for your ringtones with Garageband which is a nice little ability to have.
So open Garageband and create all your favorite songs into ringtones and show them off the next time you get a phone call.
Images