Blogging for Fiction Writers
First Things First
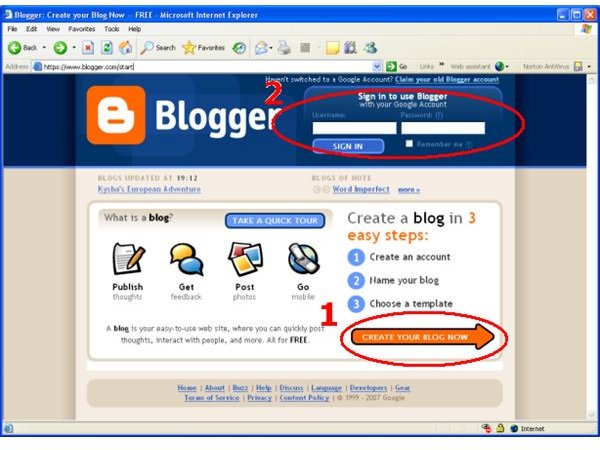
What do you do when you want to create a blog?
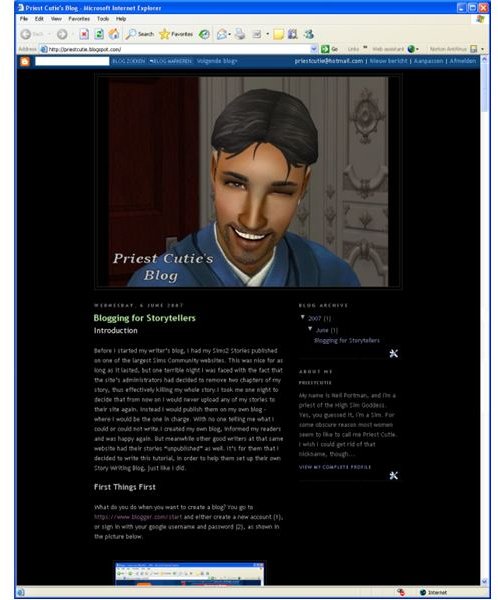
You go to https://www.blogger.com/start and either create a new account (1), or sign in with your google username and password (2), as shown in the picture below.
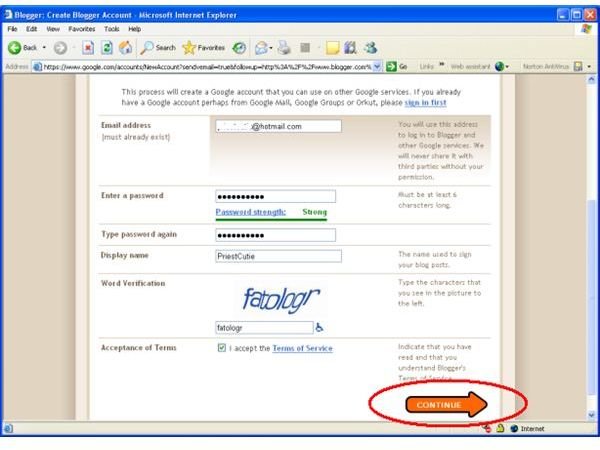
If you need to create an account first, you’ll be taken to a very simple sign-up form, which you have to fill out. Just don’t forget to indicate that you accept the Terms of Service.Then click “continue”.
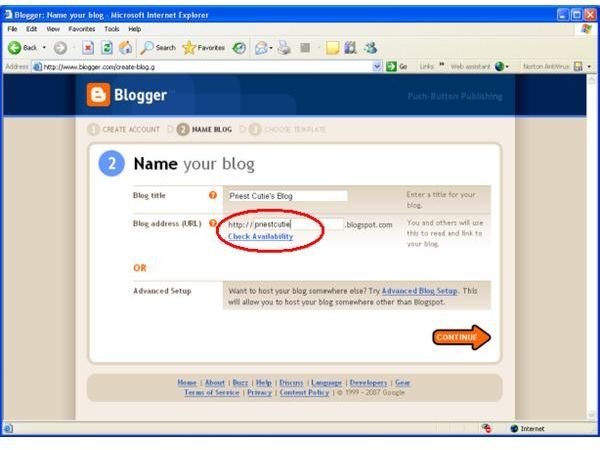
Now you get to choose a name for your blog and your desired blog url. Don’t forget to check the availability of your desired url. If your desired url is already taken, you’ll have to choose something else.
Once you’re happy with your Blog title and url, click “continue” again.
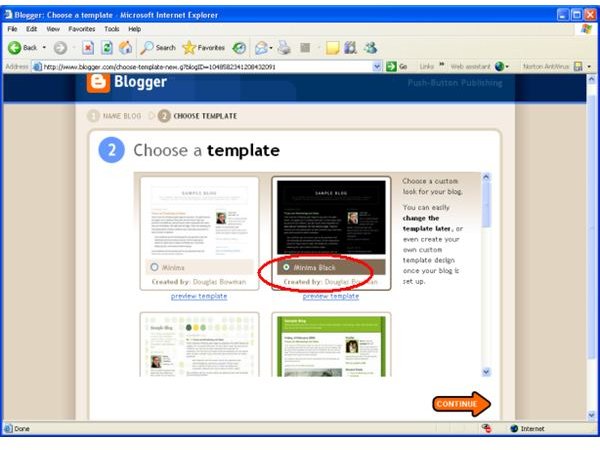
Your next step is to choose a template. I chose Minima Black, but it doesn’t really matter which template you choose. They all work basically the same way.
When you’ve chosen your template, click “continue”.
You’ll now be taken to a page that tells you: Your blog has been created!
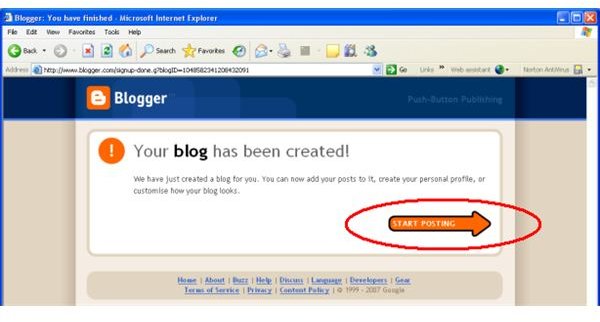
Congratulations on your new blog. Now you’re ready for the next step: Start Posting.
Posting your Stories - Start with your Pictures
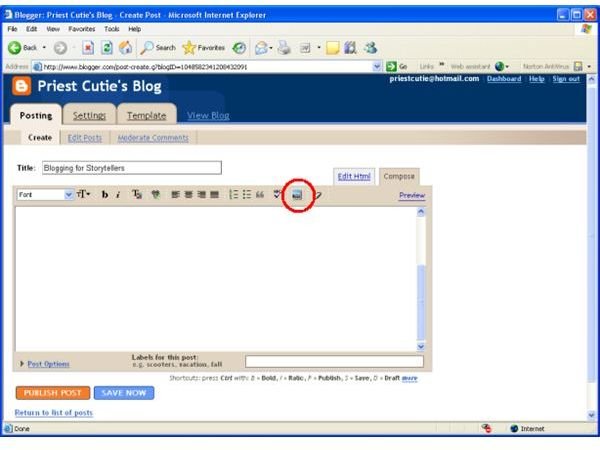
Although posting on a Blog is very simple, posting your illustrated stories is just a bit more complicated than that, because you’ll want to add images.You start by entering the title of your post in the title field, but before you enter any text in the text field, you’ll want to upload and insert your pictures. Just click on the little picture icon as shown on the picture below:
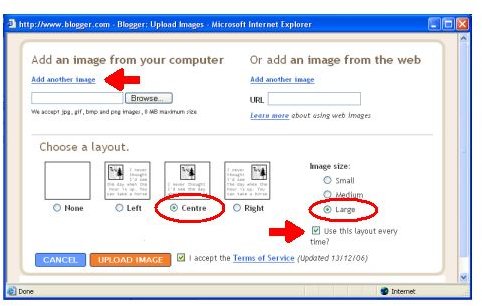
A new screen will now pop up, as shown in our next picture. (Image 7)
Since you’ll most likely be uploading a lot of screenshots, you start by clicking “Add another image”. This feature allows you to upload up to 5 pictures at a time. This still isn’t much, but it’s way better than just one picture at a time. And you’ll get there eventually – it just takes some time.
You’ll also want to choose a layout for your pictures. I chose “Centre” and “Image size: Large”, and checked the “Use this layout every time” box. This way you’ll only have to choose your layout once. When you first upload your pictures, you’ll also have to agree to the Terms of Service.
A Picasa account will be created for you, which you can access using your google username and password – the same ones you use for your blog.
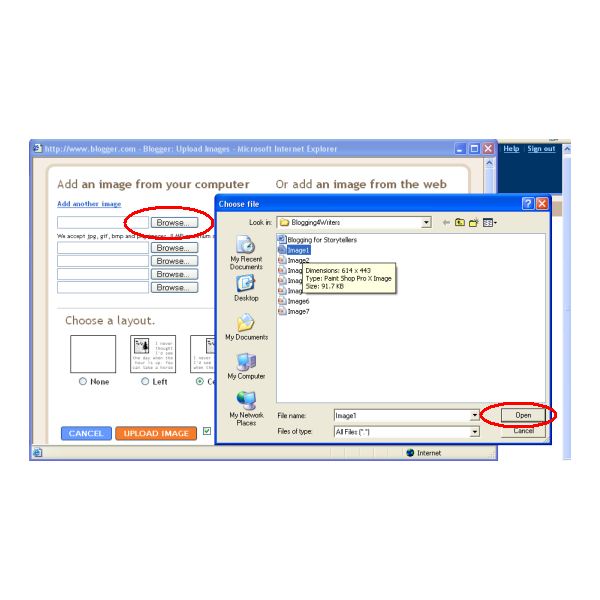
Add images by clicking “Browse”. This will pop up a screen where you can browse files from your computer. Select the images you wish to use, and click “Open” each time you selected an image.
When you’ve selected five pictures, click “Upload”. Your new Picasa account will be created and your pictures will be uploaded to your blog. Make sure you start by uploading the last five pictures of your story! So if you’ve got 20 pictures with your story, upload pictures 16, 17, 18, 19 and 20 first. In that exact order and not the other way round. Next add pictures 11-15, and so on. I’ll tell you why in just a minute.
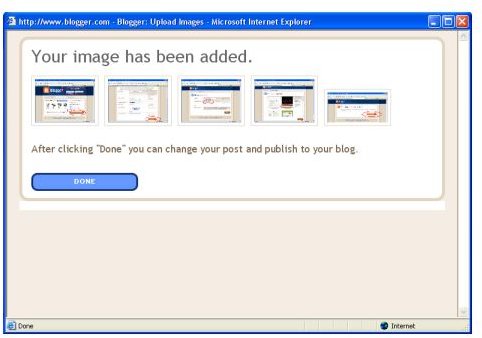
Check that the right pictures were uploaded, then click “Done”.
Posting your Stories - Adding the text
Now that your pictures have now been uploaded, you can start inserting your text between your pictures.

Make sure - I cannot stress this enough - that you’ve uploaded all illustrations for your current chapter before inserting your text and that you started by uploading the last five pictures of your story/chapter, and ended with the first images. Otherwise your first illustrations will be the last in your post, and the last will be the first, and you’ll have to do a whole lot of dragging-and-dropping to get them to appear in the right order.If you’ve accidentally already inserted your text before uploading your pictures you’ll find your text at the bottom of your post…
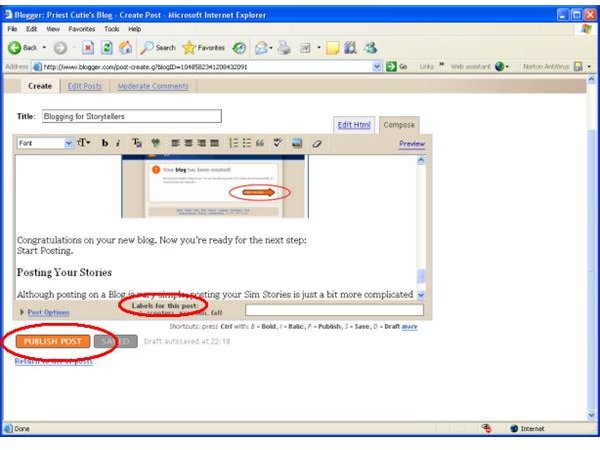
When you’ve inserted all your text, you can add labels to your story, e.g. story, stories… These labels might improve search results, but are not really necessary. Also, if you didn’t add any labels at this point, you can always add them later.Ready? Then click the “Publish Post” button and see what happens.

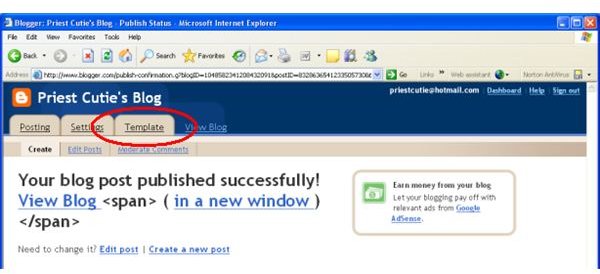
As you see, you can now view your blog. I usually choose to view my post in a new window. That way, if I want to edit it – and I usually will – I can leave the window with my published post open, and only have to press F5 to view my updated post once I finished editing it.
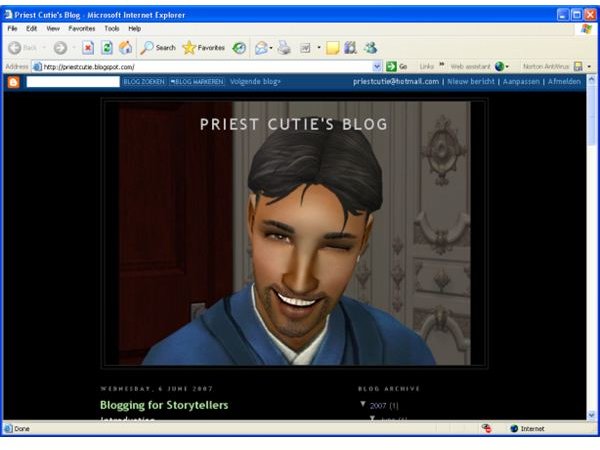
You blog will now look somewhat like the blog on the picture below.
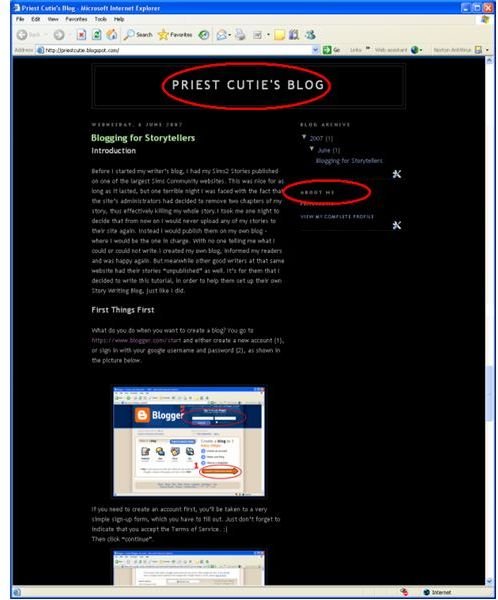
Not bad, hmm? But there’s room for improvement.
To start with, the header here just says: “Priest Cutie’s Blog”, but wouldn’t it be nice to have a picture there instead?
Also, the “About Me” section I still practically empty. You may want to tell a little about yourself there.
Customizing the Header
Go back to the previous window and click on “Template”
You’ll be taken to a screen that looks like the one on the picture below.
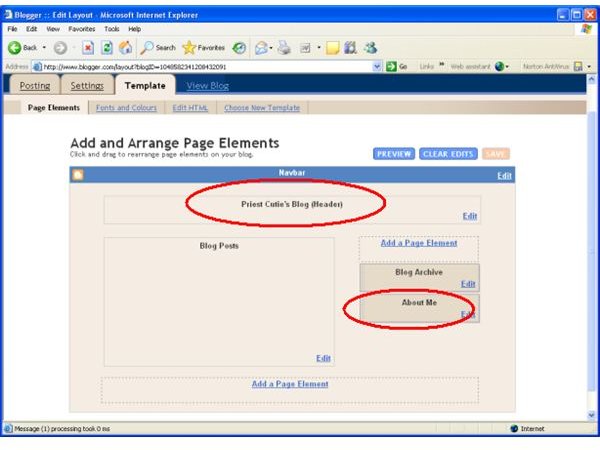
You’ll want to edit the Header, and the “About Me” field.
Let’s start with the Header. Click “Edit”. A new screen will pop up that allows you to configure your header.
Since I was going to upload a picture from my computer, I click the “browse” button, which immediately pops up yet another screen allowing me to choose one of the many, many pictures I’ve got stored on my hard disk. After selecting a nice picture, I click the “open” button.

The “Choose file” screen disappears and the “Configure Header” screen is refreshed and looks like what you see in the next picture.
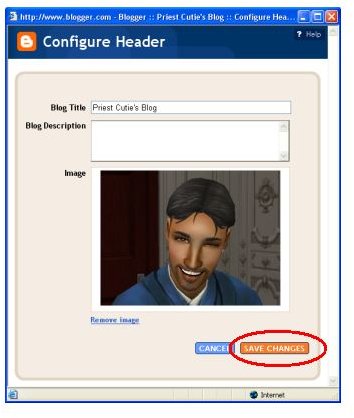
Well, I’m quite happy with the picture I’ve chosen, so I’ll just click the “Save Changes” button.
When I refresh my Blog, however, I’m a bit disappointed by what I see.
You see, I’m picky and don’t like the title of my blog ruining Priest Cutie’s haircut, so I’ll have to do something about that. I do want my visitors to know, however, that this is Priest Cutie’s Blog, so I guess I’ll have to edit the picture first and add the title of my Blog to it where I want it to be. I can do that in PSP or in good old MS Paint. Photoshop would be fine too, but I haven’t got that.
After I edited my picture, I removed the one I had on the blog, and uploaded the new version with the Blog’s Title already on it.
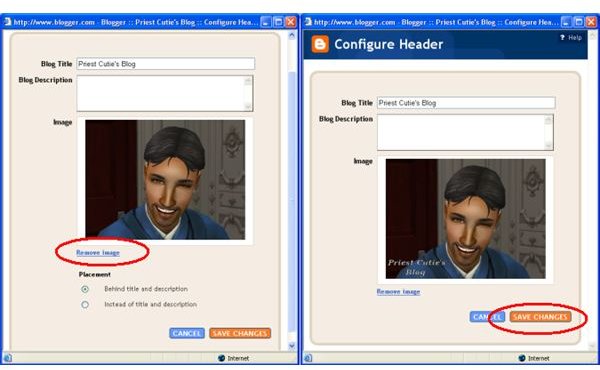
Now all I have to do, is get rid of the title the blog still wants to display over my picture.
I need to go back to the “Configure Header” screen one more time and adjust the placement of my picture.
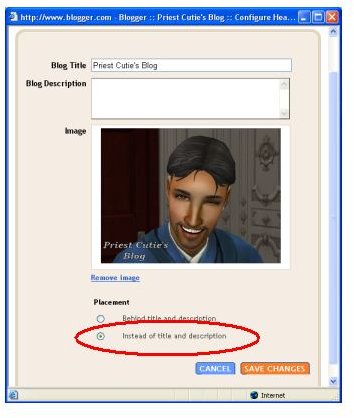
After checking “instead of title and description” and saving once more, my blog now looks like this:
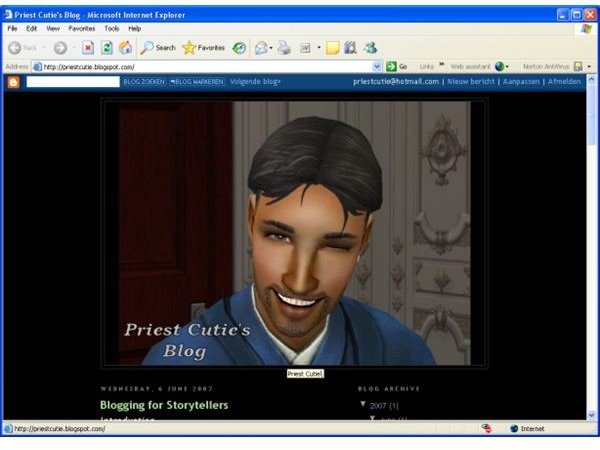
There! Isn’t that much better?
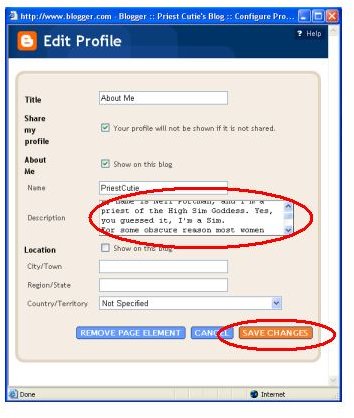
Editing the “About Me” Field
Now that you’ve done all this, editing the “About Me” field is a piece of cake.

Going back to the “Edit Layout” screen, click “Edit” in the “About Me” Page Element. Add a nice description of yourself, save the changes you made and enjoy your work!
Adding more page elements
While you’re making changes to the Layout of your Blog, why not have a look at the many different widgets you can add to your blog with just one click of your mouse?
As you can see in the picture below, there’s a whole host of different widgets (or gadgets) you can choose from. Some useful, others probably less so, but one thing’s for sure: you’re spoiled for choice.
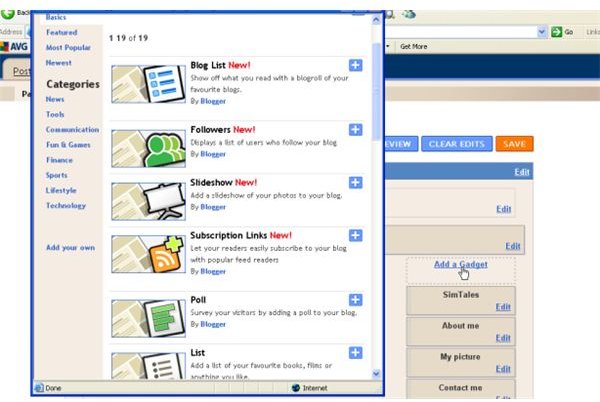
One of the most useful widgets for a fiction writer to have on her blog, is definitely the linklist. If you think outside the box a little, you will see that links don’t necessarily have to go to other sites; they can just as easily link to other pages on your blog, and that’s going to come in very handy here, as this will allow you to create a table of contents, in which you can list all chapters of your story and link to them, so your readers can easily navigate between the chapters of your story.
Other widgets that should also be included on a fiction writer’s blog, are a plain text element for the copyrights, another text elemant with a blurb - you know, the part that usually goes on the back cover or dust jacket of a book - about your story, a subscribe widget so your readers will be able to sign up for automatic update notifications, a recent comments widget if you’ve got comments enabled, and maybe a list to some of your favourite writing sites. You may also want to post your email address so your readers will know where to contact you.
If you form alliances with other writers in the same genre, something I highly recommend doing, be sure to include a blogroll to their blogs, so you’ll help each other attract more readers.
AdSense
Although personally I have never wanted to try it, some writers might want to add a Google AdSense widget to their blog.
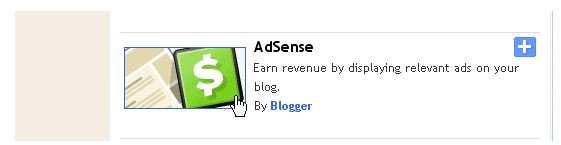
Some say AdSense is a great way to earn some bucks with their blogs, other say it really isn’t worth it and you hardly ever earn a penny. I guess it all depends on how many unique visitors your blog gets every day, so if you don’t attract more than just a handful of readers, I really wouldn’t bother.
If, on the other hand, your story blog proves to be very popular, it might really be a good choice to sign up for AdSense and display relevant ads on your blog.
Your New Blog
When you’ve got everything set up to your liking, this is what your new blog could look like:
There are many more things you can do with your blog, like creating a series or related blogs and interlinking them so they appear to be one and the same blog rather than several different ones, but these are the basics every fiction writer should know.
Now go and create your blog and have fun.
Don’t be afraid to experiment. I discovered all this and more just by experimenting, so there’s no reason why you couldn’t learn just as much as me by simply playing around a little.