How to Manually Remove Google Redirect Virus
The Google Redirect virus is a particularly nasty piece of malware and one which is difficult to remove successfully. If you have followed the Google Redirect virus walkthrough and/or Google Redirect virus diagnosis but are still having problems with the virus, then this walkthrough will detail how to hopefully remove the virus once and for all, and leave you with a clean, operational computer.
A PC that has been afflicted with the Google Redirect virus is easy to diagnose. Put simply, when a user uses Google to perform web searches, the virus creates a dummy results page filled with bogus websites, which when visited will heap further misery on your PC by infecting it with more spyware and malware. The end result will be a PC that is largely unusable, as well as providing unscrupulous web users with an opportunity to scam the unfortunate victim out of money.
Steps for Removal of Google Redirect Virus
The first place to address when removing the Google Redirect virus is in your PC’s Local Area Network (LAN) settings. The reason for this is to ensure the virus isn’t redirecting your PC’s browser traffic through a malicious proxy server.
To check your LAN settings:
In Internet Explorer:
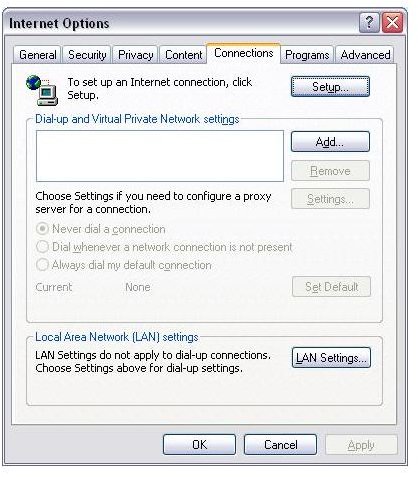
a) Open your browser and select Tools>Internet Options, followed by the ‘Connections’ tab.
b) Click on the ‘LAN settings’ button.
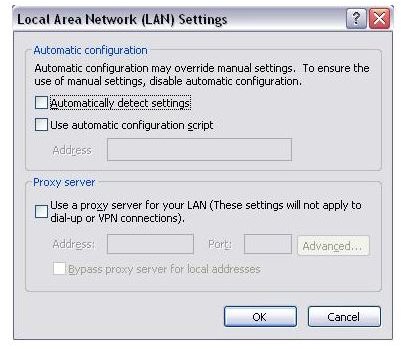
c) In the next window, ensure the option ‘ Use a proxy server for your LAN’ is unchecked.
d) Select ‘OK’ and close.
In Firefox:
a) Open your browser and select Tools>Options
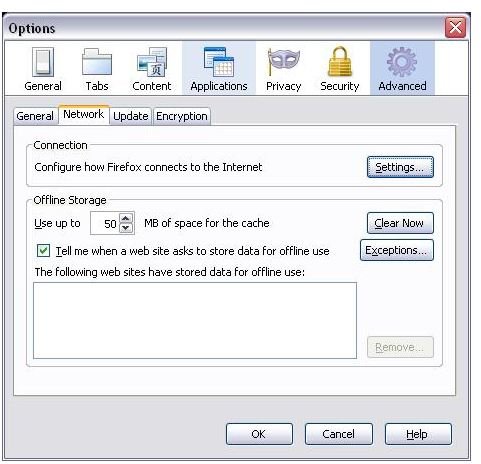
b) Click on the ‘Advanced’ tab and then the ‘Network’ tab, followed by ‘Settings’
c) In the next window, ensure the ‘No Proxy’ radio button is selected.
d) Click ‘OK’ and close.
The steps above might vary slightly depending on the browser version you use, but in the main should be similar to the above.
Checking LAN settings in Internet Explorer 8 & Firefox 3.6.x

Check your PC’s DNS Settings
Having checked that your browser traffic is not being redirected through a malicious proxy, the next step is to ensure the Google Redirect virus has not altered your PC’s DNS settings. Domain Name Servers (DNS) perform a role akin to an internet telephone book to resolve browser requests and direct users to the correct website.
To check your PC’s DNS settings:
a) Open Control Panel via Start>Control Panel
b) Double-click the ‘Network Connections’ icon and right-click ‘Local Area Connection’ icon.
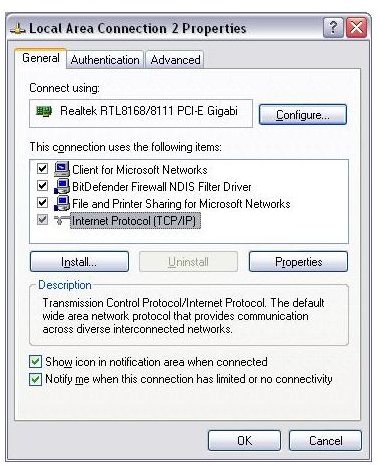
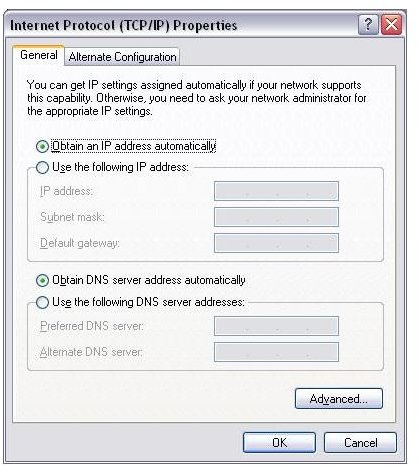
c) Select ‘Properties’ from the menu and highlight the ‘Internet Protocol (TCP/IP)’ option.
d) Click ‘Properties’ and in the next window ensure the option ‘Obtain DNS server address automatically’ radio button is selected.
Click ‘OK’ and close.
Checking your PC’s DNS settings
Check Windows HOSTS File

It is possible that the Google Redirect virus has modified your PC’s HOSTS file. The Windows HOSTS file contains a list of computer IP addresses which is accessed whenever a user types in a web address to their browser. The browser will check the HOSTS file to see if the typed address exists in the HOSTS file and if so, direct the user to the relevant site. If the address doesn’t exist in the HOSTS file, the browser will ask the user’s ISP DNS server for the web address and once obtained will direct the user to the site.
The Windows HOSTS file is a standard .TXT file and can be found in C:\Windows\System32\drivers\etc under the name ‘hosts’. There is also a file called ‘lmhosts’ – make sure you select the HOSTS file! There is usually no file association with the HOSTS file, so open it by right-clicking (or double-clicking) the file and selecting ‘Open With’ followed by Notepad.
An unmodified HOSTS file should only contain the IP address 127.0.0.1 localhost. If there are other entries in the HOSTS file, remove them and then resave the file.
These checks can be applied to any suspected malware infestation, not just the Google Redirect variant. There are many viruses, malware applications and other nasties which can target any or all of the above so its always a good idea to check each one.
Killing Running Processes
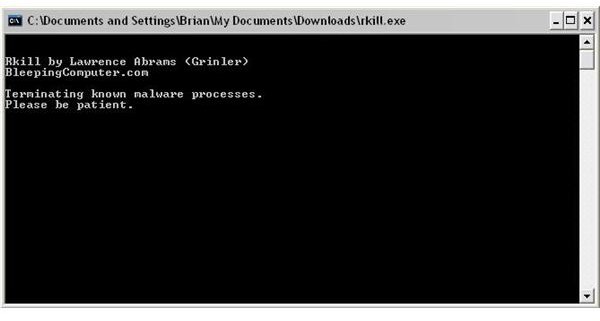
Your chances of removing the Google Redirect virus greatly increase if you can ensure there are no running processes other than those which Windows requires to run. To do this, you can either boot your PC into <strong>SAFE MODE</strong>, or download and run the RKill tool.
RKill is a freeware tool which kills active malware processes to allow malware removal tools to do their job. Note that RKill does NOT remove malware on its own, but simply stops malware processes from running.
You can download RKill from here.
Disable the Virus Hook
The Google Redirect virus typically installs itself as a service on your PC, so in order to remove it we have to first disable the service and stop it from running. To do this go to Start>Control Panel>System>Hardware>Device Manager>View>Show Hidden Devices…
Once there, scroll down to the option for ‘Non-plug and Play Drivers’ and click the ‘+’ icon to expand the driver list. Here look for the device ‘TDSSserv.sys’ and click ‘Disable’. Don’t uninstall it, as you will have to reboot the PC which will reinstall it.
You can also use the free TDSSKiller tool by Kaspersky Labs to disable and remove the malicious service.
Once you have disabled the service using either method, you can restart your computer.
Perform an Anti-Malware scan
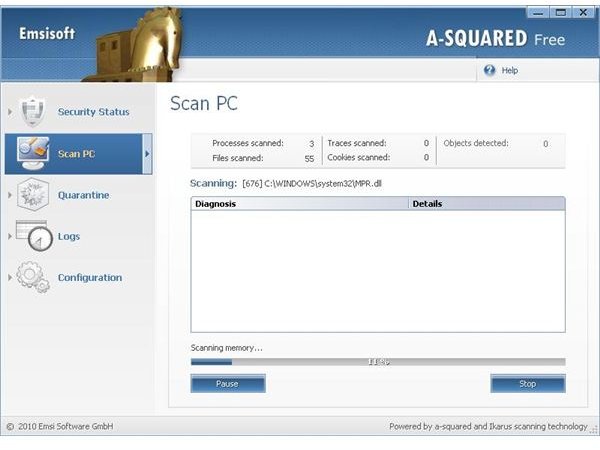
Once you have rebooted your PC, perform a full system scan for malware with your preferred (and updated!) anti-malware scanner. Some useful scanners include:
Hitman Pro - https://www.surfright.nl/en
Spybot S&D - https://www.safer-networking.org/en/home/index.html
Malwarebytes - https://www.malwarebytes.org/
A-Squared - https://www.emsisoft.com/
SuperAntiSpyware - https://www.superantispyware.com/
Let the scan do its stuff, and once complete remove anything it finds.
System Cleanup & Housekeeping
Using CCleaner (or similar) delete your internet cache and missing or corrupt registry keys to remove any remnants of the virus that might be left behind. Finally, create a new System Restore point via Start>All Programs>Accessories>System Tools>System Restore and delete older restore points as these could still harbour the virus and can re-infect your PC if you need to use a restore point to return your PC to a prior configuration.
You should now be clear of the Google Redirect virus and can resume browsing and searching as normal. If however, you are still experiencing problems and all other potential cures have failed to eradicate the problem, it might be time to bite the bullet, back up your important files and format c:/ as a last resort…