Struggling to have your voice heard in a sea of blogs? Finding that regular blogging is too intensive? Help is at hand with a selection of tools and hacks for the Blogger platform. Read on for my Top 5 Blogger tools and hacks!
Maximise Your Blogging!
Blogging is a great past time, one that allows you at one level to express yourself and at another level to make money.
As such, streamlining the blogging process is vital for many bloggers, who might opt to use tools and hacks to get their blog as up to date and dynamic – and most of all relevant – as possible.
We’ve collected together a selection of tools and hacks – additional software, ideas and functions that can be used separately or together in order to give your blog the boost it needs.
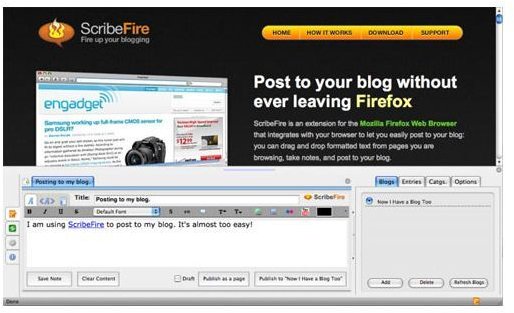
Ultimate Blogger Tools: Scribefire
Of all the Blogger tools and hacks you can apply, download and tweak, the one you should be making a beeline for straightaway if you use Firefox as your browser is the amazing Scribefire, a desktop blogging editor.
This is an add-on for Firefox, Chrome and Safari that allows you to instantly bring up a connection to your blog admin screen simply by pressing F8 on your keyboard. This allows simultaneous blogging and browsing, particularly useful if you plan on referring to other web pages in your blog, use images found on the web, etc.
Find out more about Scribefire at www.scribefire.com - or find out about other Desktop Blog Editors for Windows .
Get a Domain Name
One thing that Blogger blog users often ignore is the power of a good domain name. Calling your blog carpartsblog.blogger.com is OK, but not particularly memorable. It will get indexed in Google, but what you really want is the benefit of a full URL (Uniform Resource Locator).
Someone typing “carparts blog” into Google will typically see www.carpartsblog.com before the result for carpartsblog.blogger.com – and all you need to do is purchase the URL and use the admin screen provided to direct the new address at your existing blog.
You can purchase a URL quite cheaply from websites such as www.1and1.com or perhaps even via your own internet provider.
Stop Spam
So much time on your blog can be lost managing comments, particularly if you have no policy against spam comments.
Blocking comments entirely is not the answer – the nature of a blog is to engage and interact with your readers and to provide a talking point. Meanwhile solutions such as WordPress have plug-ins like Akismet that get rid of the comment spam for you. While a tiny minority of comment spam is manually entered, the majority of it is automated, posted by applications that search the web for places to post their spam-laced comments.
Blogspot and Blogger accounts have a superior tool built in – via Settings you can enable Word verification for all comments left. This basically means that anyone leaving a comment on your blog has to prove that they are human by entering a string of text as required.
Vital Blogger Tools - Back-up Your Blog
In the event that you decide to move blogging platforms or Google loses your blog for whatever reason (such as your Blogger blog being locked for too many links), having a backup of your Blogger blog is a good idea.
Previously, the only way to do this would be to download an XML page of your full RSS feed, using this URL:
https://blogname.blogspot.com/feeds/posts/default?max-results=1000
Don’t forget to change “blogname” to the name of your own blog!
After saving the page, you would then be able to keep it for later use or export the RSS feed into another blogging platform, such as WordPress.
If necessary, you can also backup comments:
https://blogname.blogspot.com/feeds/comments/default?max-results=1000 )
However things have moved on. Many blogs use Feed-burner, which limits the 1000 posts considerably. As a result, Blogger provides an import and export function.
You can find this in the blog control panel, under Settings. In the Blog Tools section, the options to Import Blog, Export Blog and Delete Blog are available, where Export allows you to save a copy to your PC or laptop and Import Blog allows you to restore a previous export.
Blog Post Title Tags
Blogger always displays your blog title in the upper left portion of your browser window, along with the post name. However for better results from Google and other search engines, it is important that the post title is displayed before the title of your blog.
Changing this is a little complicated, and requires minor editing of your Blogger template. To begin, open your Blogger dashboard, and go to Layout > Edit HTML.
Next use your browser search function (CTRL + F in Firefox and Internet Explorer on Windows, COMMAND + F in Safari on Mac) to find the following tag:
This tag should be replaced with the following code:
<b:if cond=‘data:blog.pageType == "index"’>
One you have saved your template, load your blog in a new window or tab, and you will see that the blog title and post title have swapped placed. It will take a few days for this to be reflected in search engine results, but definitely worth it!
Meanwhile, if you’re interested in more comprehensive editing of your template, see our article on Blogger Template Designer .
So there you have it - 5 great Blogger hacks to get your blogging efforts back on track!


