One nice tool found in Google Picasa 3 is a feature that lets you geotag your digital photos and other images. In this guide, we’ll explain how to use that tool.
Picasa Geotagging Tools
By working in conjunction with Google Maps, Picasa 3 can help you geotag your digital photos even if you don’t have a GPS device. Although this feature isn’t quite as nice as similar ones found in other applications, like the free GeoSetter , it is quick and easy to use.
Since this feature does use Google Maps to find the geographic location where the photo was taken, you will need to be connected to the Internet to use this tool. Other than that, all you need are your photos and a copy of Picasa downloaded and installed on your PC to get started.
How to Geotag a Photo
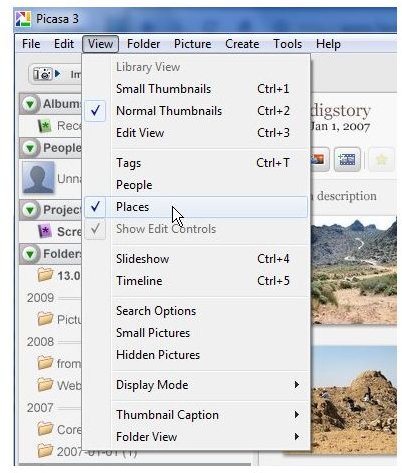
Step 1: Make sure that the Places window is visible in Picasa. If it’s not, select View from the Picasa main toolbar and click on Places. This will put a check mark next to Places in this menu to denote that this window is being shown. (Click any image for a larger view.)
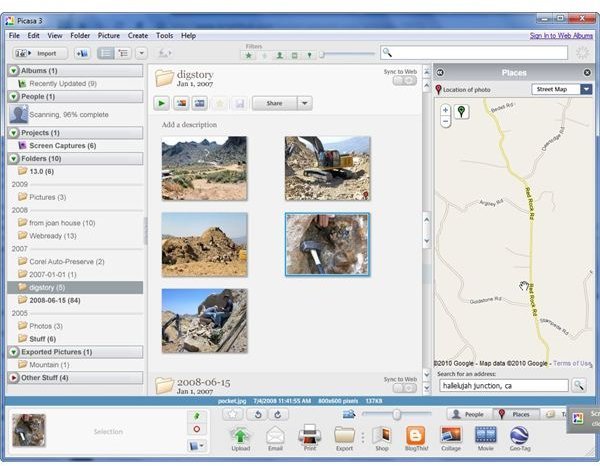
Step 2: Select the photo that you want to geotag. Then, either type in an address or location in the search field in the Places menu, or pan around the map until you find the area where the photo was taken.
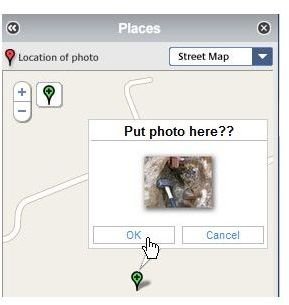
Step 3: Click on the green balloon push-pin icon at the top of the map. This will attach the green balloon to your cursor. Move your cursor to the point where you want to add the photo and click. If this is the location you want to assign to the photograph, click OK. If not, click Cancel and you’ll able to click on the balloon again and reposition it.
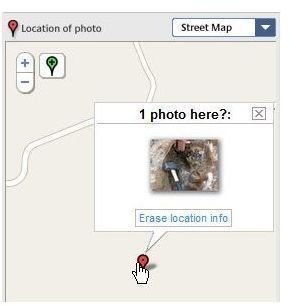
After placing the marker, the balloon will turn red and another red balloon will show on the bottom right-corner of your photo thumbnail in the Picasa viewer.
Note: If you accidentally place the photo in the wrong location and you want to “undo” that mistake, click on the red balloon on the map. A pop-up window will appear with a button you can click to Erase location info.
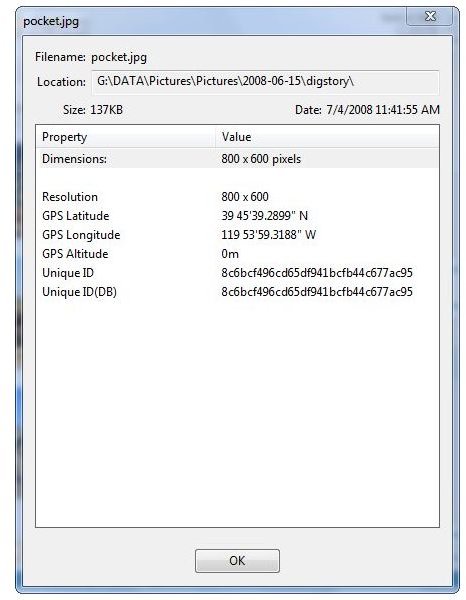
If you want to see the actual GPS coordinates that have just been assigned to the photo, either right-click on the photo thumbnail and select Properties or choose Properties from the Picture menu on Picasa’s main toolbar. Another window will pop-up showing the GPS Latitude and GPS Longitude along with some other information.
Additional Resources
Four Free Geotagging Tools for Windows PCs – If you’re looking for more options, such as adding altitude and other geographical information to your photos, you may want to try out one of these other tools instead. All are completely free with no hidden costs or agendas.
How to Add Photos to Google Maps – Do you want to add your photos to Google Maps and share them either with a private group or make them public for all the world to see? This tutorial will walk you through the process.
How to Edit Your Photos in Picasa 3 – Learn how to perform basic editing tasks in Picasa, such as cropping a photo, straightening an image, removing red eye, fixing blemishes, and more. Also, find out how you can add simple effects to your photos – like applying a sepia tint or adjusting the brightness.


