Creating a movie with the Picasa 3 Movie Maker is simple, quick and fun. Once your movie is created, you can share it with your friends and family by posting it to YouTube with one click of a button!
How to Create a Movie in Picasa 3
The Picasa 3 Movie Maker allows you to combine videos, music and photos together, create a Windows media file, and upload your movie directly to YouTube to share with all of your friends and family. Making a move in Picasa 3 is both fun and easy.
The Picasa 3 movie maker supports both mp3 and .wma audio formats. The movie maker allows you complete creative control when making your movie, including the ability to change slide duration and transition style, as well as the music sync. You also have the ability with the Picasa 3 Movie Maker to create and add text slides and include photo captions.
You have the ability to create a movie for all photos in a specific album or to pick and choose photos from various folders and collections.
To Create a Movie
-
Open your Picasa 3 program.
-
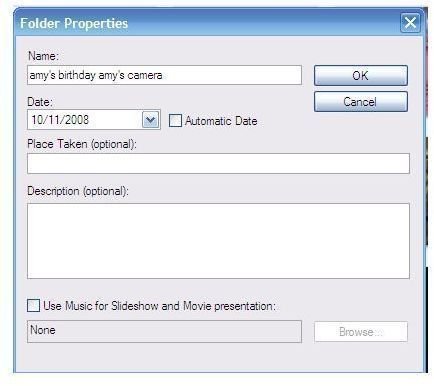
Click the folder you would like to make into a movie. Fill in the Folder Properties.
Advertisement
-
If you would like to pick and choose your photos from several different folders, Click the Movie button in the tool bar at the bottom of the screen. Choose the Clips tab and Select the Get More… button.
-
If you chose to use an entire album, you will now click the Movie button in the tool bar at the bottom of your screen.
Advertisement -
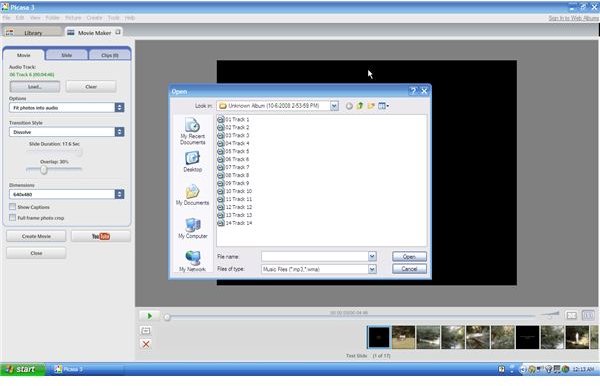
If you would like an audio track on your movie, Select Load at the left of the screen and upload the desired track.
-
Choose your Transition Style and Dimensions.
Advertisement -
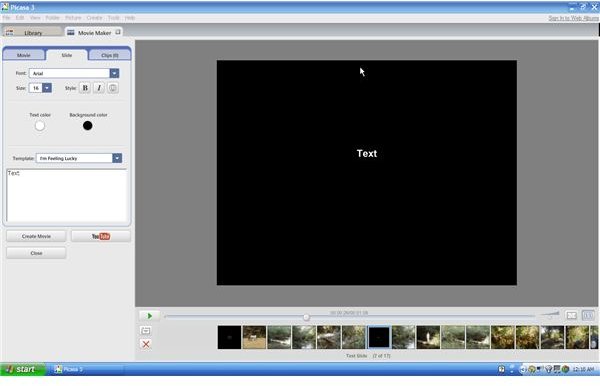
Click the Slide tab to create a text slide. Choose the Font, Size, Color and Template you wish to use.
-
If you would like to add more pictures from another folder, you can now follow Step 3 above.
Advertisement -
When you are finished choosing the pictures you want to use, Select Create Movie. You will see a Draft screen while the movie is being created.
-
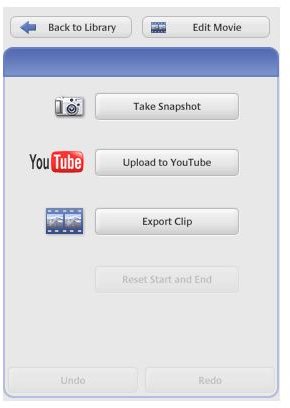
Once the movie is created, Choose any action you would like to take, such as editing, in the After Creation options.
Advertisement -
Your movie will automatically be saved in your Picasa 3 program. If you would like to share it with friends and family members, you can automatically send it to YouTube by Selecting the YouTube button at the left of the screen.
Images